
Tips for Improving Fit
Improve fitting quality around the chest, feet, shoes, hats, and gloves.
きせった (Kisetter) 3.1.3 documentation👚How to Fix Chest Deformation Caused by Body Shape Differences#
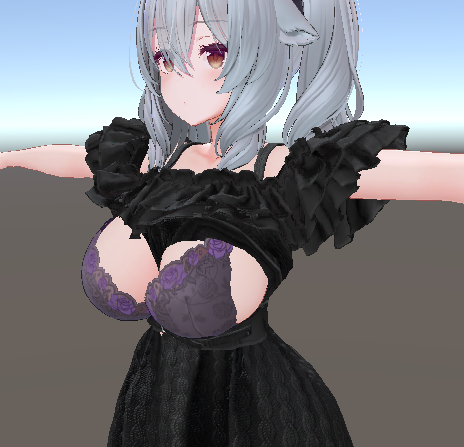
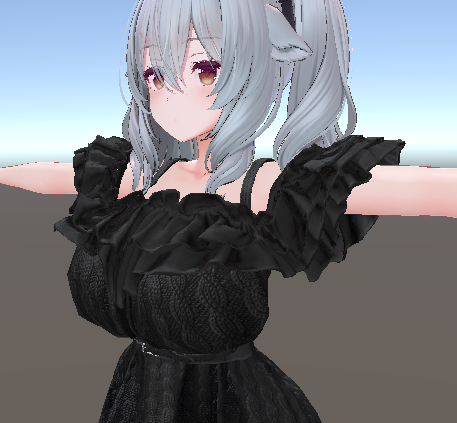
If there is a significant difference in body type between avatars, the transformation may not occur properly,
and the shapemay often become distorted, particularly in the chest area.
In such cases, if the original avatar or outfit has a Shape Key that allows you to adjust the chest size,
it is helpful to use that Shape Key to align the chest shape as closely as possible with the target avatar
before proceeding with the deformation.
Example) Shinano → Milltina
Adjustments using mesh editing tools#
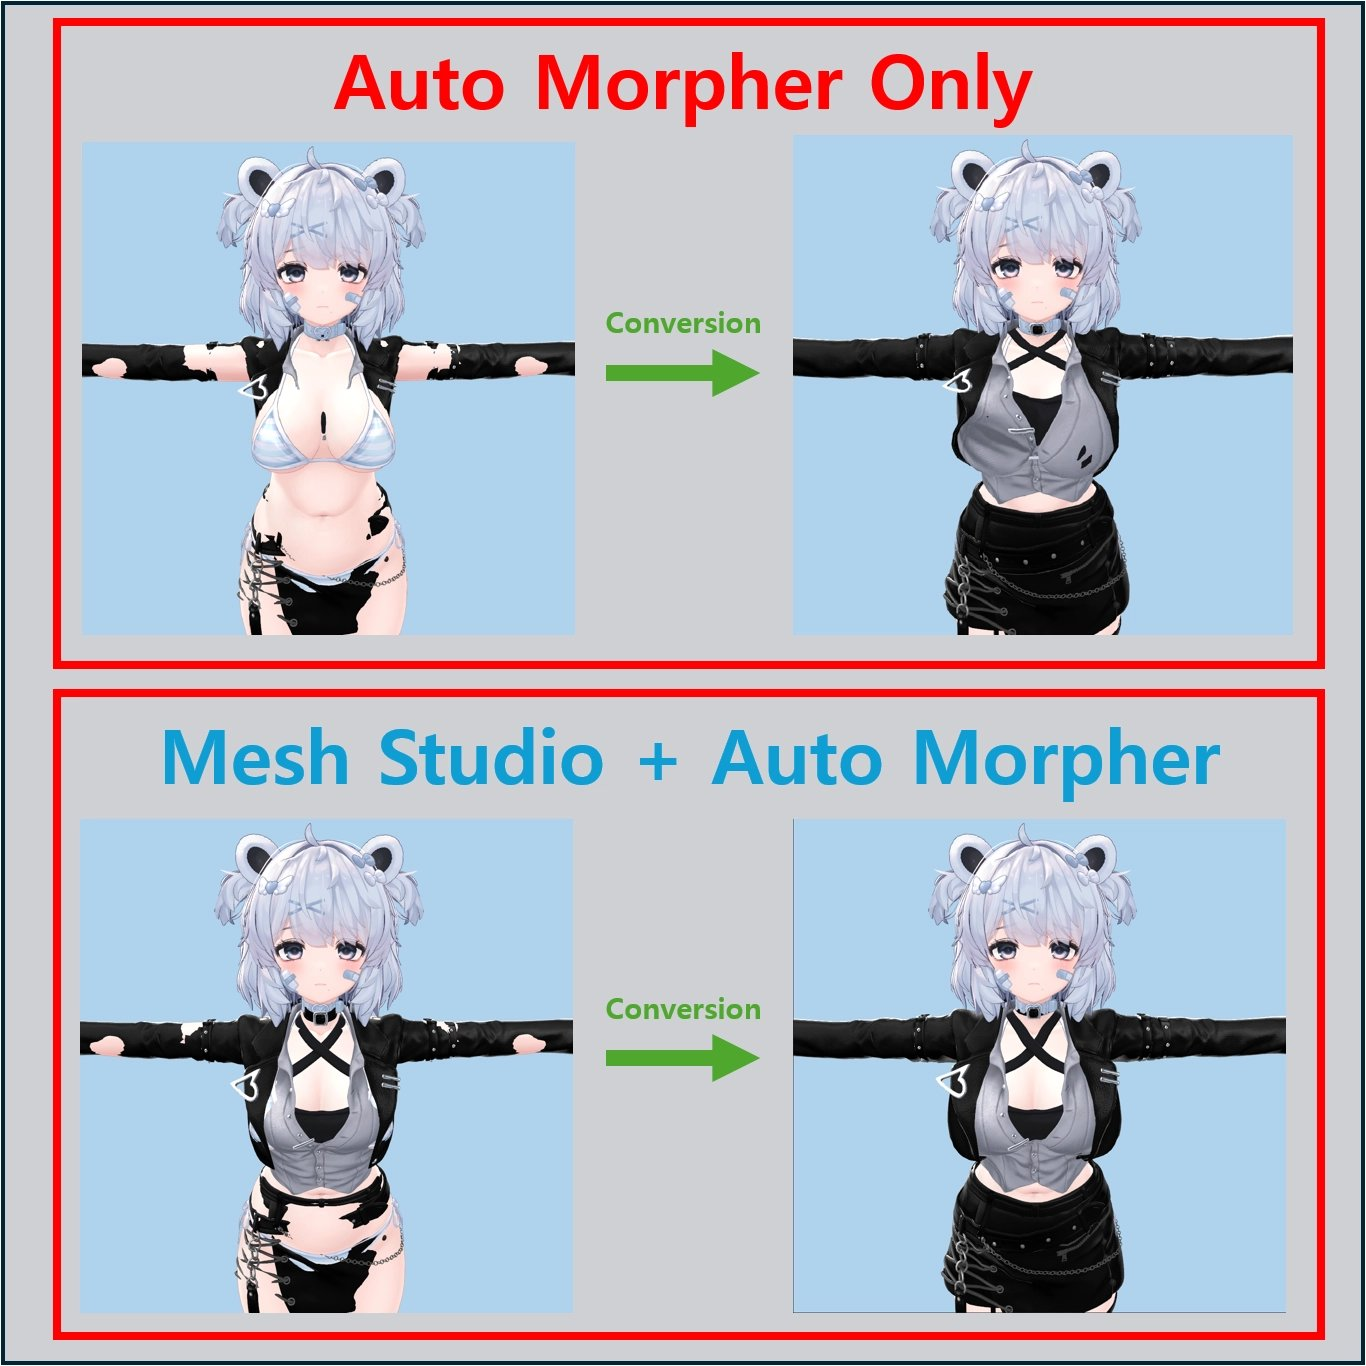
Alternatively, if you first adjust areas with significant body shape differences in [Manual Mode], you can achieve a more natural fitting result.
- First, run [Auto Setup]in[Manual Fitting Mode].
- Then, use a mesh editing tool such as Mesh Studioto further adjust the Target Clothes Object.
- In particular, adjust areas with significant body shape differences, such as the chest, to match the shape of the Source Clothes Object.
- Adjusting in this way will yield results that fit the avatar’s body shape more naturally overall.
🦶 How to Perform Foot Deformation Stably#
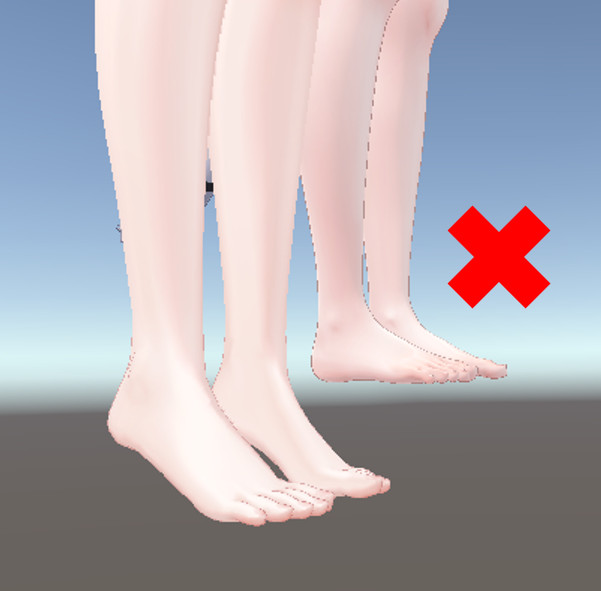
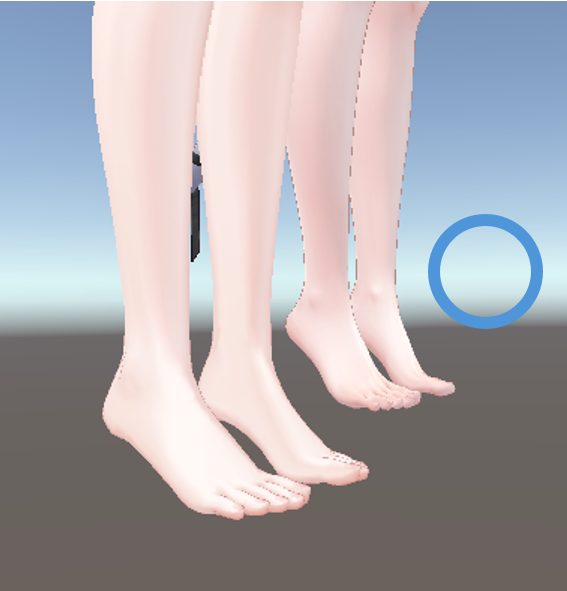
Since this tool takes the shape of the feet into accountduring the transformation process,
the more similar the foot shapes of the original avatar and the target avatar are, the more stable the results will be.
Therefore, before proceeding with the transformation,
we recommendadjusting the foot shapes of the Source Avatar and Target Avatarto beas identical as possible.
⚠️ Solution for when shoes become distorted#
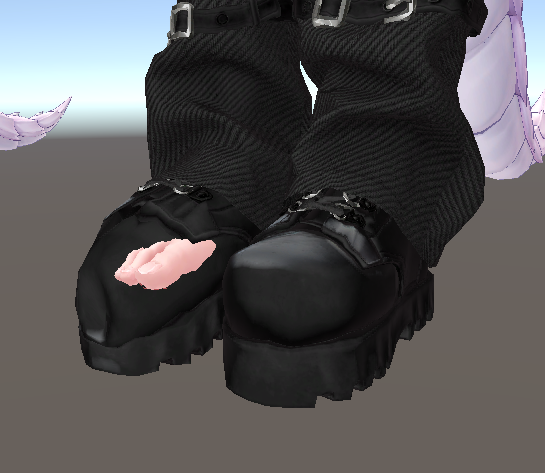
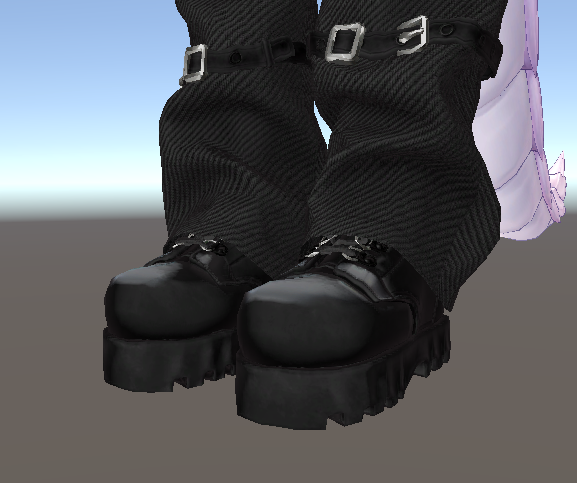
If the shoes appear squashed or distorted even after adjusting the foot shape,
pleaseenable "Skip Foot Fitting"in the Advanced Options .
Using this option applies onlyfoot position and size adjustments,
skipping the shape deformation to prevent the shoe from becoming distorted.
🥿 When the shoe flattens out like a puddle#
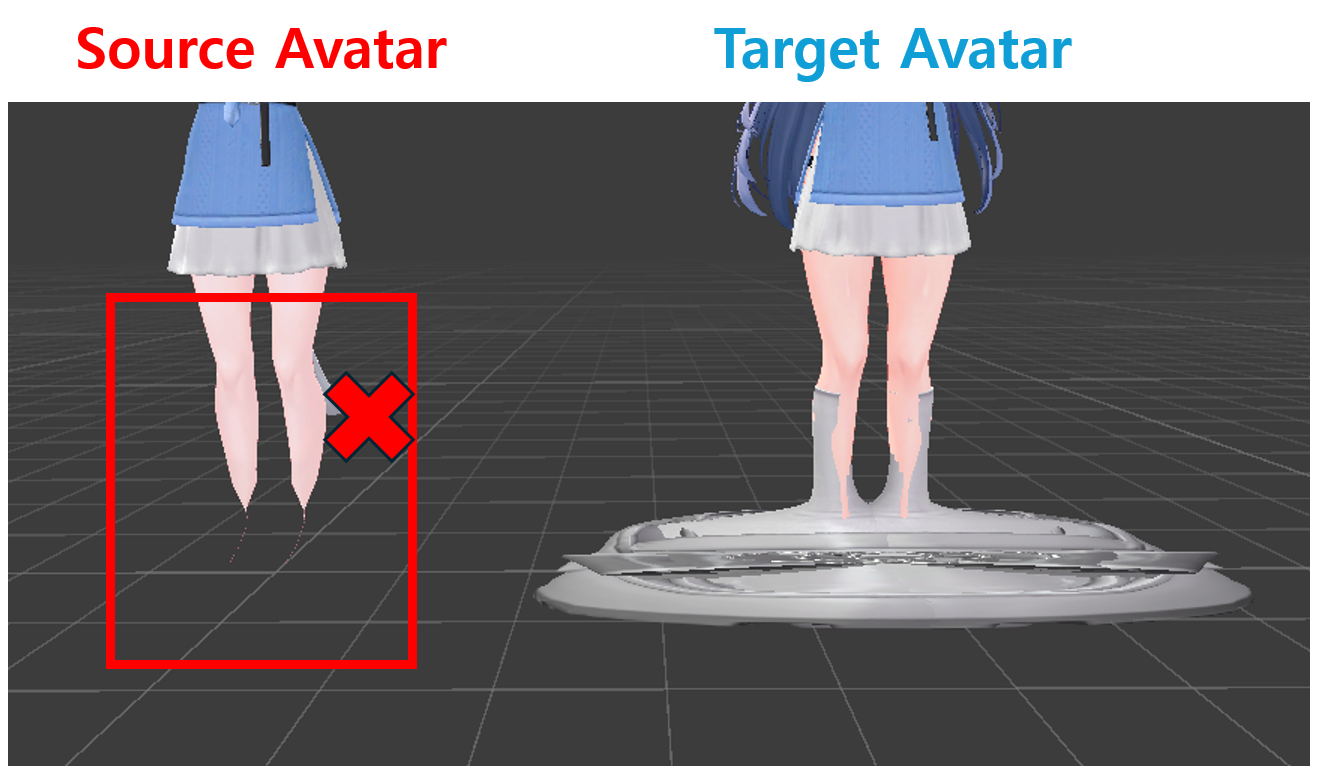
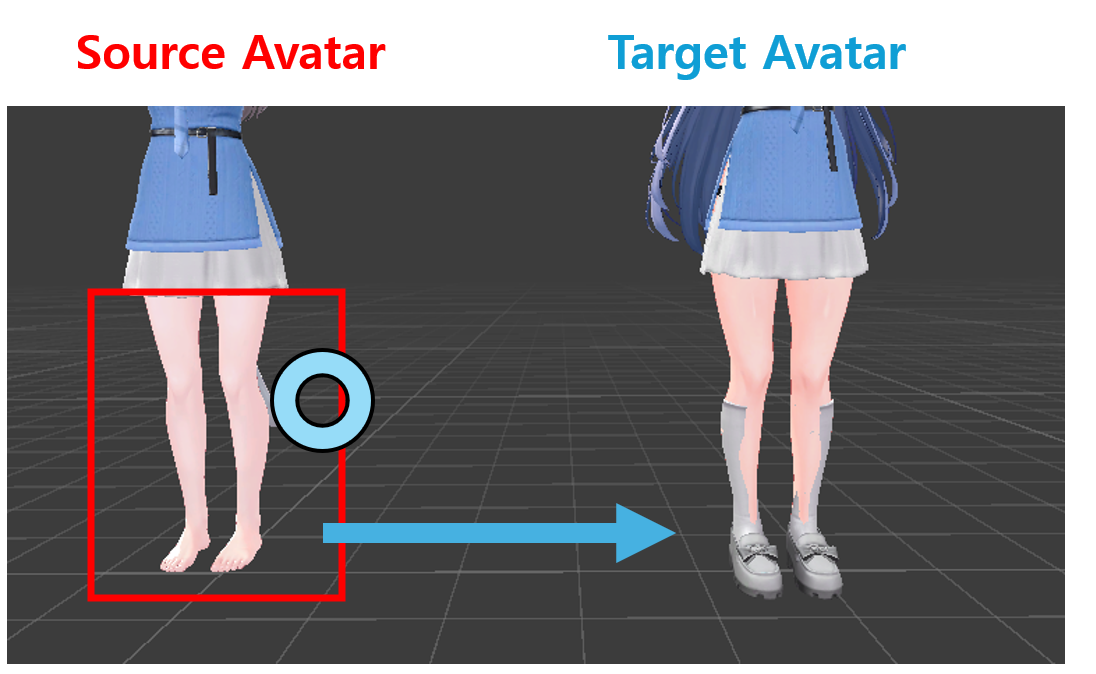
- If the shoe flattens out like a puddle, please check whether "Shrink" is applied to the Foot part of the Source Avatar.
a. How to manually adjust the foot#
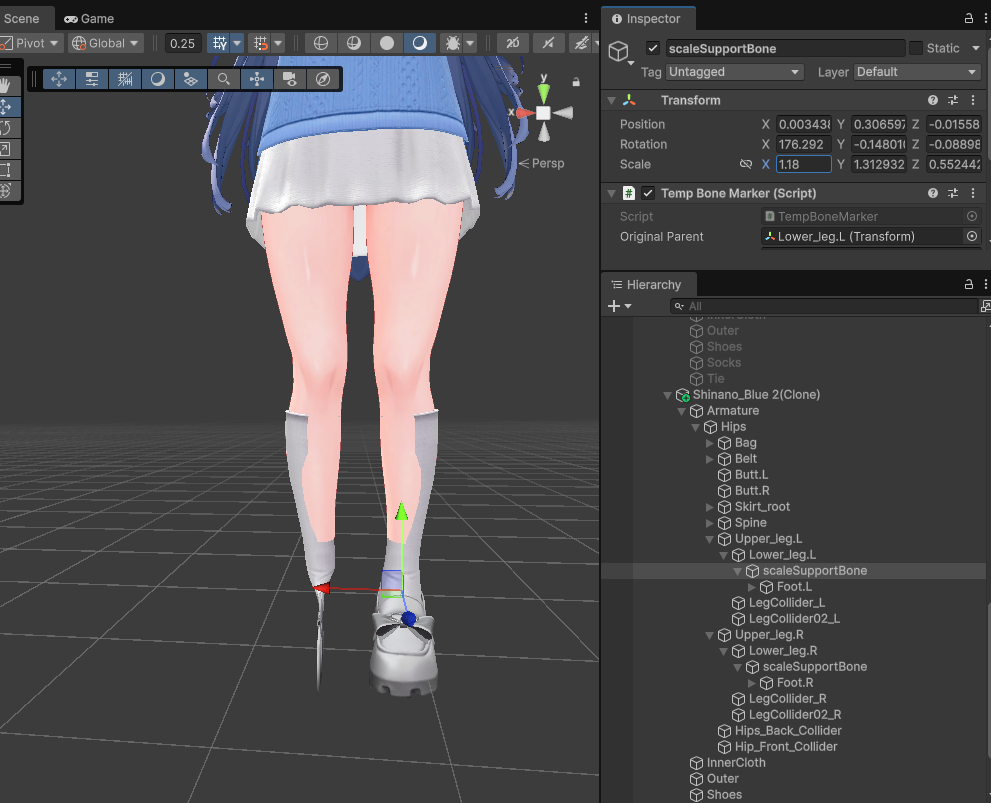
- After selecting [0. Auto Setup] in [Manual Fitting Mode], you can manually adjust the foot size.
- A scaleSupportBonefor adjusting the shoe scale is created below the Target Clothes Object’s Armature, directly above the Foot bone.
- Adjusting the scale and position of this bone allows you to fit the foot area more comfortably.
🎩🧤 How to Handle Weighting for Hats and Gloves#
Currently, きせった (Kisetter) does not support automatic position adjustment for clothing bones attached to the head or hands.
- After running [0. Auto Setup]in[Manual Fitting Mode], please manually adjust the position of gloves or hats using the bones.
- If you have disabled**[Advanced Option] - [Weighting] - [Transfer Weight To Avatar]**, you can manually adjust the bone positions after the transfer to achieve the desired placement.
👕 How to Handle Clothing Already Worn by the Avatar#
きせった (Kisetter) works properly only when the outfit has its own armature.
However, even if the avatar is already wearing the default outfit or the outfit is not separated into a separate prefab,
you may still want to modify that outfit.
In such cases, you can follow the steps shown in the attached video.
- Copy the existing avatar.
- Remove the Animator and any unnecessary componentsfrom the copied avatar.
- In particular, you must delete avatar-related components such as the VRC Avatar Descriptor and Pipeline Manager to avoid issues when uploading to VRChat.
- Delete unnecessary meshes, such as the Body Mesh, to leave only the outfit.
- Move the object containing only the outfit to be a child of the existing avatar (below it in the hierarchy).
- If you usethis object as a costume prefab, you can apply transformations using the きせった (Kisetter).
By using this method, even the default avatar outfit—which isn’t separated into distinct parts— can be used as a target for deformation.
🔗 How to Create a BlendShape That Works Together with Another BlendShape#
BlendShape Generator is designed with the assumption that each BlendShape is generated as a standalone BlendShape.
If you want to create a BlendShape that is used while another specific BlendShape is already applied, please follow the steps below.
- The video below shows an example of creating
Breast_SmallandBreast_Flat (With Small).
- If the base BlendShape does not exist yet, first create the base BlendShape with BlendShape Generator.
- In the video,
Breast_Smallis created first.
- In the video,
- Set the Weight of the base BlendShape to 100 on both the avatar and the outfit.
- In the video, BlendShape Controller is used to adjust the values on multiple Meshes at once.
- In BlendShape Generator, select the BlendShape you want to create next.
- In the video,
Breast_Flatis selected. - At this step, if the base BlendShape is checked, please uncheck it.
- In the video,
Breast_Smallis unchecked.
- In the video,
- In the video,
- Generate the BlendShape.
- Check that the generated BlendShape works as intended.