
BlendShape Generator
Create outfit mesh BlendShapes from the avatar's BlendShapes.
きせった (Kisetter) 3.1.3 documentation⚫ This feature adds BlendShapes from a specific mesh on the avatar to other meshes as well.
Things to Check Before Setting the BlendShape Mesh#
- BlendShape Generator calculates the mesh deformation based on the current BlendShape values set on the Source Avatar and the BlendShape Mesh.
- Before generating, please make sure the BlendShape values on the Source Avatar and BlendShape Mesh are set to the intended state.
- For example, if you want to add a
Breast_SmallBlendShape to an outfit that does not have one, theBreast_Smallvalue on the Source Avatar or BlendShape Mesh should be set to 0.
- For example, if you want to add a
Generating When the Reference Mesh BlendShape Value Is Not 0#
Some outfits are made to fit not the avatar’s default body shape, but a shape where a specific BlendShape has already been applied to the reference Mesh.
In this case, if the reference Mesh has values such as
Breast_SmallorBigBreastset to something other than 0, and you select that same BlendShape as a generation target,the tool treats the current shape as the Weight 100 state for that BlendShape and generates the BlendShape based on it.
- In addition, a helper BlendShape called
[Body Base]is generated so the mesh can return to the Weight 0 shape. - In this case,
[Body Base]must be set to 100 for the other generated BlendShapes to work correctly.
- In addition, a helper BlendShape called
1. Prepare the Source#
- Assign the avatar's Animator to the Avatar Animator.
- Assign a mesh containing the blendshape you want to add to the BlendShape Mesh.
- e.g., Head Mesh / Body Mesh
2. Add Mesh#
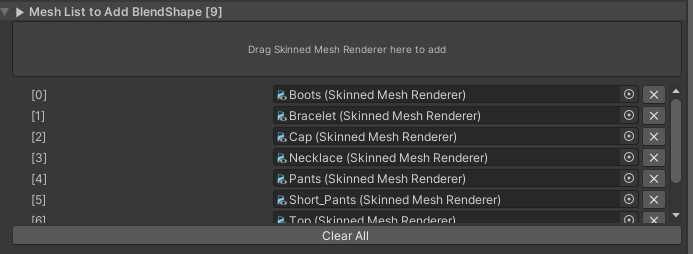
- Click the [Mesh List to Add BlendShape] window to open the list.
- Drag the mesh you want to add into the box labeled [Drag a Skinned Mesh Renderer here to add].
- You can add a single Skinned Mesh Renderer by dragging it directly.
- Alternatively, you can drag a parent object that has multiple Skinned Mesh Renderers as children to add them all at once.
- You can remove a mesh from the list by clicking the [X] button or the [Clear All] button.
3. Option Settings (Optional)#
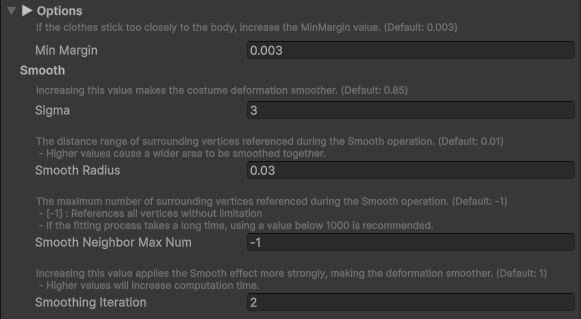
- You can configure options by clicking the Options button.
- If you want the outfit to move tightly against the body , we recommend setting the Min Margin value to 0.
- However, setting this value to 0 may cause the mesh to penetrate (become transparent) in some BlendShapes .
- If you want the outfit to move tightly against the body , we recommend setting the Min Margin value to 0.
- You can set variables related to the minimum distance from the reference mesh or smoothing.
4. Select the BlendShape to add#

Click the [BlendShape List] button to open the list window.
Click the [Refresh BlendShape List] button to update the list of available BlendShapes.
- The BlendShapes associated with the Mesh assigned as the [BlendShape Mesh] in Step 1 will be displayed in the list.
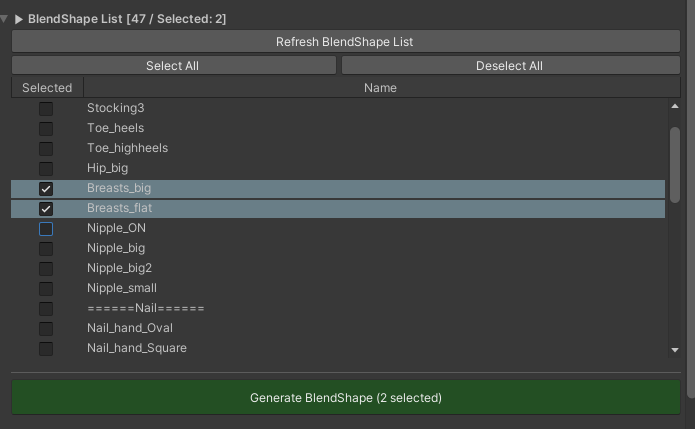
Select the BlendShape to add to another Skinned Mesh Renderer.
- You can select all of them using [Select All].
- You can deselect all items using [Deselect All].
Only those BlendShapes that actually cause changes to the Mesh will be added from the selected list.#
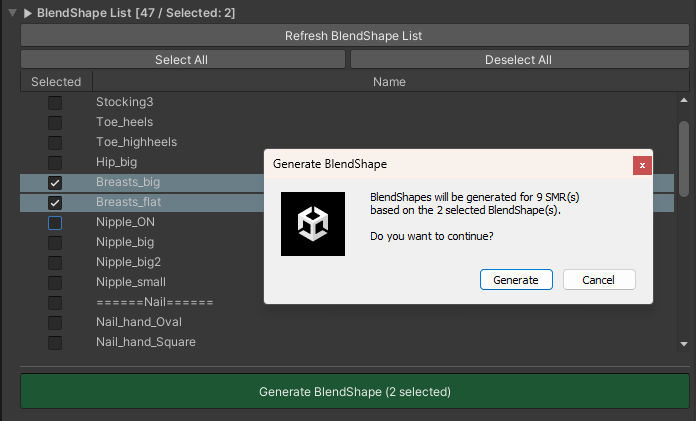
5. Click the Create BlendShape button to proceed with creation.#
ETC. Checking BlendShapes
- We are distributing the [Eden BlendShape Controller], which allows you to control all BlendShapes under an Object,
free of charge to those who have purchased きせった (Kisetter).
- Tool path: [Top Bar] - [きせった (Kisetter)] - [Eden BlendShape Controller]
- How to use: BlendShape Controller
Still need help? Ask in the Discord Help channel ↗