
Vertex Control
Move, rotate, or scale selected vertices.
きせった (Kisetter) 3.4.1 documentation[1] Select vertices#
Select Vertex Control, then click vertices or drag a selection box in the Scene View.
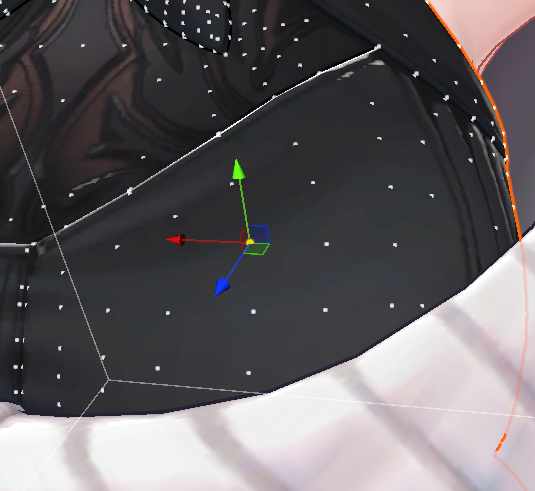
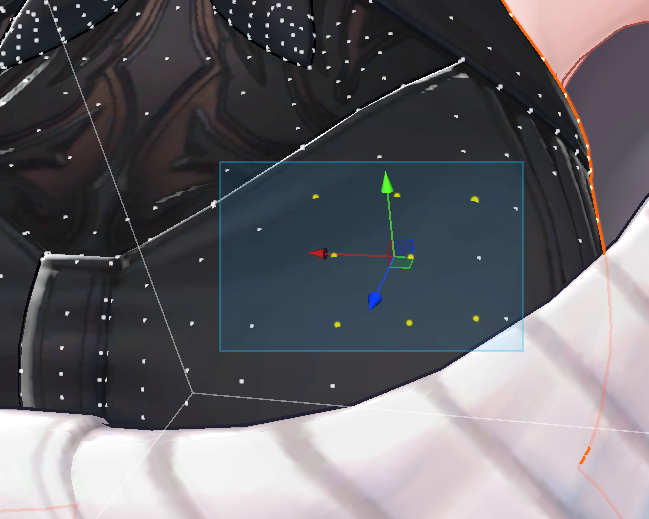
| Input | Action |
|---|---|
| Left click | Select a vertex. |
| Shift + left click | Add a vertex to the selection. |
| Ctrl + left click | Remove a vertex from the selection. |
| Left drag | Select vertices inside the box. |
| Shift + left drag | Add vertices inside the box. |
| Ctrl + left drag | Deselect vertices inside the box. |
| A | Select all vertices in the Main Mesh that have not been hidden. |
| L | Add all vertices connected to the vertex near the cursor. |
| Shift + L | Deselect all vertices connected to the vertex near the cursor. |
L / Shift + L is useful for selecting one connected piece of a mesh containing several separate pieces.
[2] Move, rotate, and scale#
Select vertices, choose W(Move) / E(Rotate) / R(Scale) using the buttons or keyboard, and drag the handle in the Scene View.
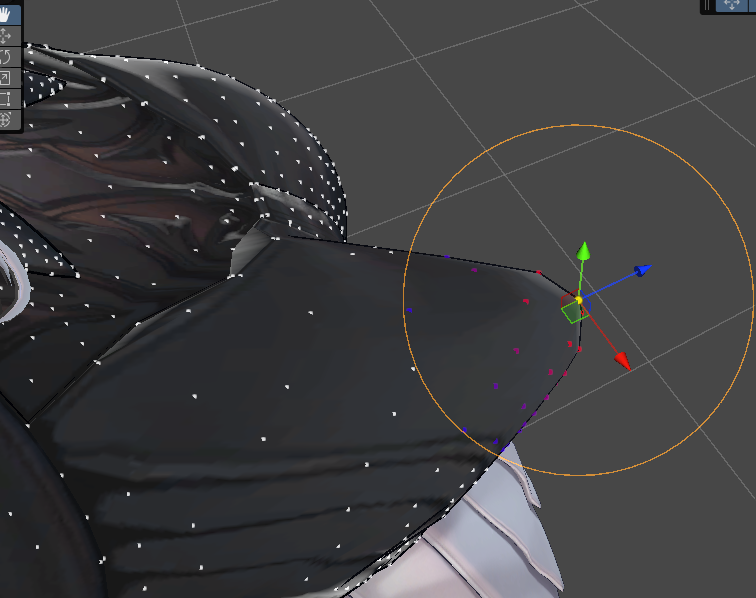
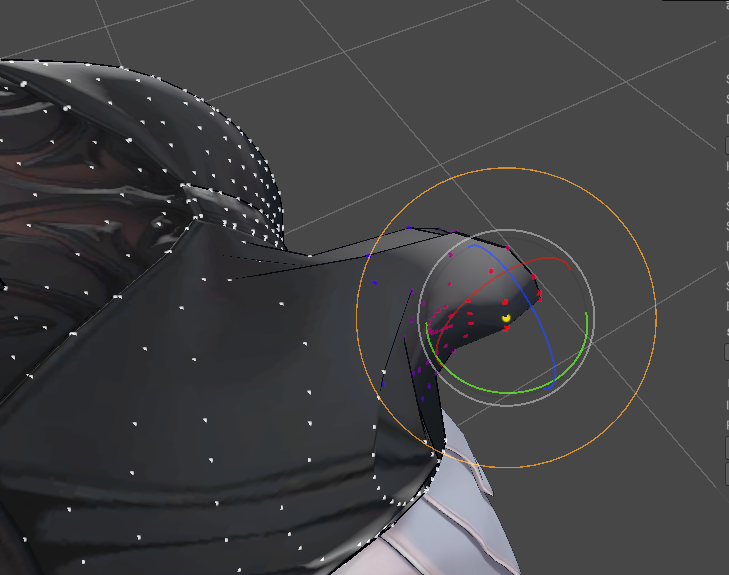
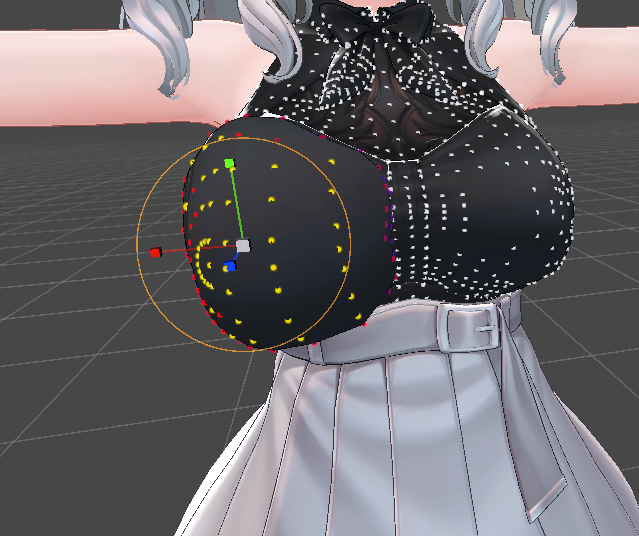
Set Handle Direction to World for world-coordinate axes, or Vertex Normal to orient the handle to the selected vertex's surface normal.
[3] Influence on neighboring vertices#
Moving selected vertices also deforms nearby vertices according to the radius and weight settings. Stronger influence appears red, and weaker influence appears blue.
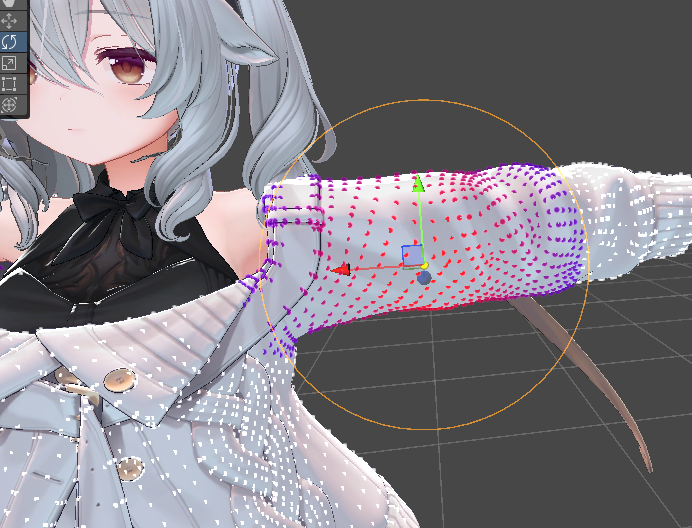
| Setting | Option | Description |
|---|---|---|
| Pick Mode | Euclidean | Affect vertices within the radius based on distance through space. |
| Adjacency | Affect vertices within the radius based on distance along mesh connections. | |
| Brush Weight Mode | Linear | Influence decreases steadily with distance. |
| Gaussian | Create a smooth transition from the center to the surrounding area. | |
| Clamp | Apply the same weight to vertices within the radius. |
Brush settings#
| Option | Description |
|---|---|
| Brush Radius | Set how far deformation extends around the selected vertices. |
| Brush Strength | Set how strongly nearby vertices follow when you move, rotate, or scale the selection. |
| Input | Action |
|---|---|
| Shift + mouse wheel | Adjust brush radius. |
| Ctrl + Shift + mouse wheel | Adjust brush strength. |
| Shift + mouse wheel with Caps Lock on | Adjust brush strength. |
Use these shortcuts in the Scene View. On macOS, use Command instead of Ctrl.
[4] Hide or delete vertices#
| Input | Action |
|---|---|
| G | Hide selected vertices. |
| Shift + G | Show all hidden vertices. |
| Delete Vertices, Backspace, or X | Delete selected vertices from the mesh. |
Hidden vertices are protected from editing. Use hiding to limit the area you work on; deleting changes the mesh's vertices and faces.
[5] Symmetry movement and clipping#
Symmetry: Enable X / Y / Z to apply the operation to the opposite side relative to Root Object. Multiple axes can be enabled together. Symmetry axes are disabled in Adjacency mode. Use Euclidean for symmetry editing.
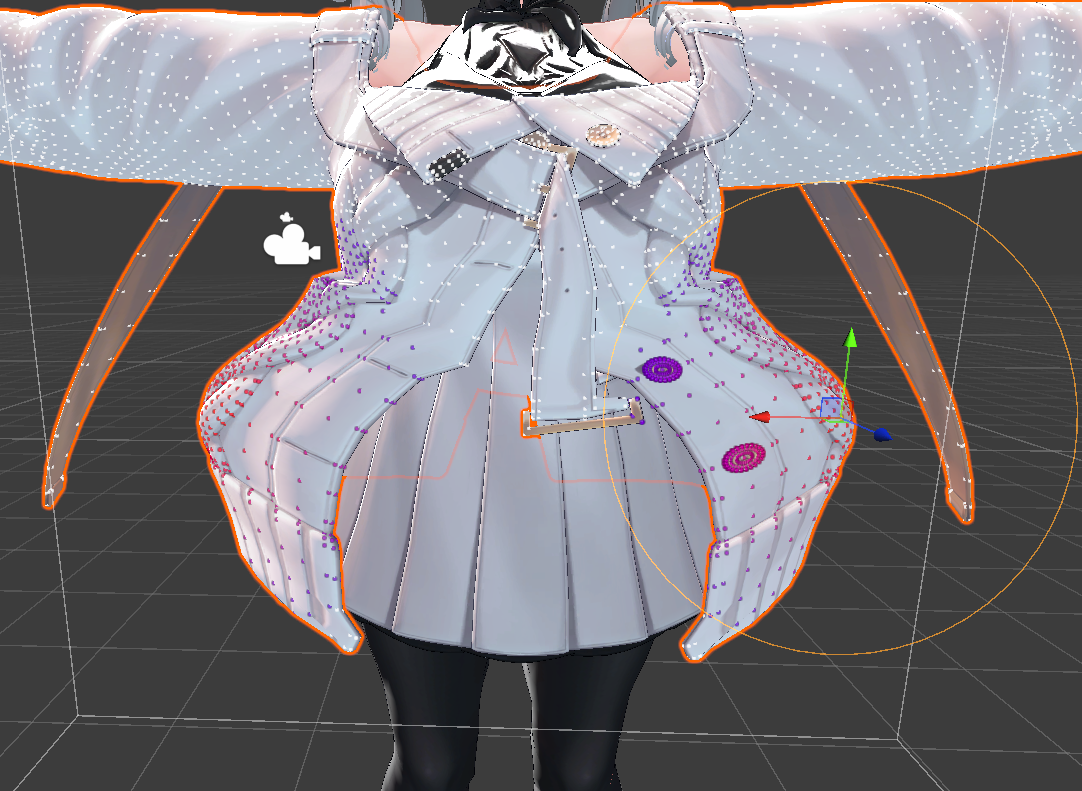
| Control | Description |
|---|---|
| Symmetry Move → Mirror | Move the opposite vertices as a mirror image. |
| Symmetry Move → Same | Apply the deformation in the same direction on the opposite side. |
| Symmetry Clipping | Prevent vertices near a symmetry axis from crossing to the opposite side. |
[6] Save your edits#
After editing, recalculate weights and realign PhysBones if needed. See saving and mesh separation to save the result as a Mesh or BlendShape.