Parameter Description
Explanation of basic and advanced fitting and weighting options.
きせった (Kisetter) 3.1.3 documentation[Basic Option]#
1. Automatically Assign Body Mesh#
When enabled, this option automatically searches for the Body Mesh on the Avatar.
a. If automatic Body Mesh detection fails#
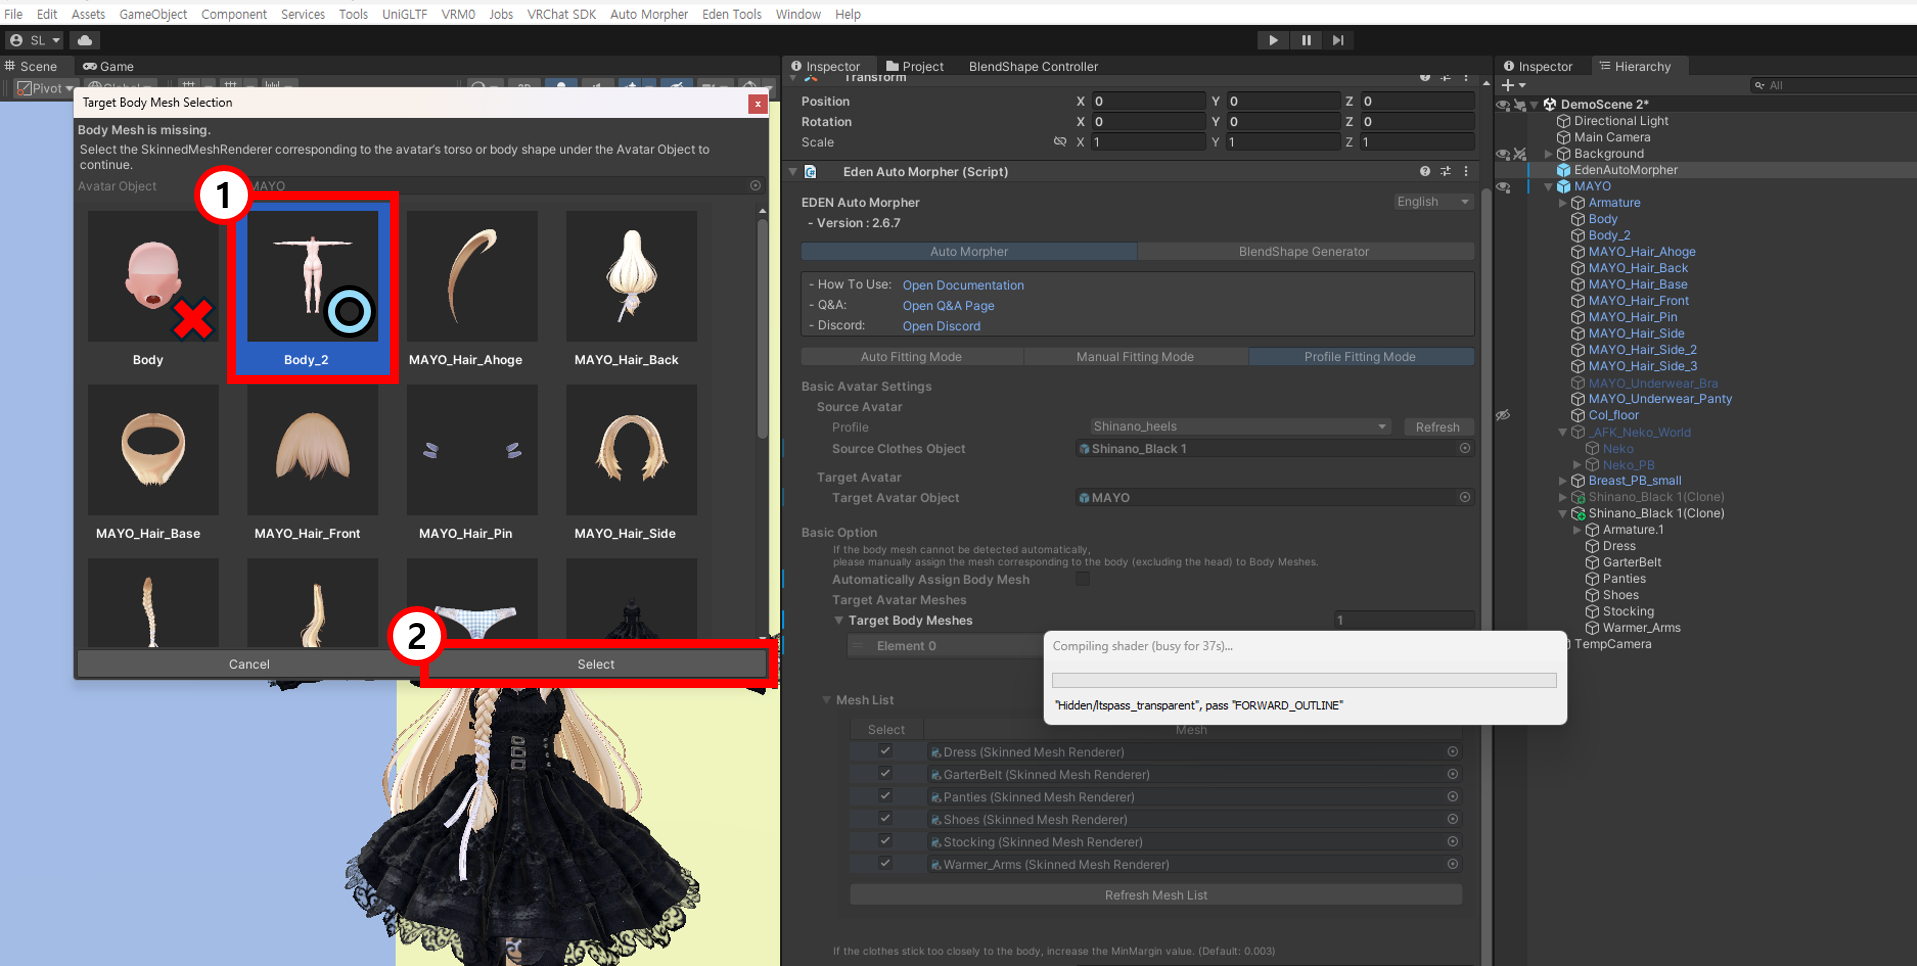
- If the Body Mesh cannot be found automatically , the Body Mesh selection window will appear.
- In that window,select the mesh corresponding to the torso as shown in the example image,then click the [Select] button.
b. How to Manually Assign the Body Mesh#
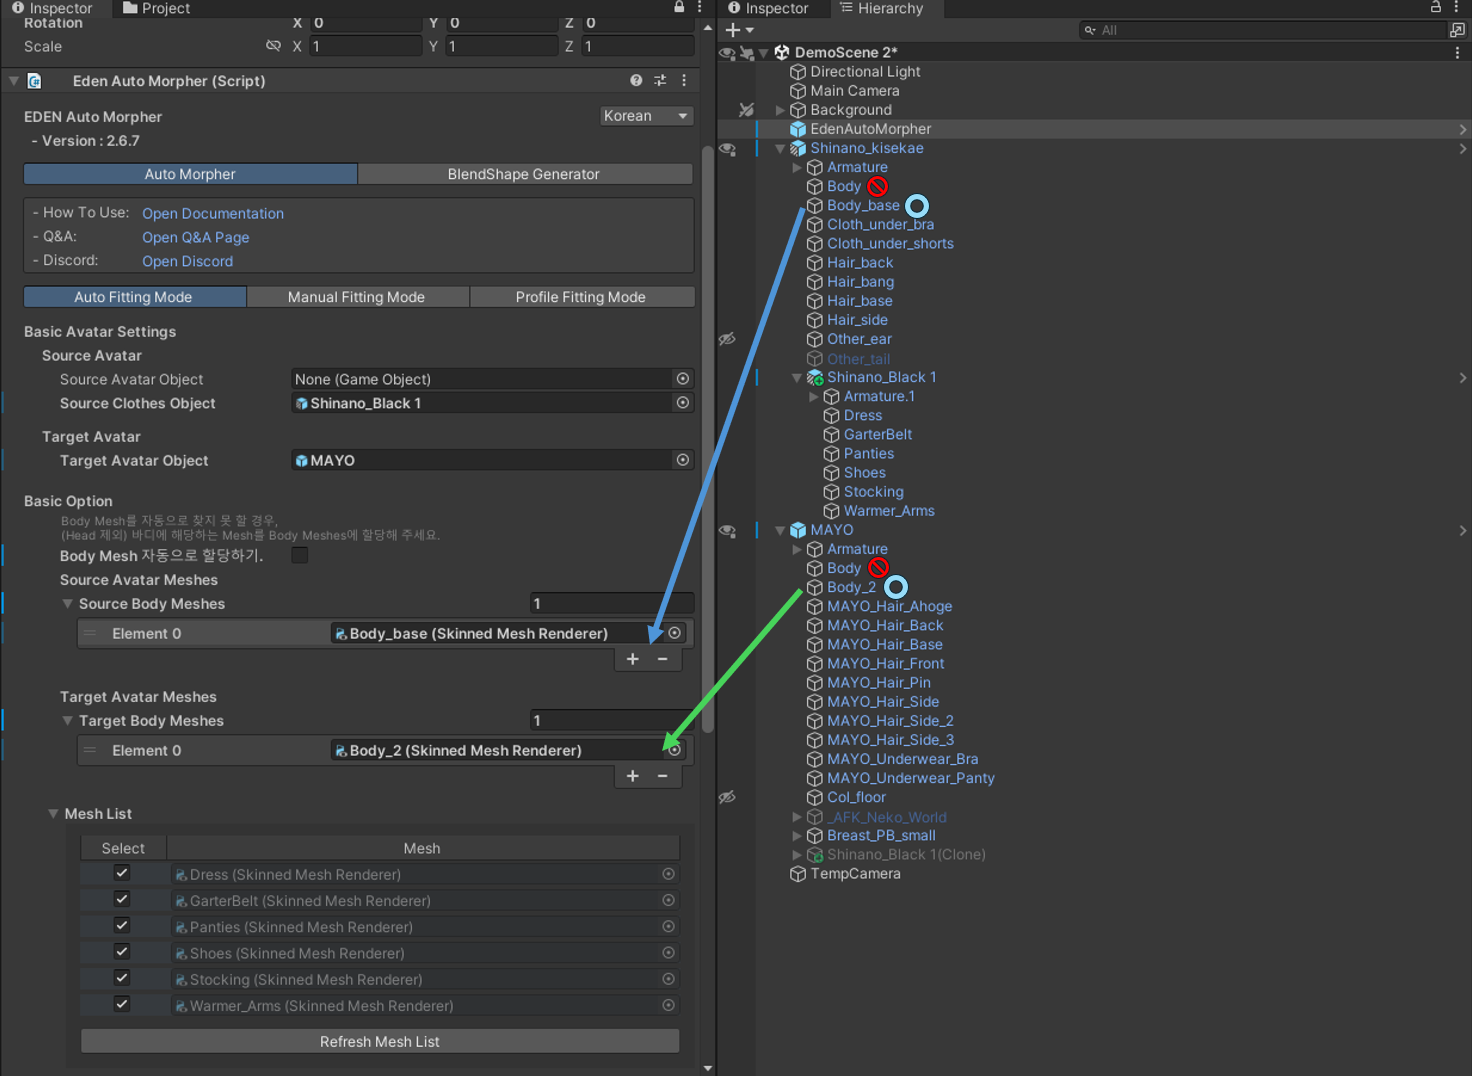
If an error message stating that the Body Mesh cannot be found appears, please disable this option and manually assign the Body Skinned Mesh Renderer corresponding to the torso.
- For VRChat avatars, the mesh labeled "Body" usually represents the face/head, so please assign the mesh corresponding to the torso, as shown in the example image.
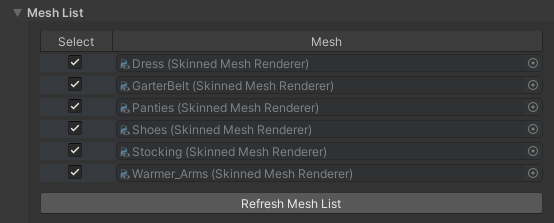
2. Mesh List#
This option allows you to select the mesh to be deformed.
If the mesh is not visible, click the [Refresh Mesh List] button to refresh the mesh list.
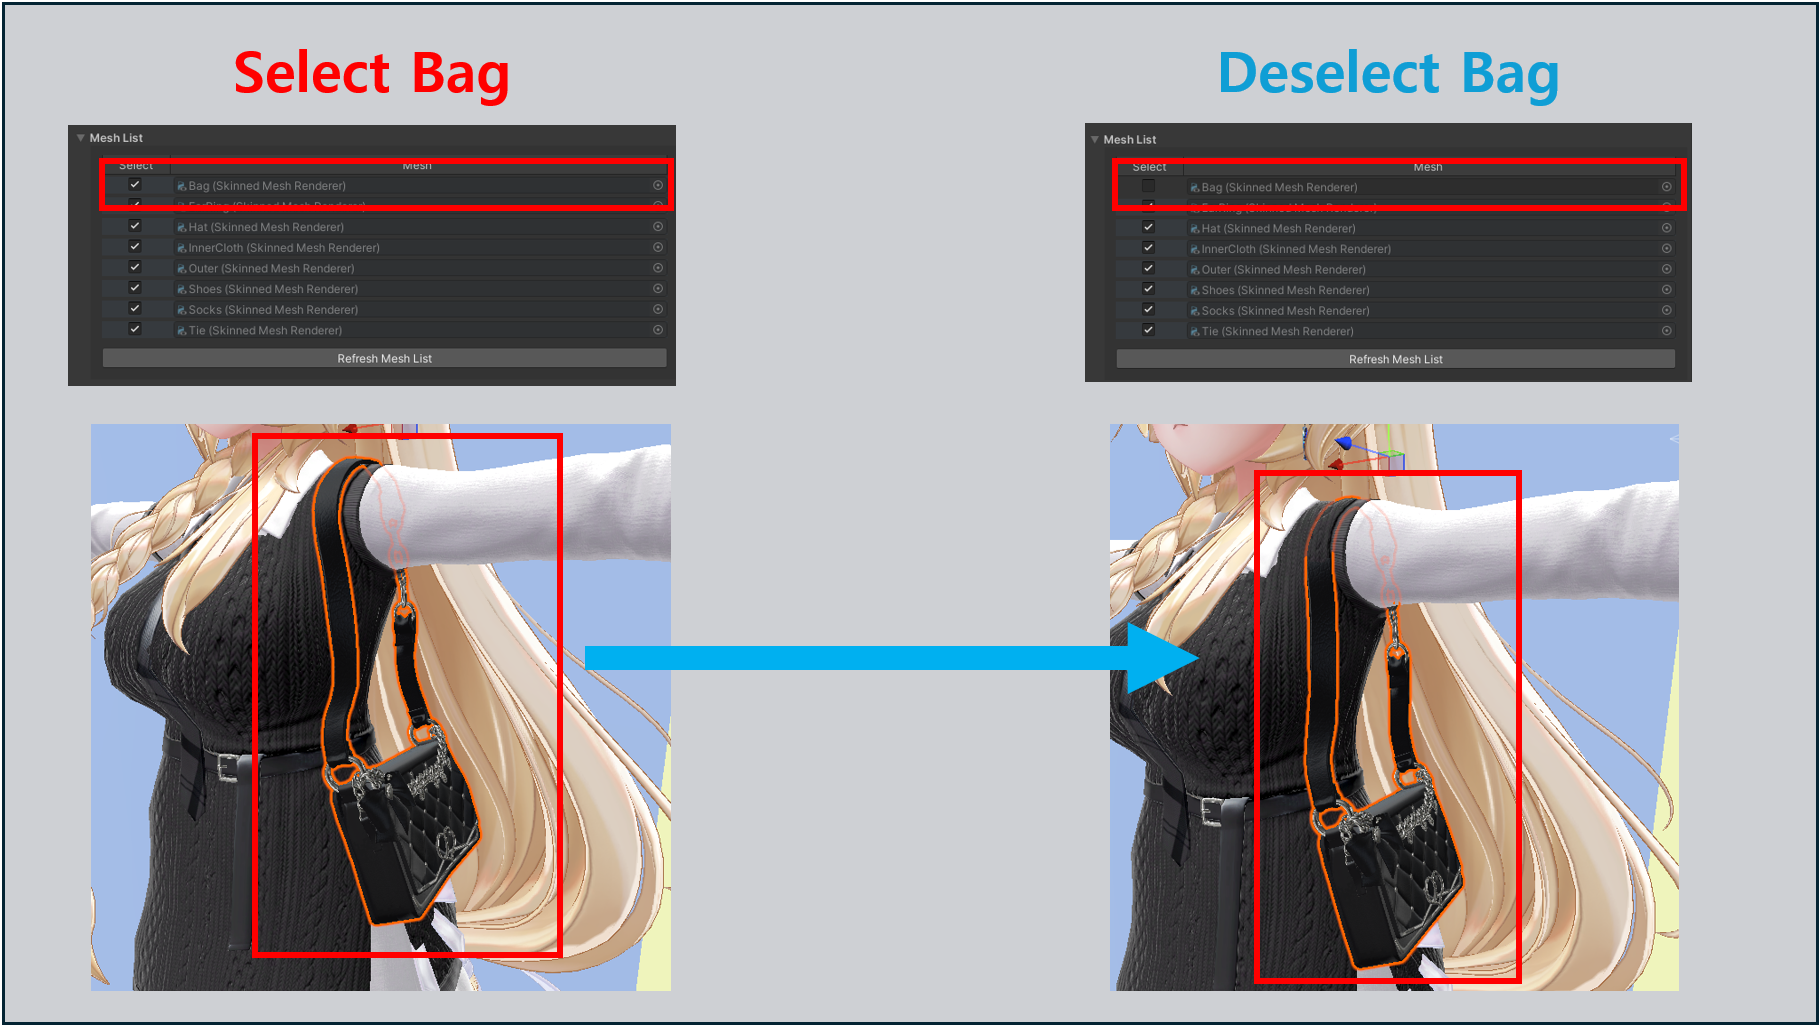
If there are any meshes you do not want to transform, uncheck their checkboxes.
Examples of when "Bag" is selected and when it is not
3. Body Gap#

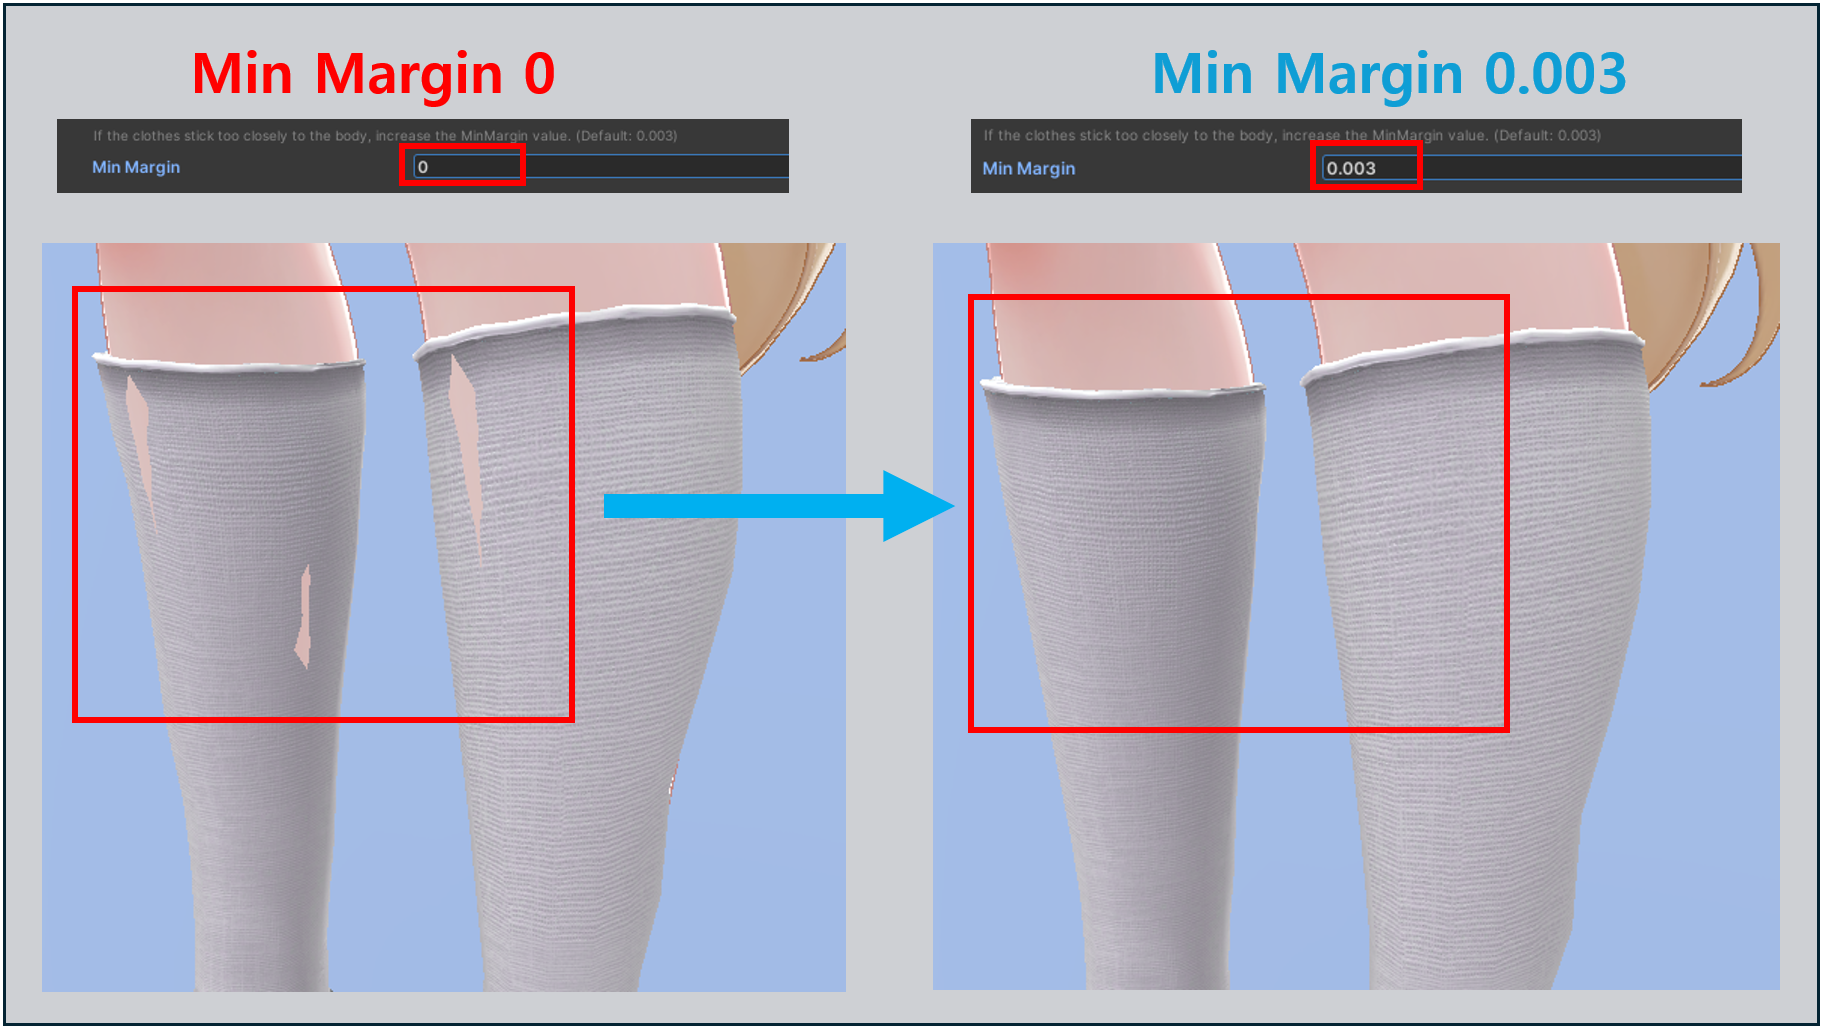
This parameter sets the minimum distancebetween the garment and the body.
- The garment will be transformed to move further away from the body by the set value.
If the garment penetrates the body (becomes transparent) excessively, increase this value.
Example
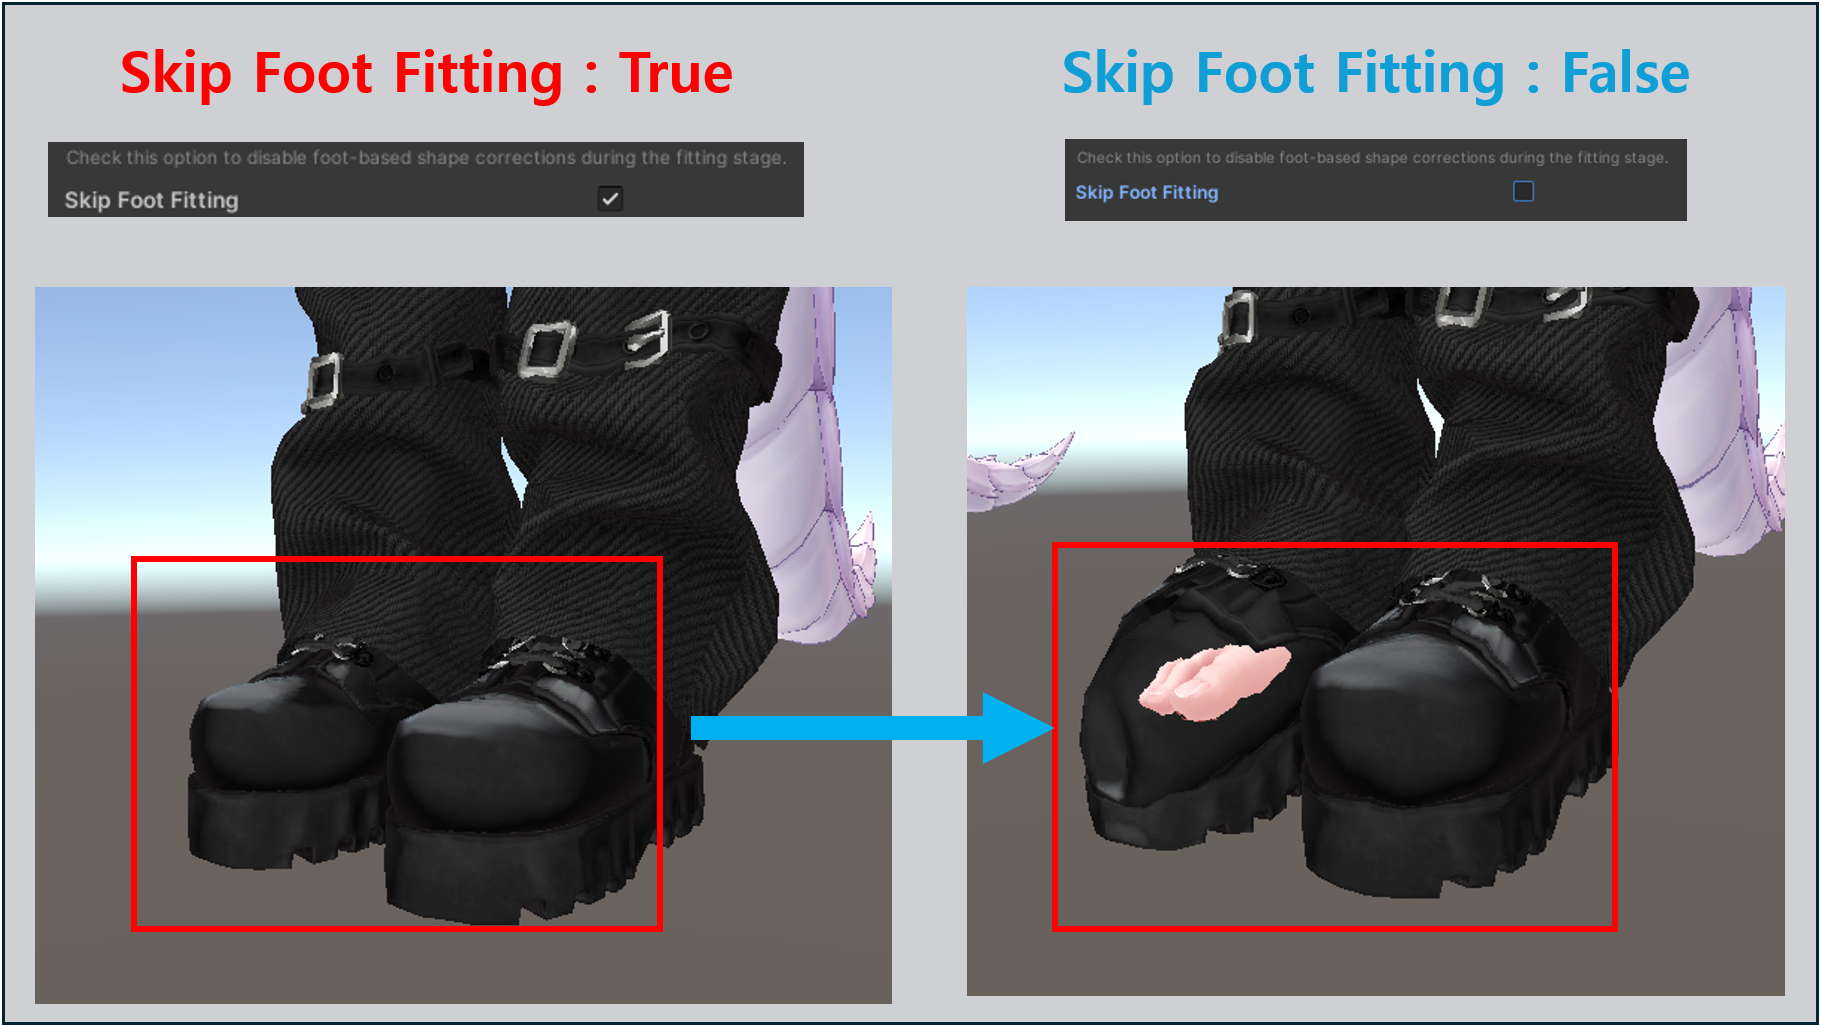
4. Skip Foot Fitting#

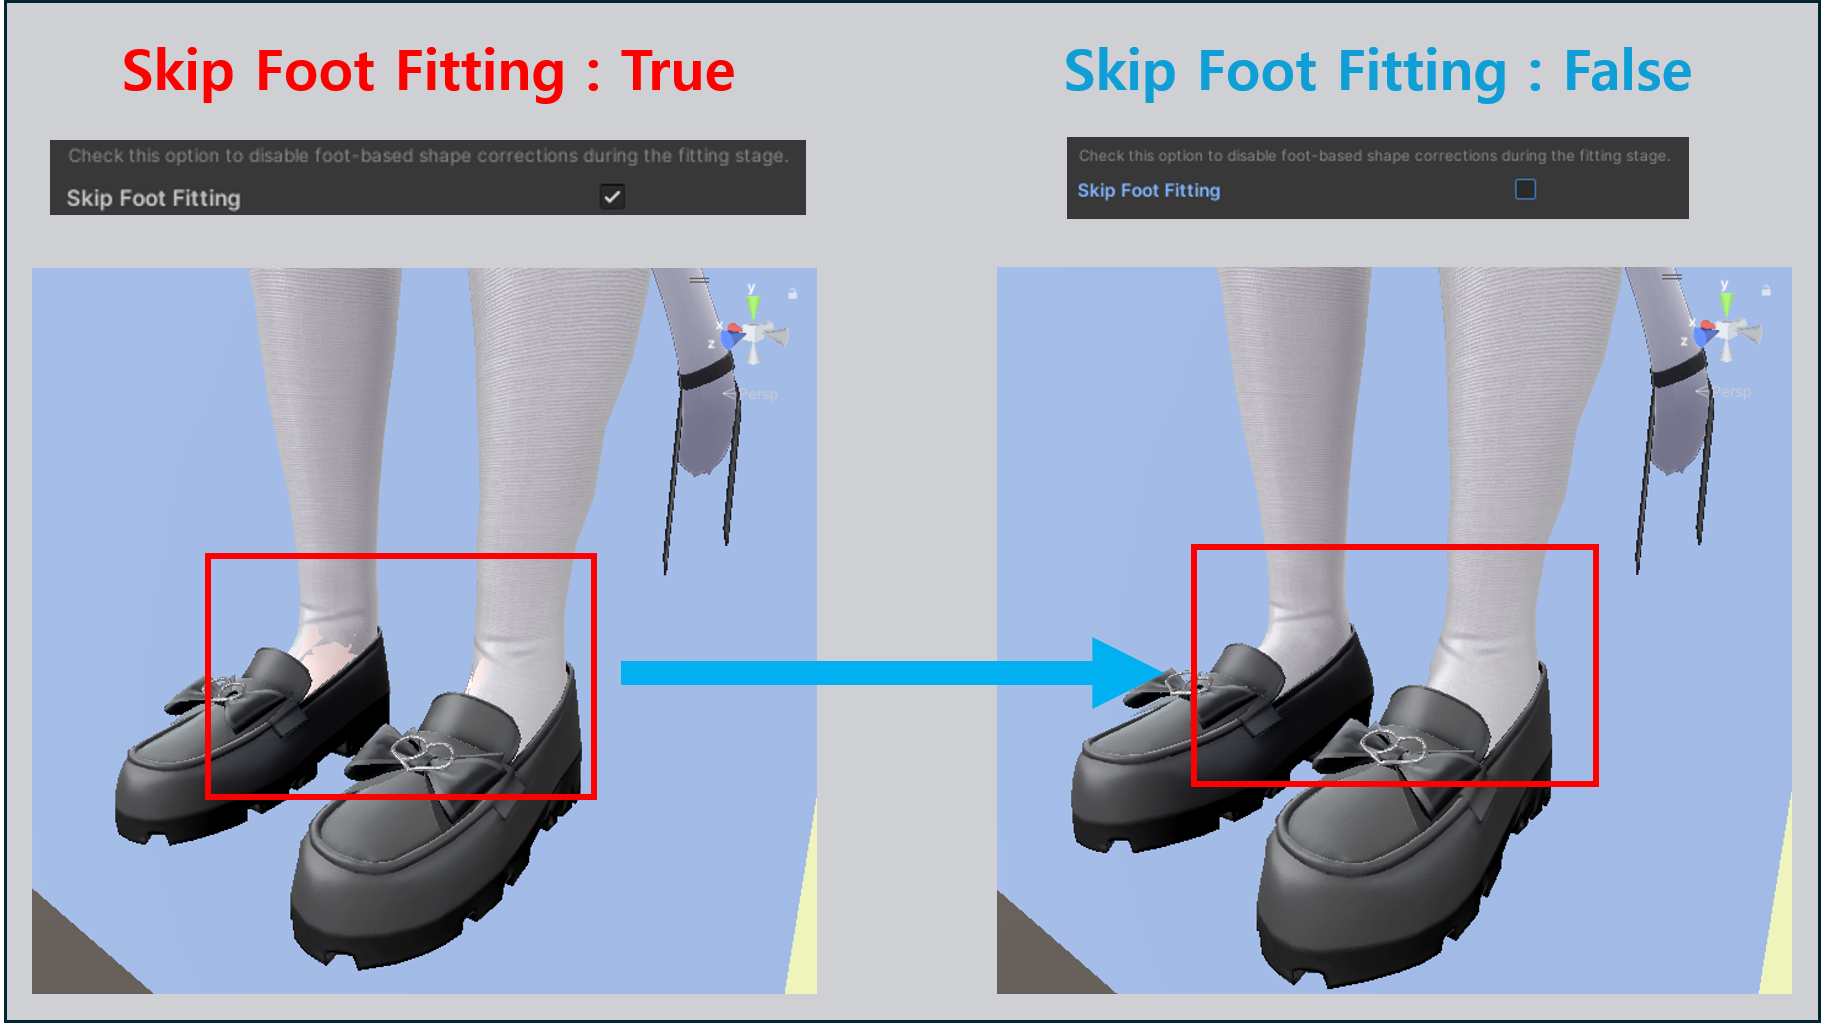
- This option determines whether detailed fitting is appliedto the shoe mesh.
- When enabled, only resizing is applied to the shoes; detailed fitting that directly modifies the shape is not applied.
- Depending on the avatar, shoe fitting may not apply correctly, or the shoe shape may become distorted.
- If the shoe shape breaks or becomes awkwardly distorted after fitting, please enable this option.
5. Remove AutoMorphed Other Clothes#

- When enabled, this option automatically deletes any outfits on the Target Avatar that have already been mapped using きせった (Kisetter).
- Please enable this when you want to delete unnecessary outfits.
—————————————————————————#
[Advanced Option]#
A. Save Settings#
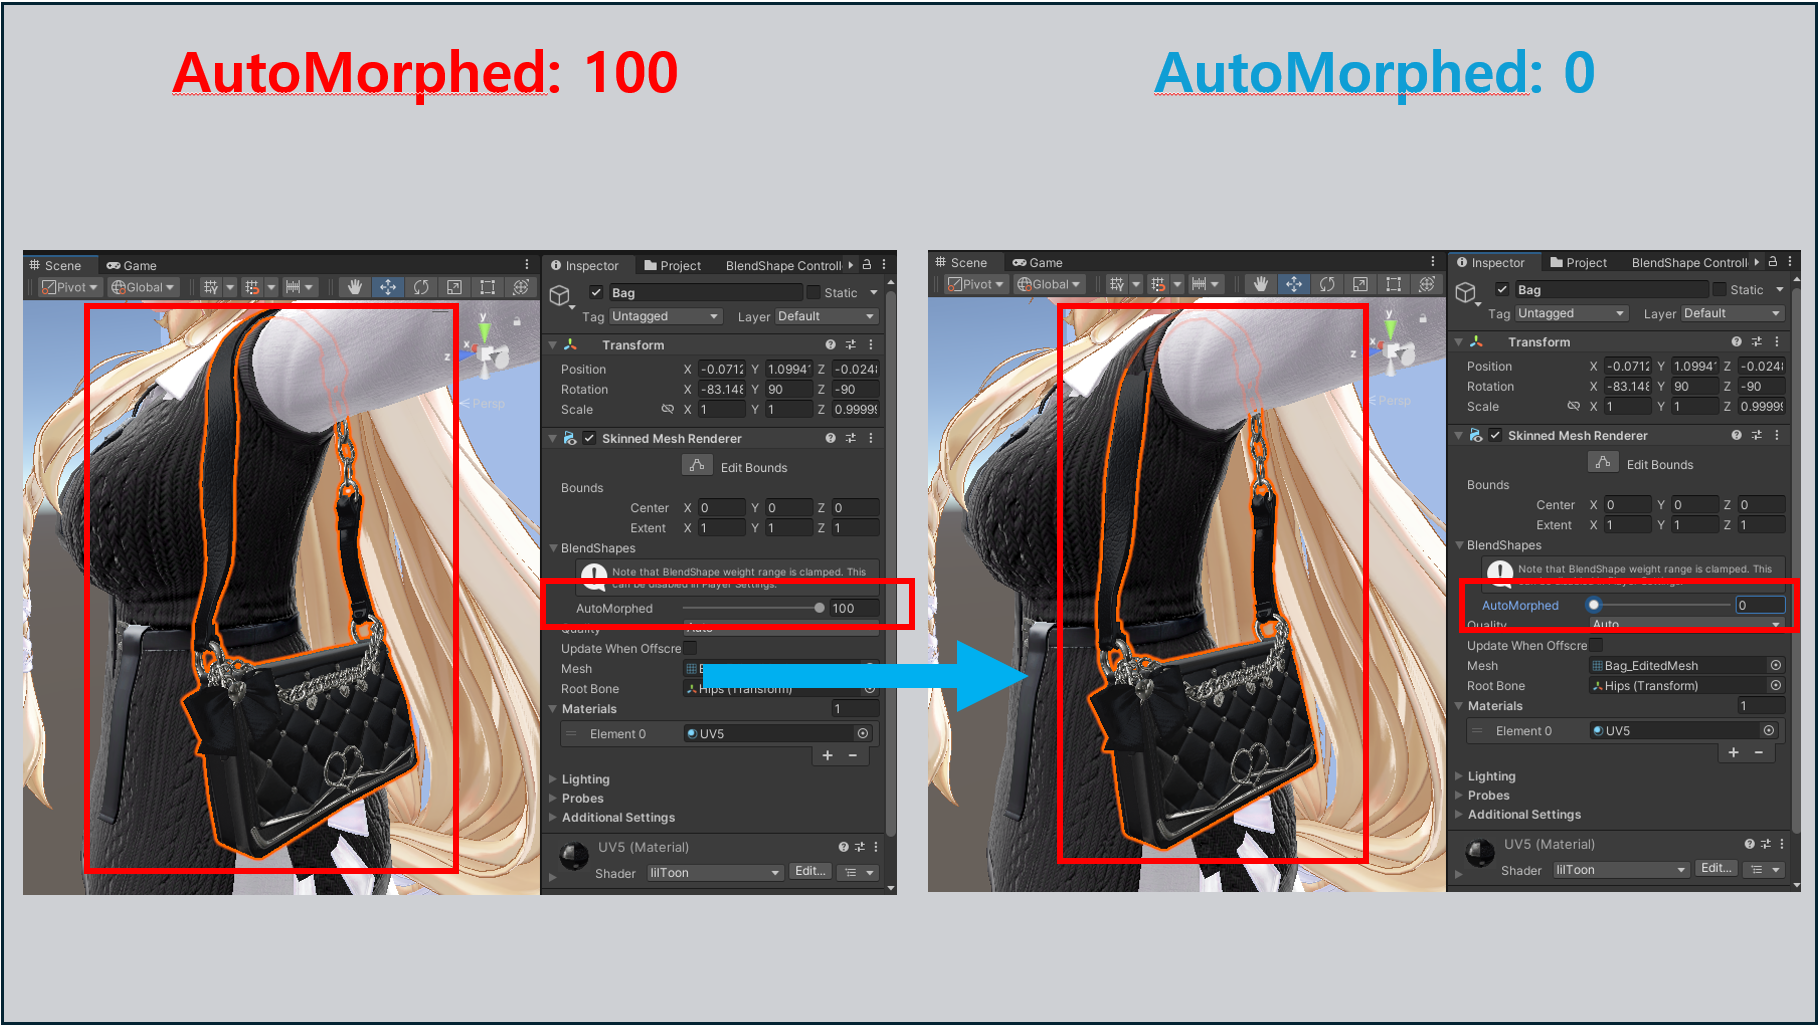
1. Save Results As BlendShape#
Savesthe deformation results as a BlendShape.
You can switch between the pre- and post-transformation statesby adjusting the BlendShape value.
a. BlendShape Name#
- Set the name of the BlendShape to be saved.
Example
—————————————————————————#
B. Fitting Options#
1. Sigma#
- The higher the value, the wider the influence range and the smoother the deformation.
- Recommended value: 2–5
2. Smooth Radius#
- Sets the distance range of neighboring verticesto be referenced when applying smoothing.
3. Smooth Neighbor Max Num#
- Sets the maximum number of neighboring verticesto reference when applying smoothing.
4. Smoothing Iteration#
- The higher the value, the stronger the smoothing effect, resulting in a smoother transformation.
- Recommended value: 1–4
- Higher values increase the processing time.
- Please note that setting this value too high may actually degrade the quality of the deformation.
5. Fitting Iteration#
This option sets the number of times the garment transformation is repeated.
a. Expand Iteration
- This is the number of times the process of pushingthe garment outwardto prevent it from sinking into the body is repeated.
- If the garment is still buried in the body after fitting, increase this value.
b. Shrink Iteration
- This is the number of timesthe pushed-out clothing is re-adjusted to fit snugly against the body's surface.
- If the clothing is still far from the body after the adjustment, increase this value.
—————————————————————————
C. Weighting Options
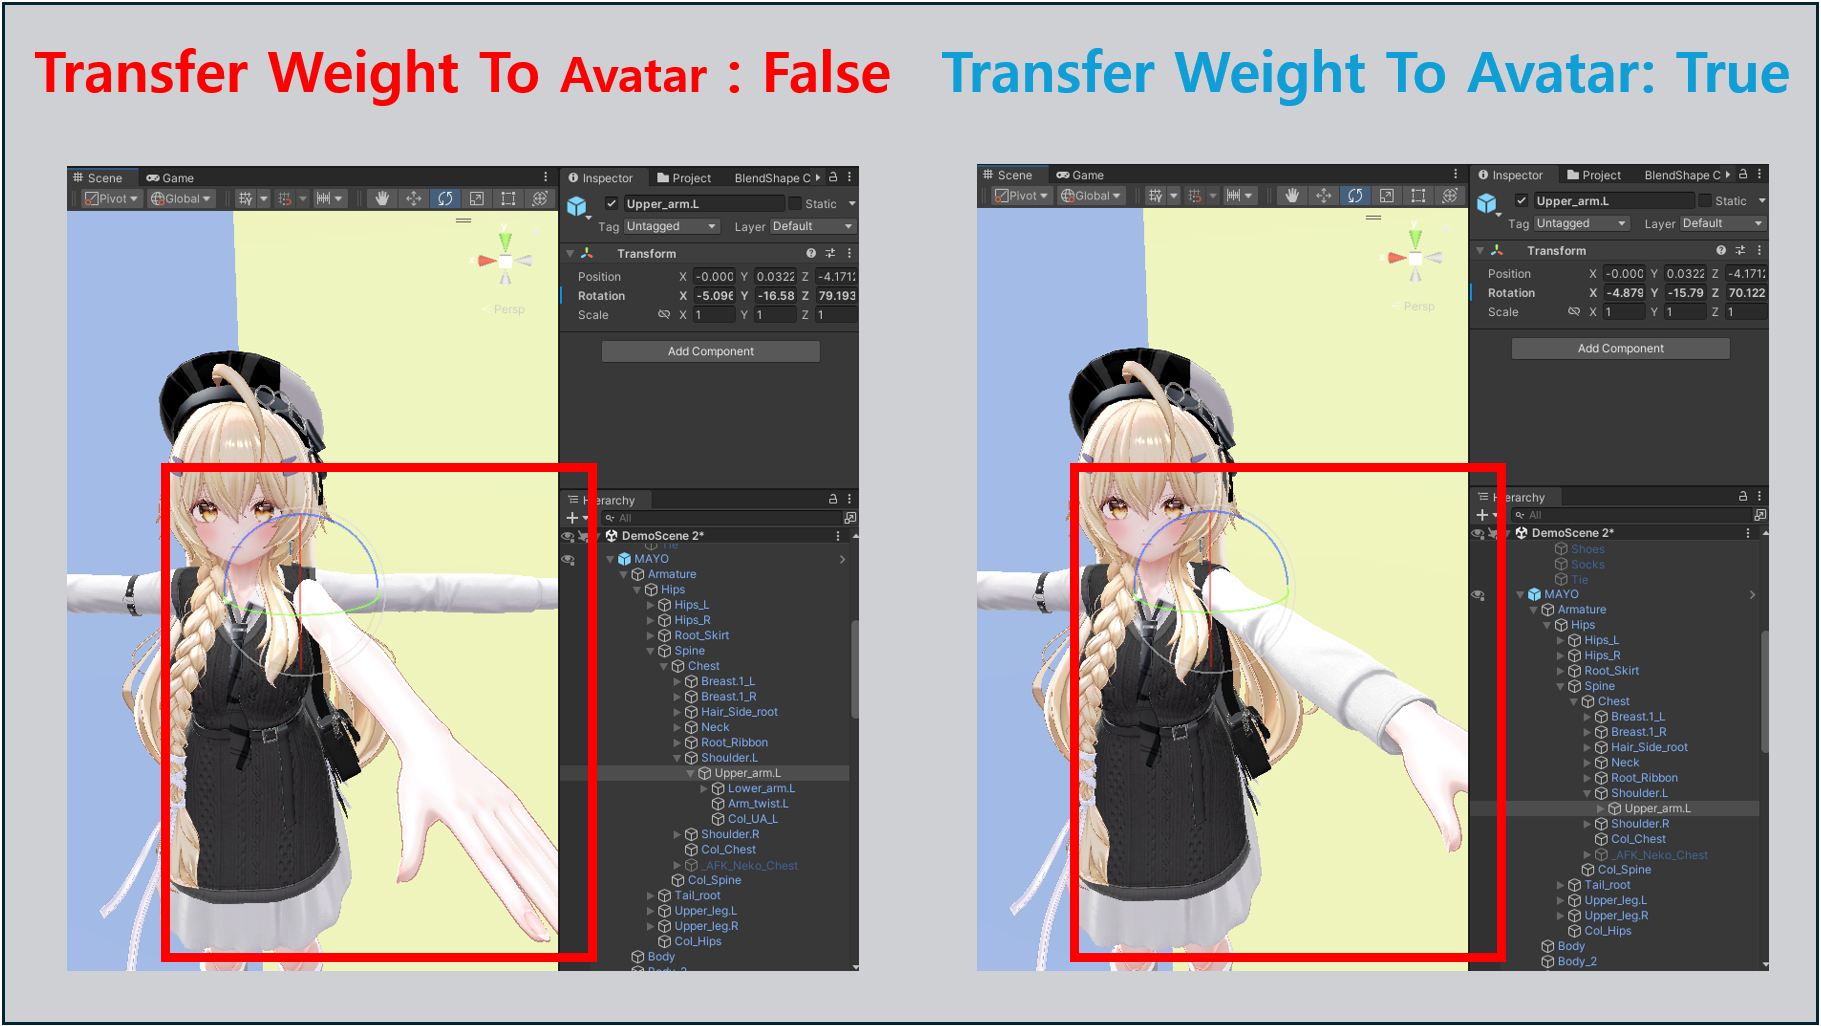
1. Transfer Weight To Avatar
This option calculatesthe weighting so thatthe garment mesh moves directly in accordance with the Target Avatar’s bones.
- When enabled, the movement is based on the Target Avatar’s armature bones rather than the bones within the costume.
This option is useful when you are not using a feature that automatically connects the costume’s bones to the avatar’s bones, such as with Modular Avatars.
If you want to save the outfit as a separate Prefab, please disable this option!
a. 🟢 Transfer Weight To Avatar Enabled
Reparent Accessory Bones

- When enabled, this automatically movesany additional bones included in the outfit to the Target Avatar’s Armature.
- This allows you to configure accessories or attached parts to move along with the avatar.
b. 🔴 Transfer Weight To Avatar Disabled
Add Anchor Bone

- This option determines whether to add an intermediate bone for rotation correctionwhen restructuring bones to match the Target Avatar.
- When enabled, the rotation of the outfit’s existing bones is preserved, and a correction bone is added to its parent to compensate.