
Auto Fitting Mode
Complete workflow for automatically fitting an outfit to a target avatar.
きせった (Kisetter) 3.1.3 documentation⚫ This mode automatically adjusts and deforms the outfit to fit the Target Avatar.
⚫ If you need to adjust bones manually, please use Manual Fitting Mode.
[1] Preparation#
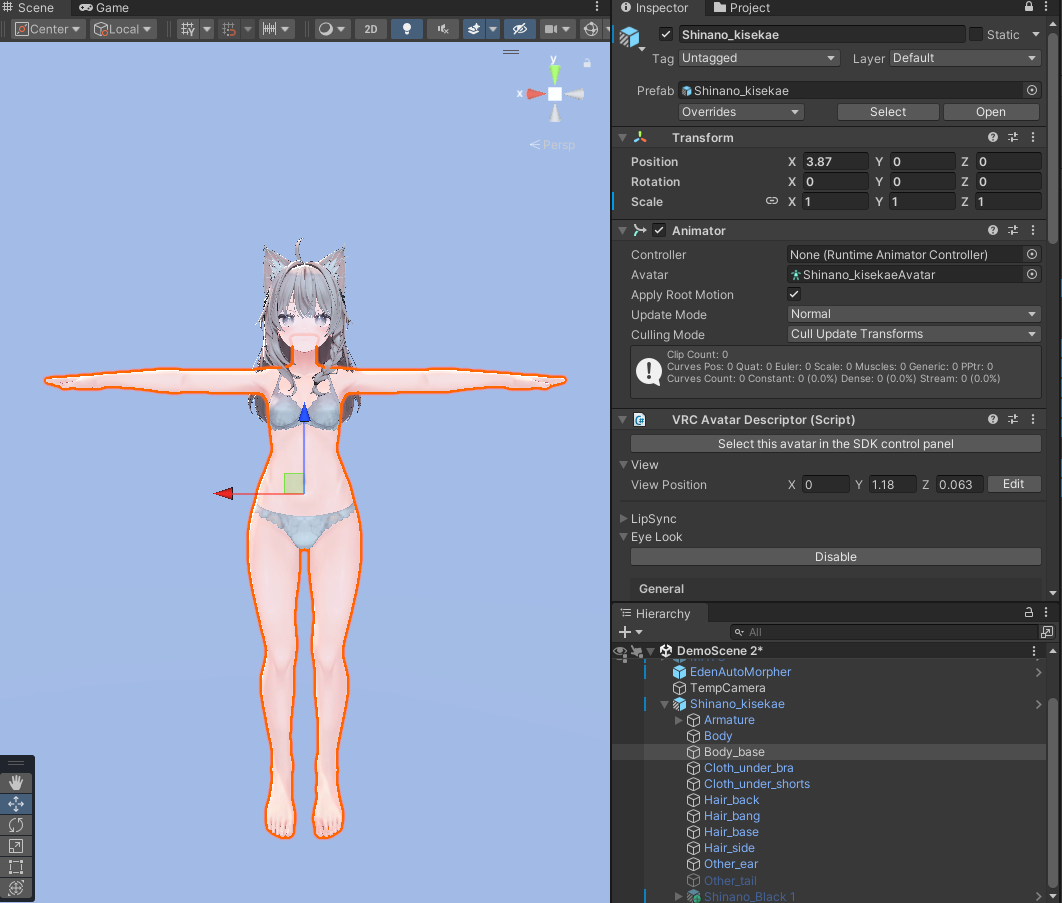
1. 🧍♂️Source Avatar Setup#
Place the avatar in the Scene, then reset its rotation and scale.
Verify that the Animator and the Skinned Mesh Renderer corresponding to the torso are present on the avatar.
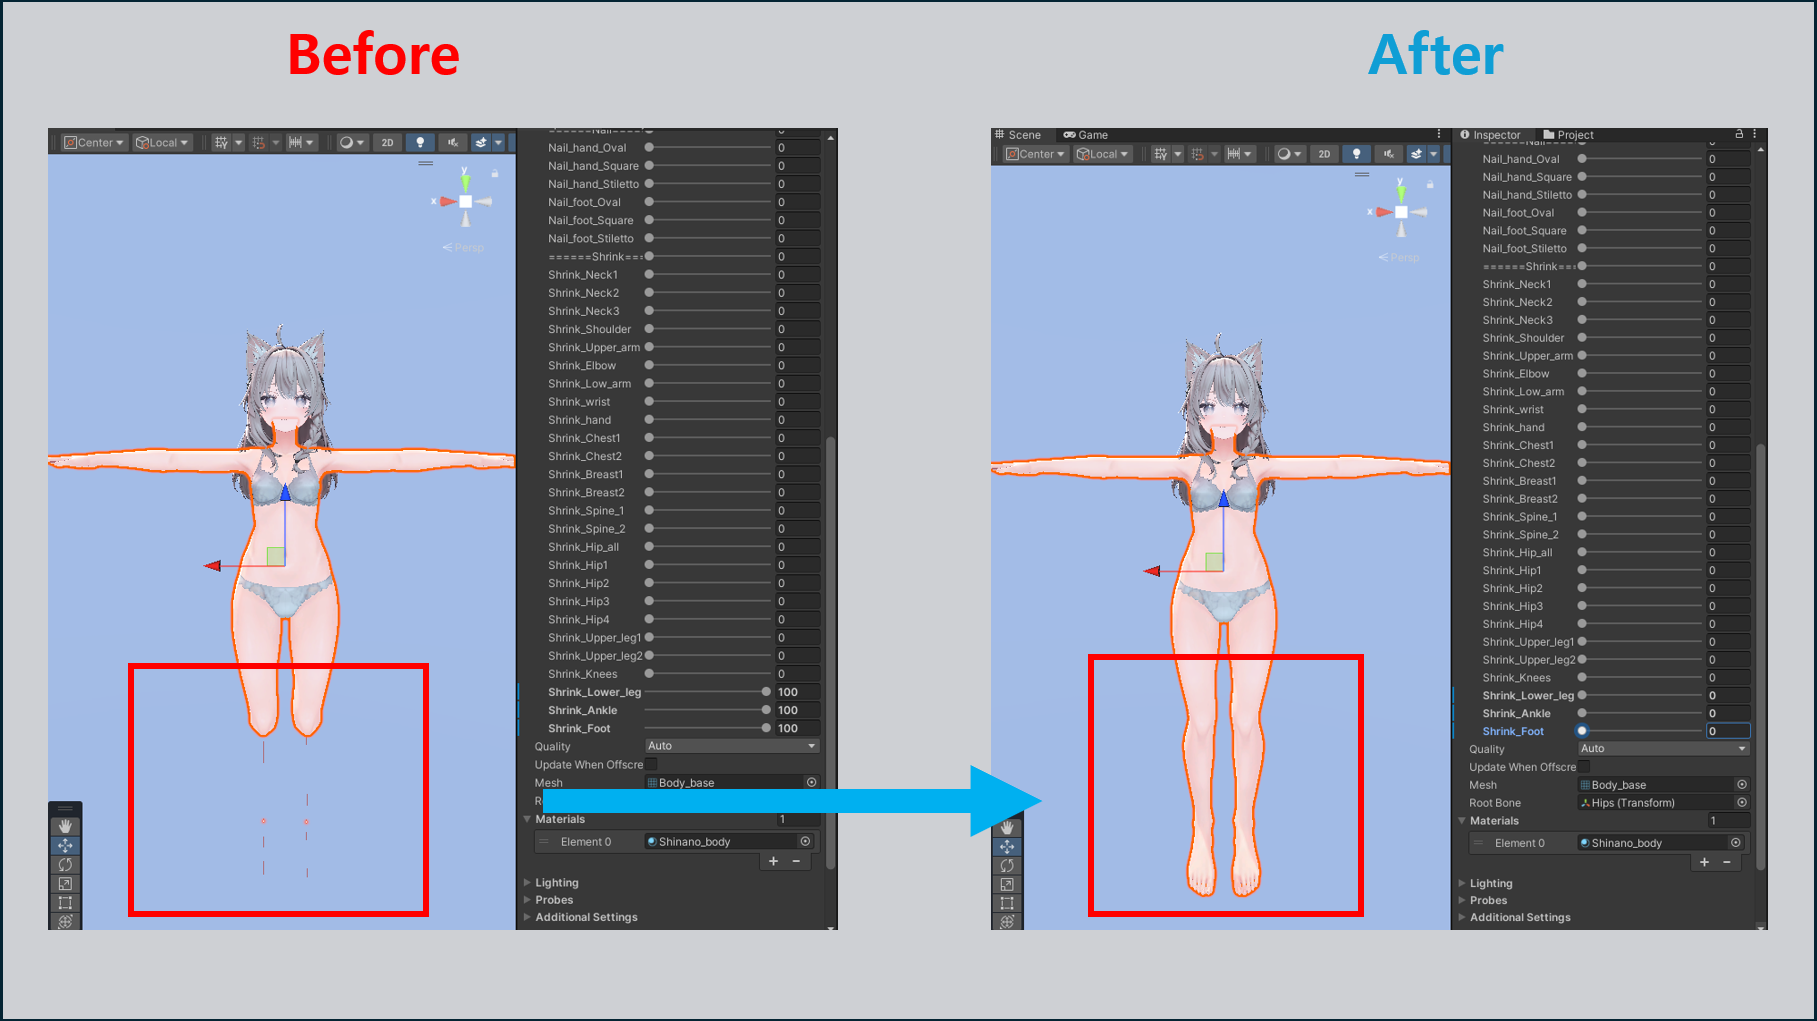
Adjust the BlendShapes so that the Body Mesh is fully visible without any parts being scaled down or obscured.
1. 👕Source Clothes Setup#
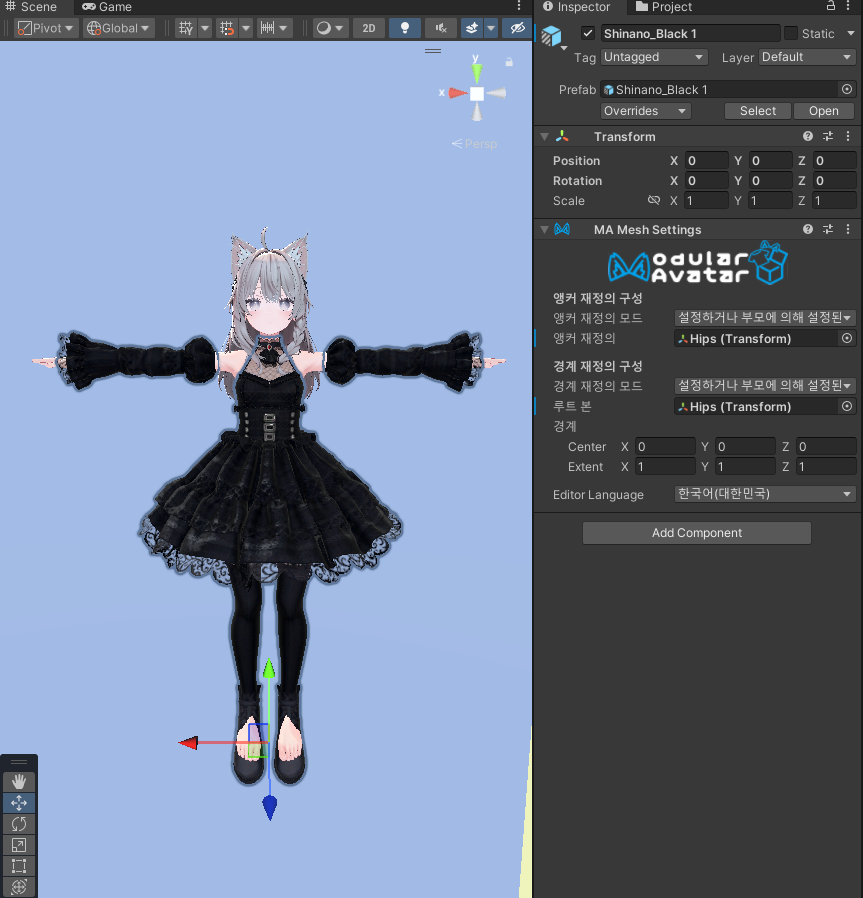
Place the outfit in the Scene, make it a child of the Source Avatar, then adjust its position and scale.
Adjust the outfit’s BlendShapes to match the Source Avatar.
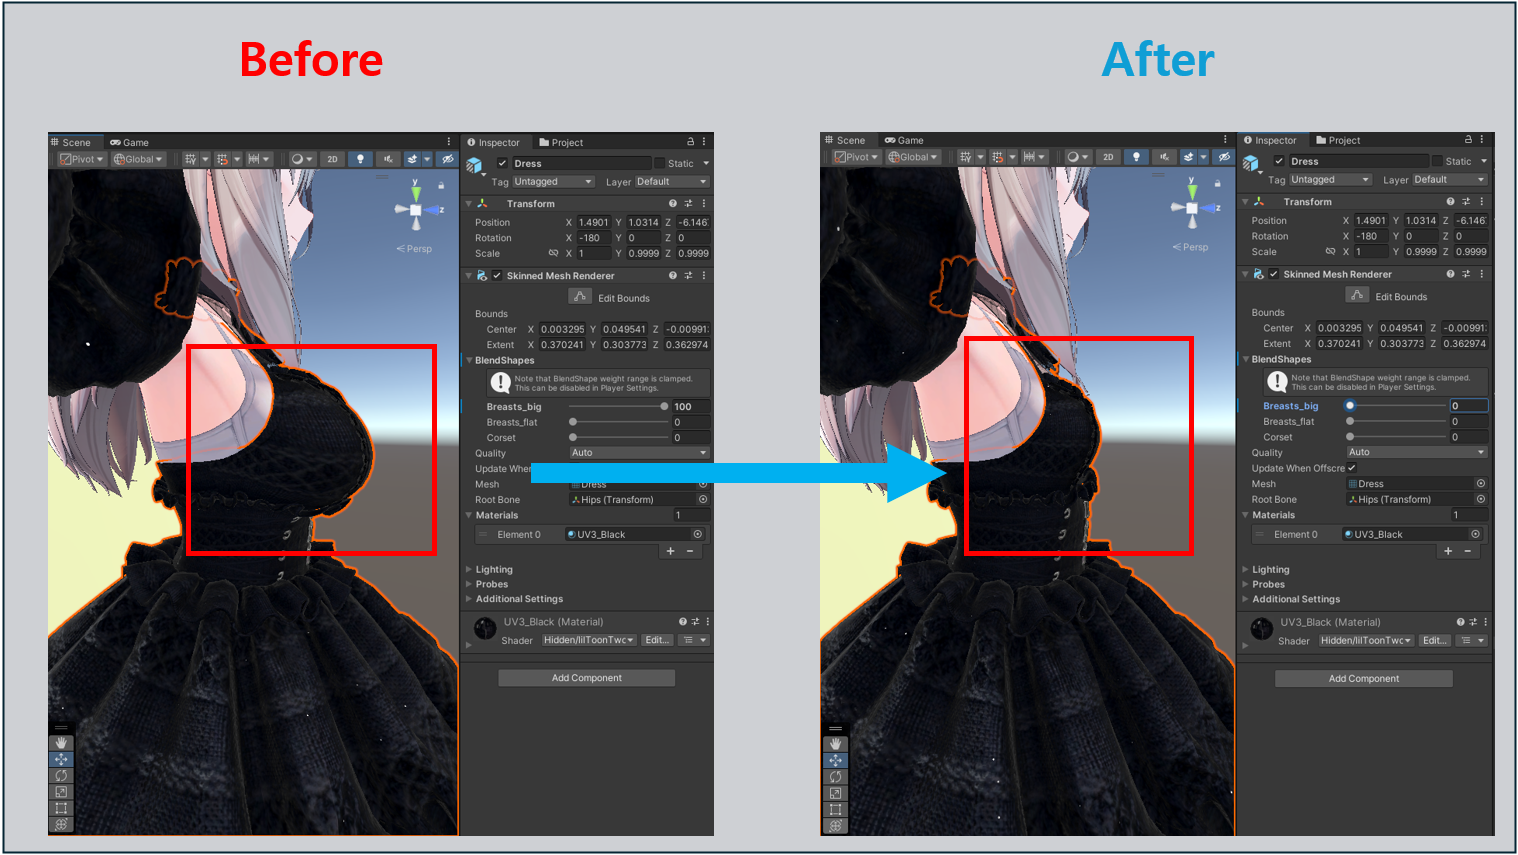
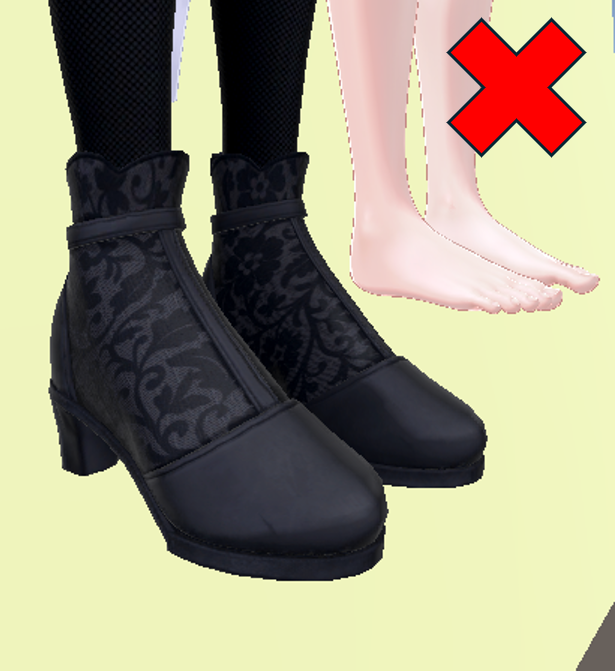
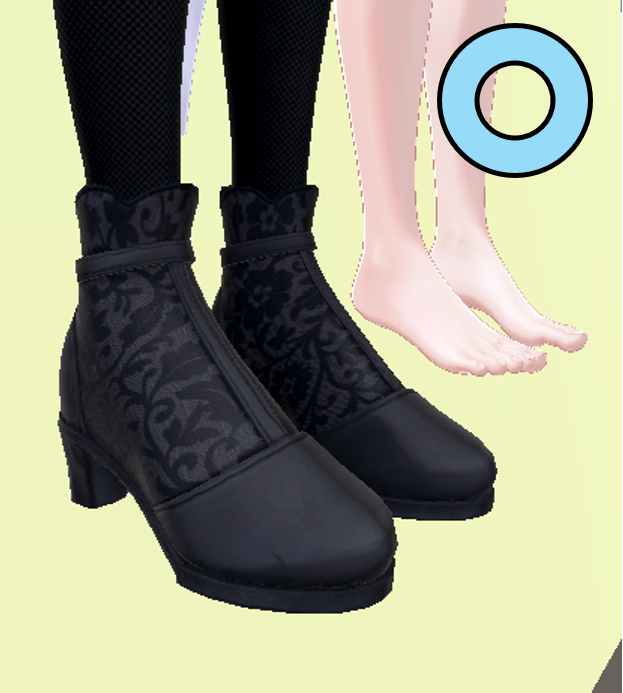
Also adjust the avatar’s BlendShapes, such as 👠 Foot Heel or 👙 Breast, to match the outfit.
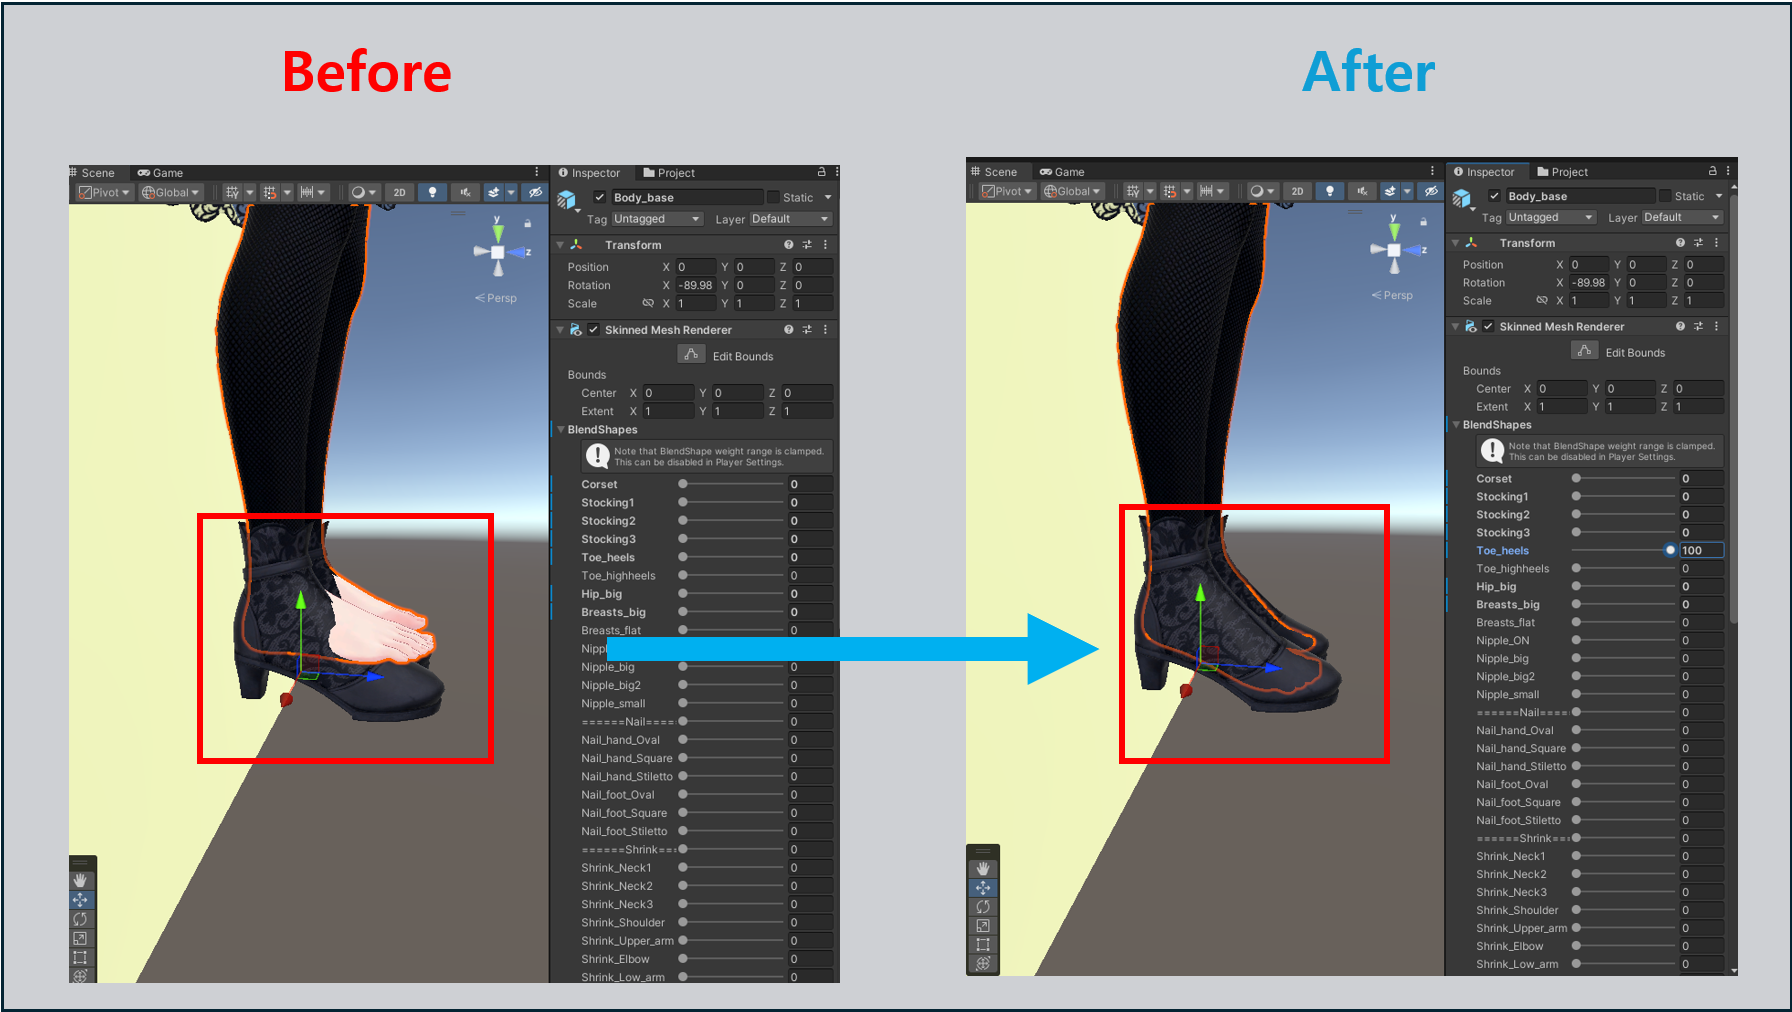
1-2. 📄 Using a Source Profile#
- Prepare the Profile.
- Profile path:
Assets\@Eden_Tools\Kisetter\Profiles - If the Profile you want does not appear in the list, manually add the Profile folder to the path above.
Example Profile folder structure: Profiles └─ ProfileName ├─ ProfileName.json └─ ProfileName.eb
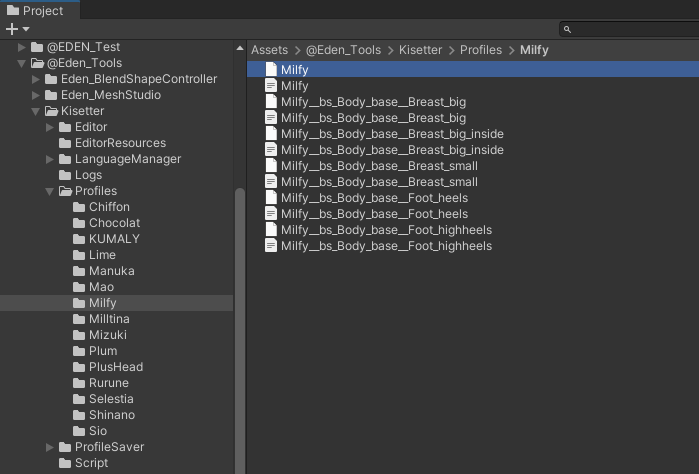
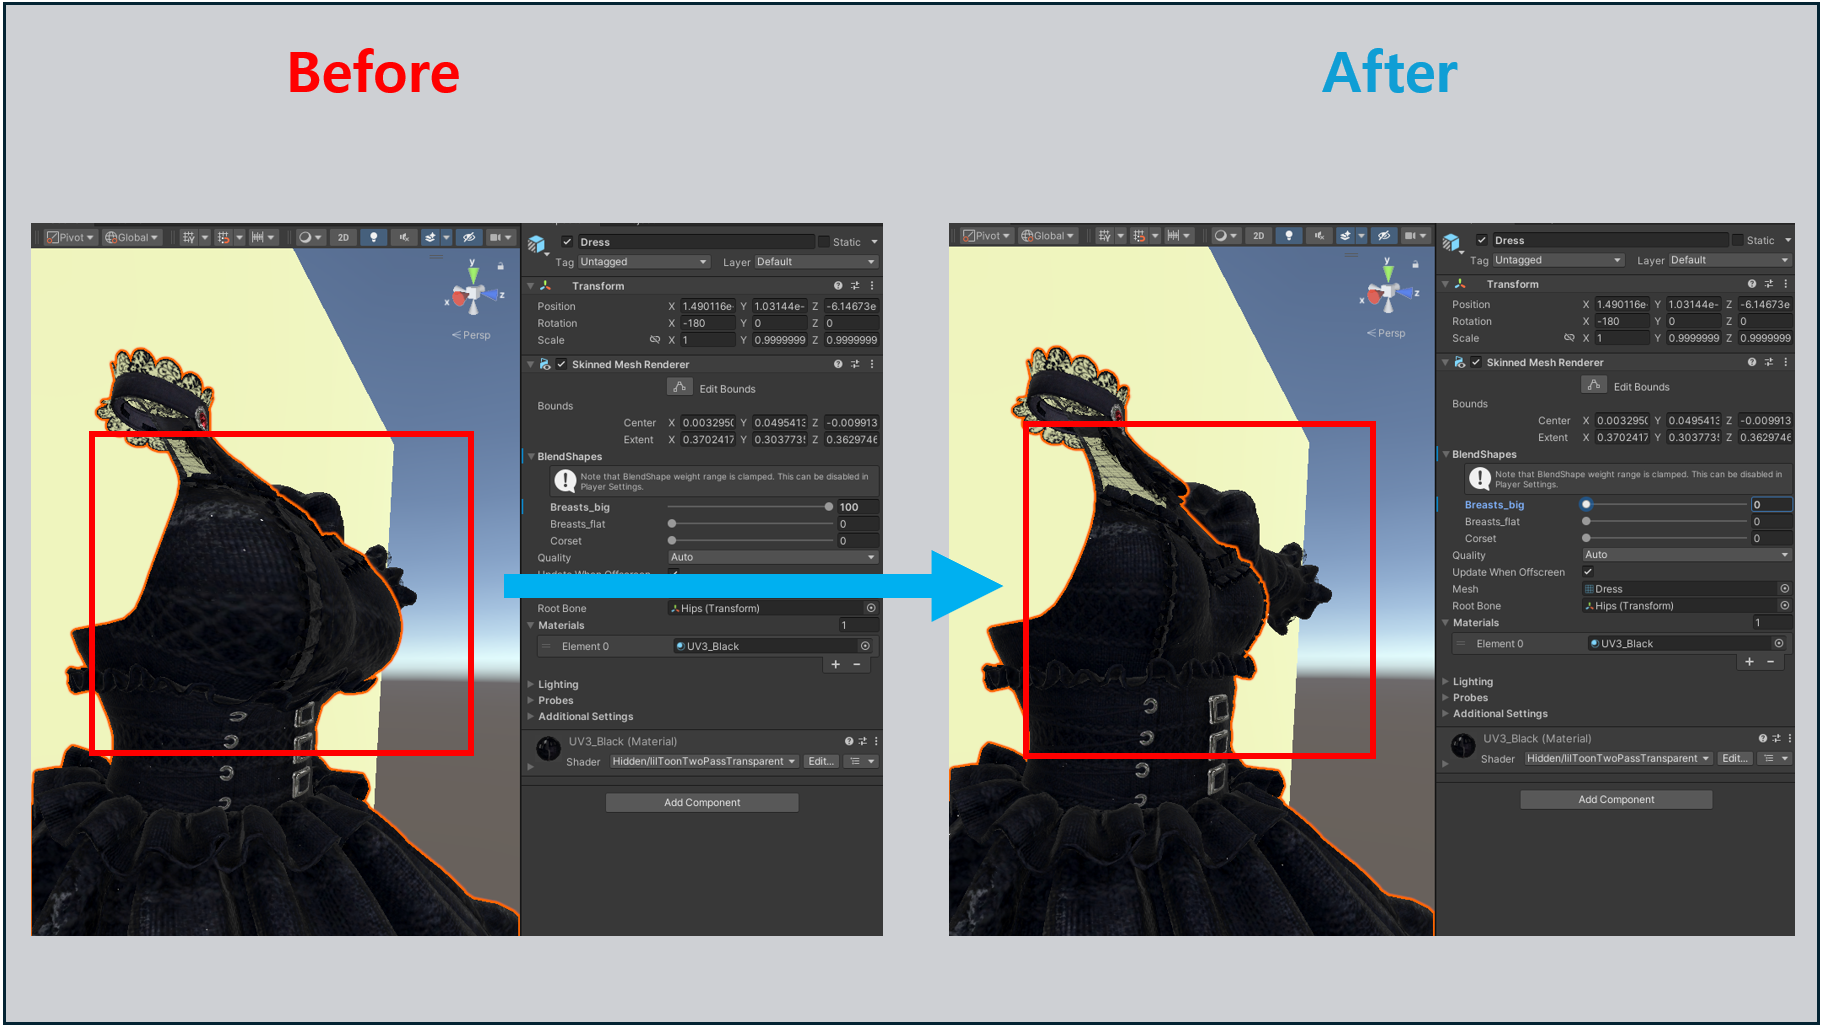
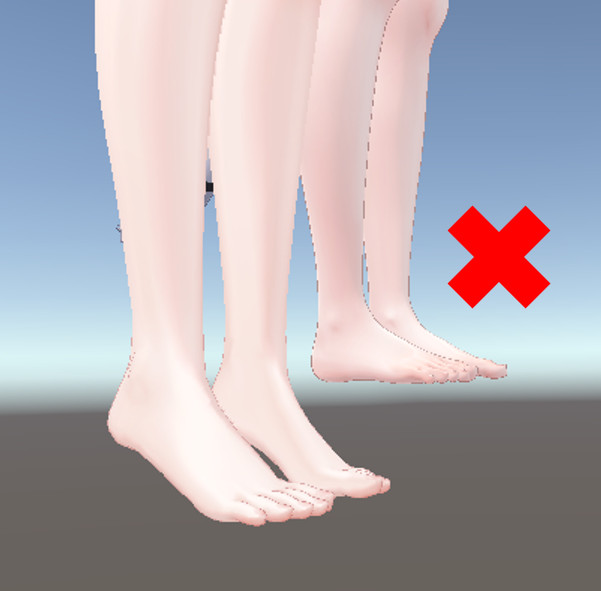
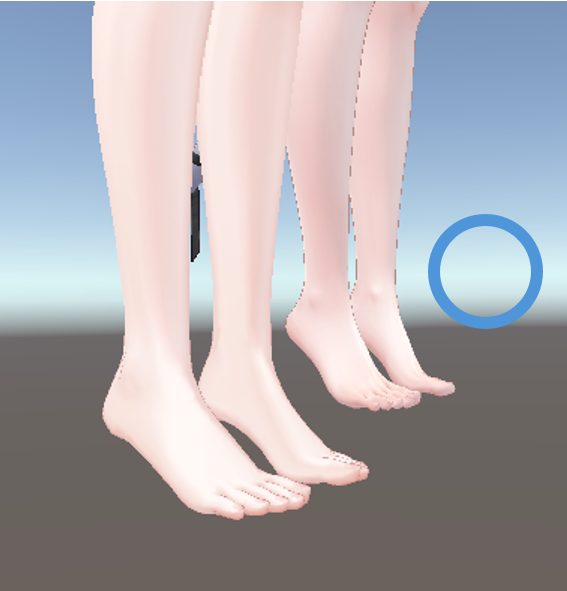
- If the Profile uses a Foot_Heel adjustment, adjust the Target Avatar’s BlendShapes so that its foot shape is similar.
- Please use a Foot_Heel or HighHeel Profile that matches the outfit.
2. 🧍Target Avatar Setup#
Place the avatar in the scene, then reset its rotation and scale.
Verify that the Animator and the Skinned Mesh Renderer corresponding to the torso are present on the avatar.
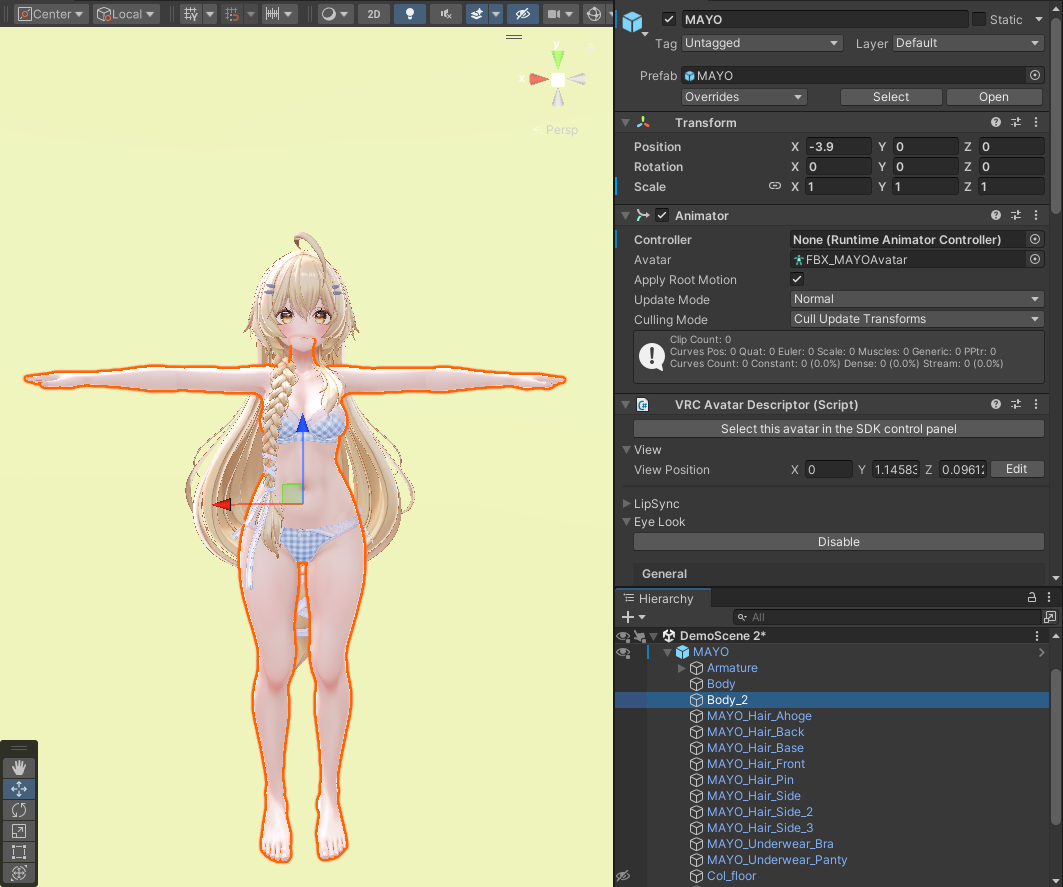
Adjust the BlendShape so that the Body Mesh is fully visible without any parts being scaled down or obscured.
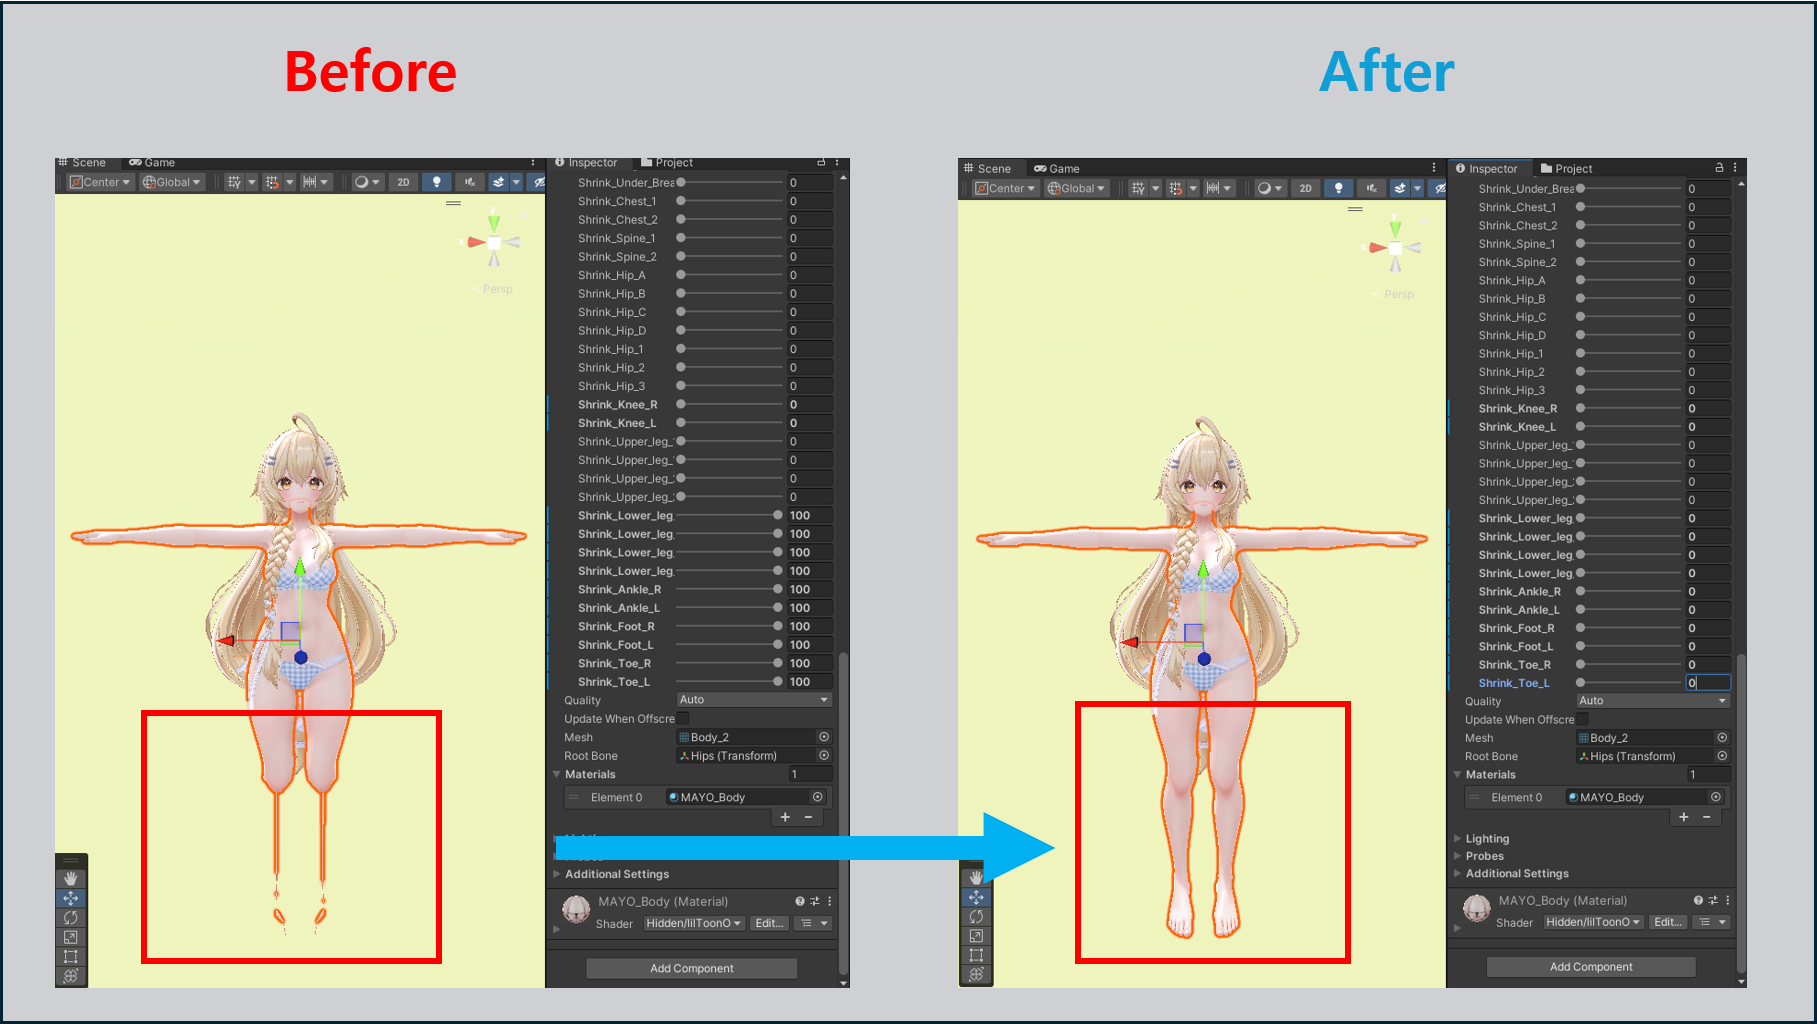
- If the Source Avatar uses a Foot Heel adjustment, adjust the Target Avatar’s BlendShapes so that the foot shape is similar.
[2] Morphing in Progress#
3. 🔧きせった (Kisetter) Setup#
- Place きせった (Kisetter) in the Hierarchy.
- Prefab path:
Assets\@Eden_Tools\Kisetter\Kisetter.prefab
- Prefab path:
4. きせった (Kisetter) Setup#
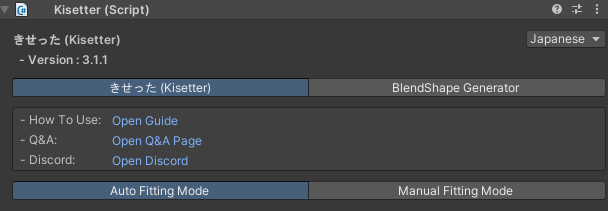
- Click きせった (Kisetter) - Auto Fitting Mode.
Assign the previously prepared avatar and outfit to the きせった (Kisetter).
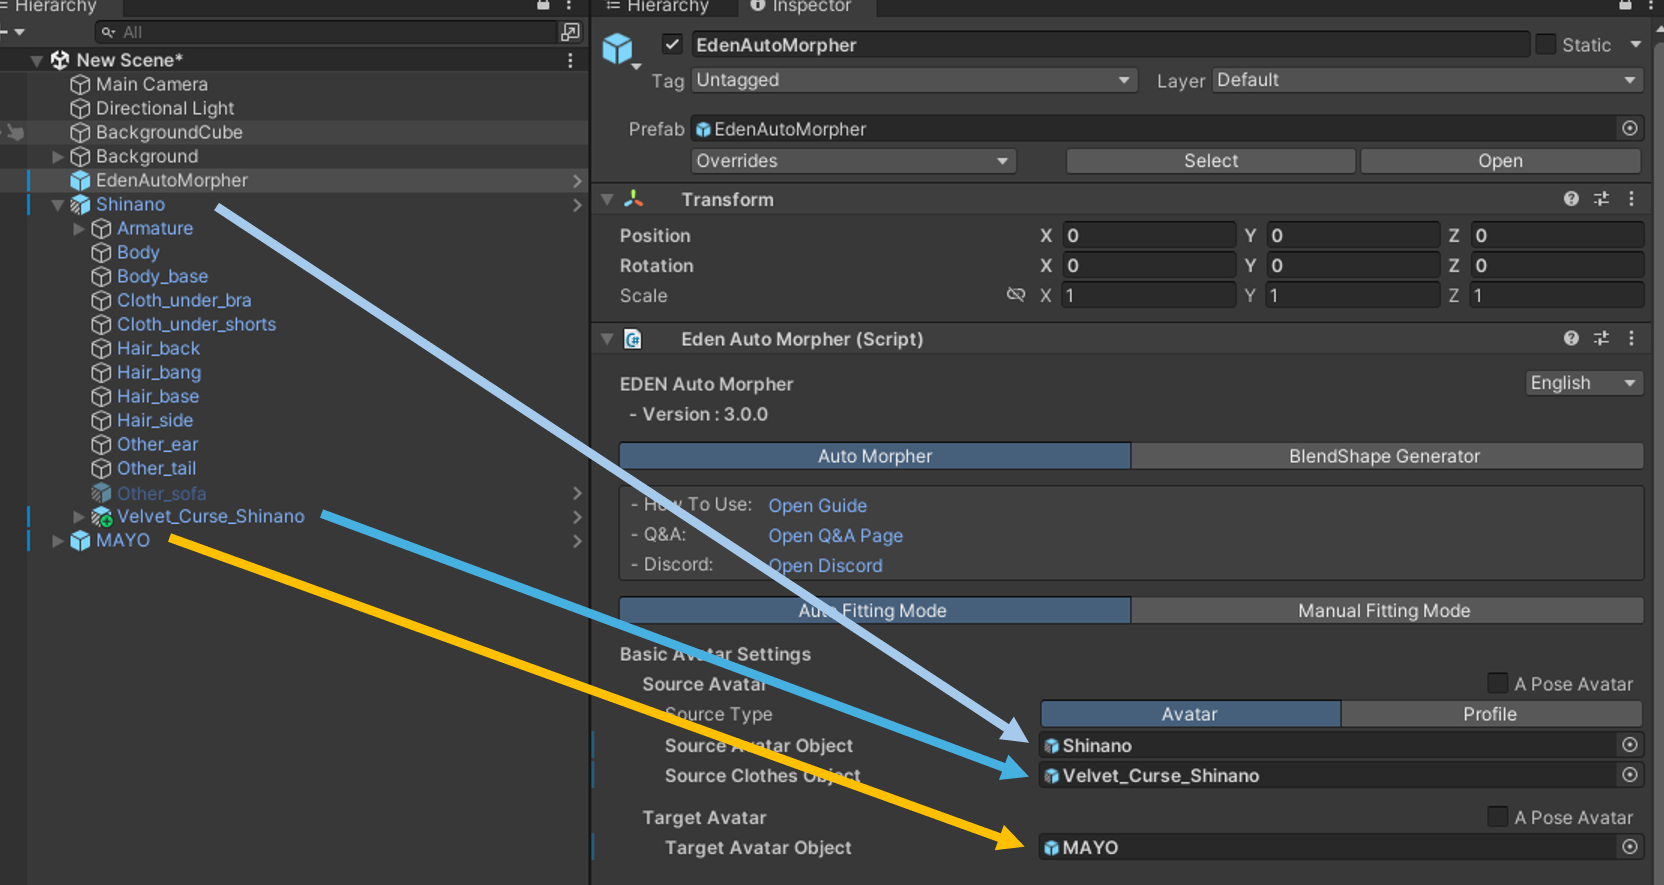
- Source Avatar Object: The original avatar object for the outfit
- Source Clothes Object: The outfit object
- Target Avatar Object: The target avatar object
When using Profile Mode
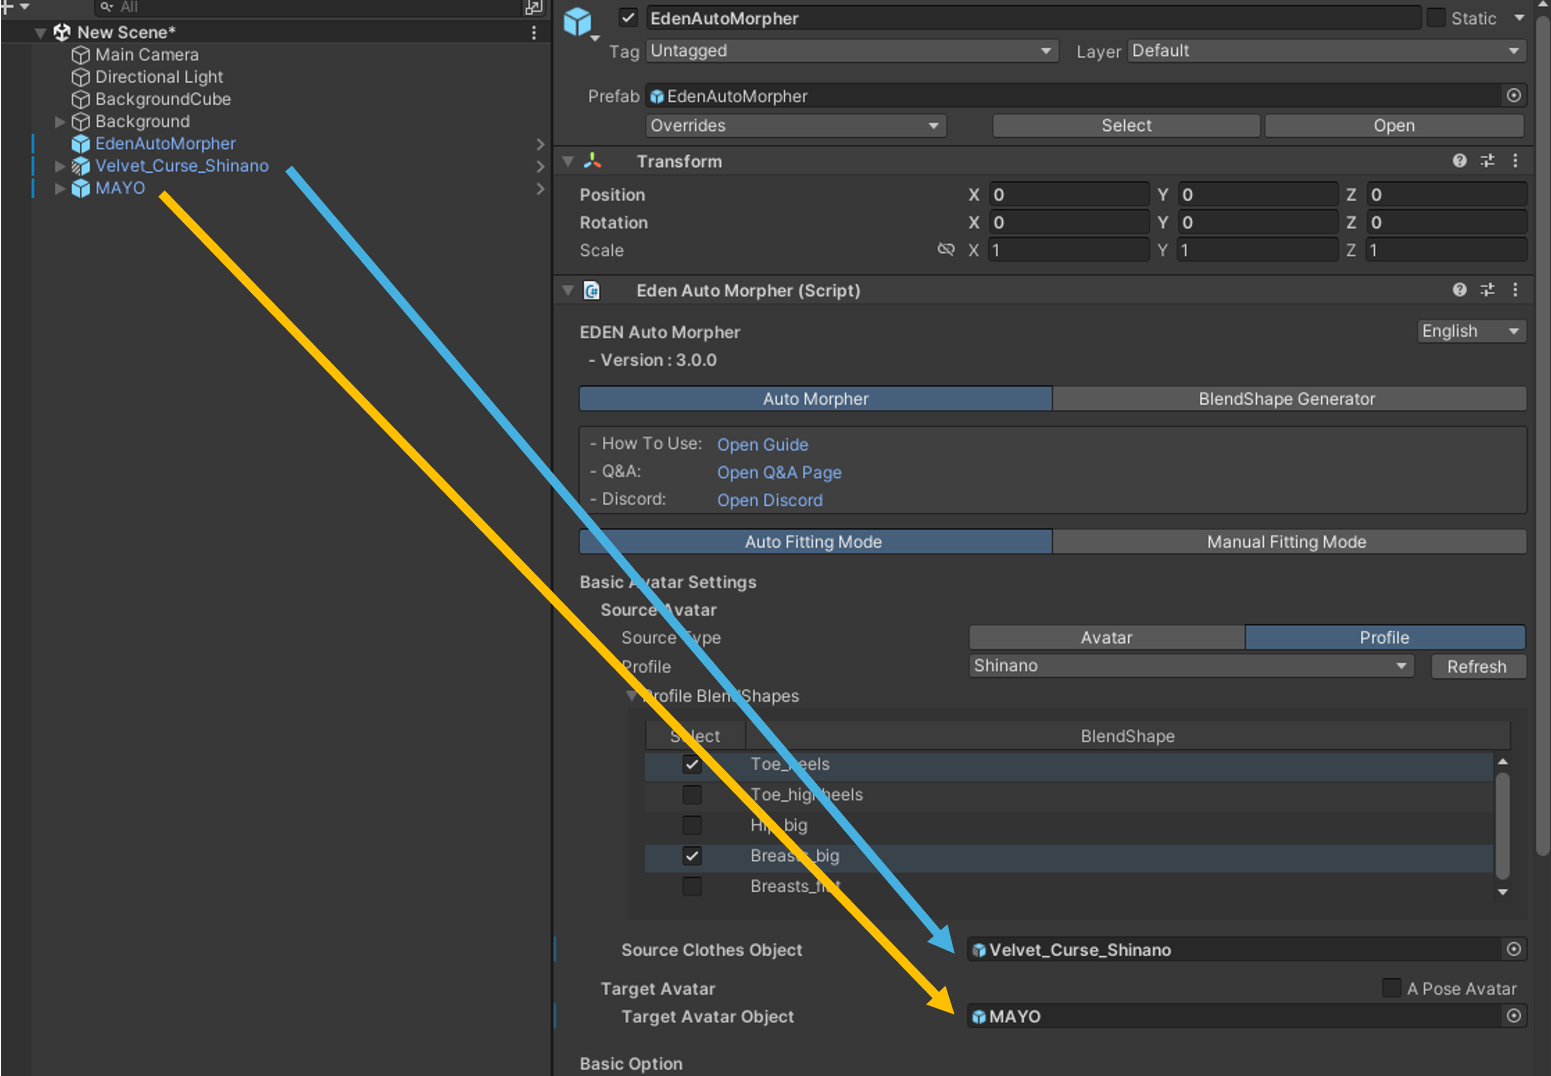
- Profile: The Profile that matches the outfit you want to use
- Source Clothes Object: The outfit object
- Target Avatar Object: The avatar object to fit the outfit to
5. きせった (Kisetter) Option Setup#
Automatically Assign Body Mesh
- When checked, the system automatically searches for the mesh corresponding to the avatar's torso.
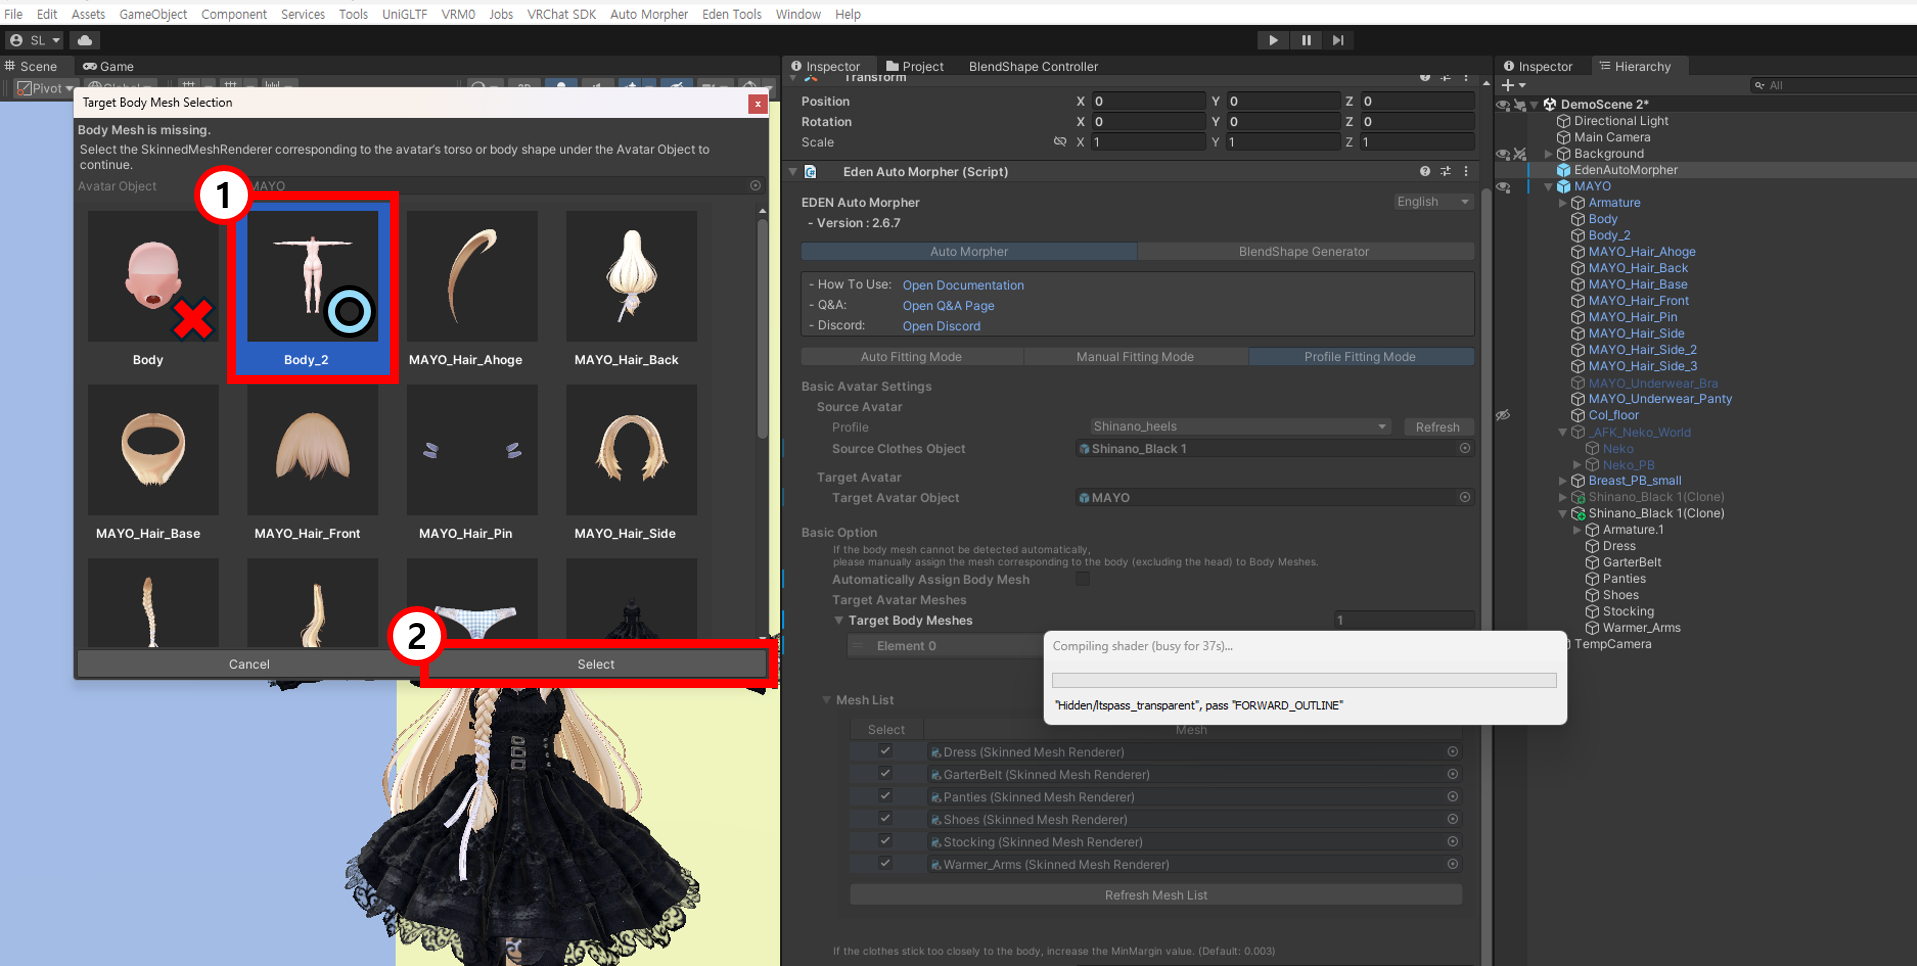
- If the Body Mesh cannot be found automatically, the Body Mesh selection window will appear.
- In this window, select the mesh corresponding to the torso and click the [Select] button.
Mesh List
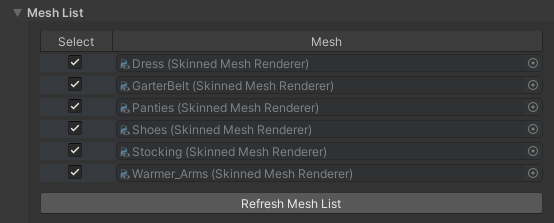
- Click the [Refresh Mesh List] button to refresh the mesh list.
- If there are any meshes you do not want to transform, deselect those items.
Body Gap
- This parameter sets the minimum distance between the garment and the body.
- If the body is penetrating the garment significantly, increase this value.
Skip Foot Fitting
- This option prevents fitting(shape modification) from being applied to shoes. (Scale adjustments will still be applied.)
- To deform the shape according to the specific details of the foot, please disable this option.
[Advanced Option] - [Save Settings] - Save Result As BlendShape
- When enabled, the transformed result is saved as a BlendShape rather than being applied directly to the mesh.
[Advanced Option] - [Weighting Settings] - Transfer Weight To Avatar
- This option reassigns the weights of the clothing mesh based on the target avatar's armature.
- Please enable this only when you need to connect the costume directly to the avatar's bones without using Modular Avatar or similar features.
- For detailed explanations of other parameters, please refer to the following document.
6. Performing the Transformation#
Click [Run ALL] to proceed with the transformation.
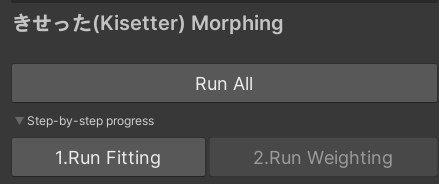
- Use the Step-by-Step Progress below to proceed with Fitting and Weighting step by step.
[3] Checking the Results#
7. Checking the Fitting Results#
7-1. Checking the Fitting Results#
- Check whether the morphed result has been applied correctly to the avatar.
- If the transformation resulted in an undesired shape, and you enabled [Advanced Option] - [Save Settings] - Save Result As BlendShape, you can adjust the Kisetter_fit BlendShape values added to the outfit to restore the original shape.
7-2. VRChat - Modular Avatar#
- The Modular Avatar is merely an example; you may use other tools, such as VRCFury, to configure the outfit’s bones to follow the avatar’s movements.
- However, if you have checked [Advanced Option] - [Weighting Settings] - Transfer Weight To Avatar, the outfit is already set to follow the avatar’s bones.
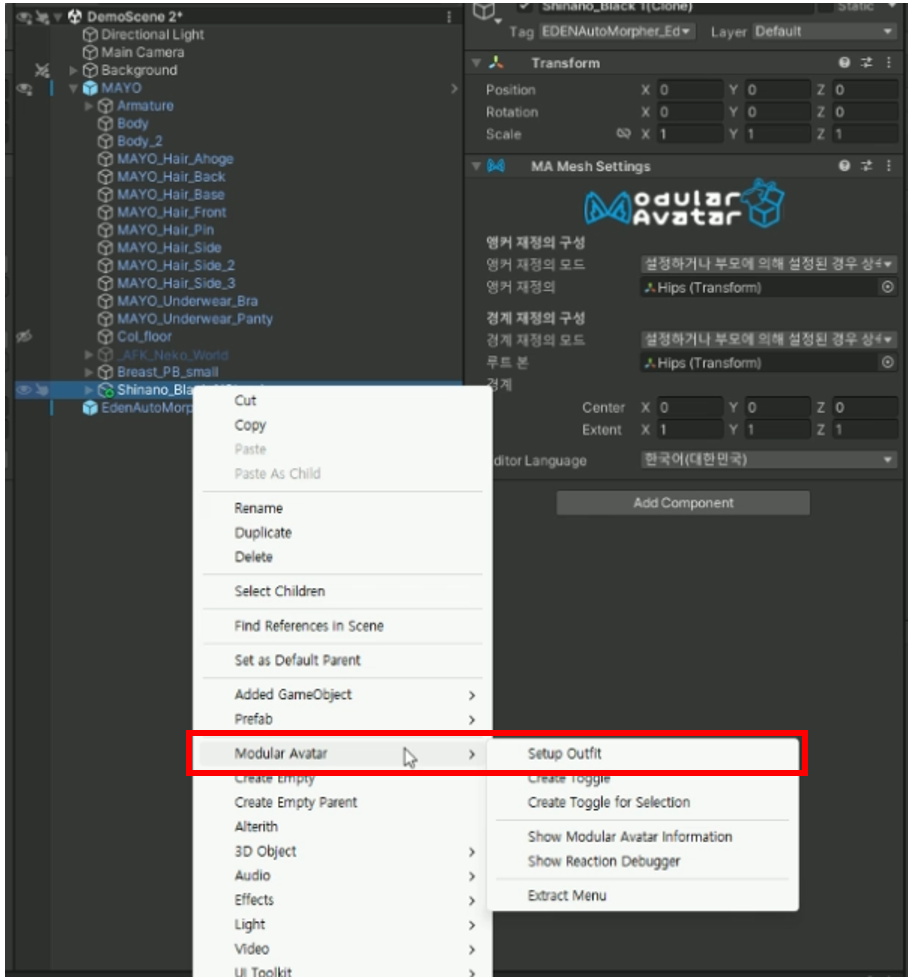
- Right-click the outfit and select [Modular Avatar] - [Setup Outfit] to configure the outfit’s bones to follow the avatar.
- Table of Contents