Manual Fitting Mode
Workflow combining automatic fitting with manual bone adjustments.
きせった (Kisetter) 3.1.3 documentation⚫ This mode runs the deformation based on an outfit that the user has manually adjusted to fit the Target Avatar.
⚫ During the fitting process, you can make additional adjustments in the Bone Adjustment window for a more precise result.
1. 🧍♂️Source Avatar Setup#
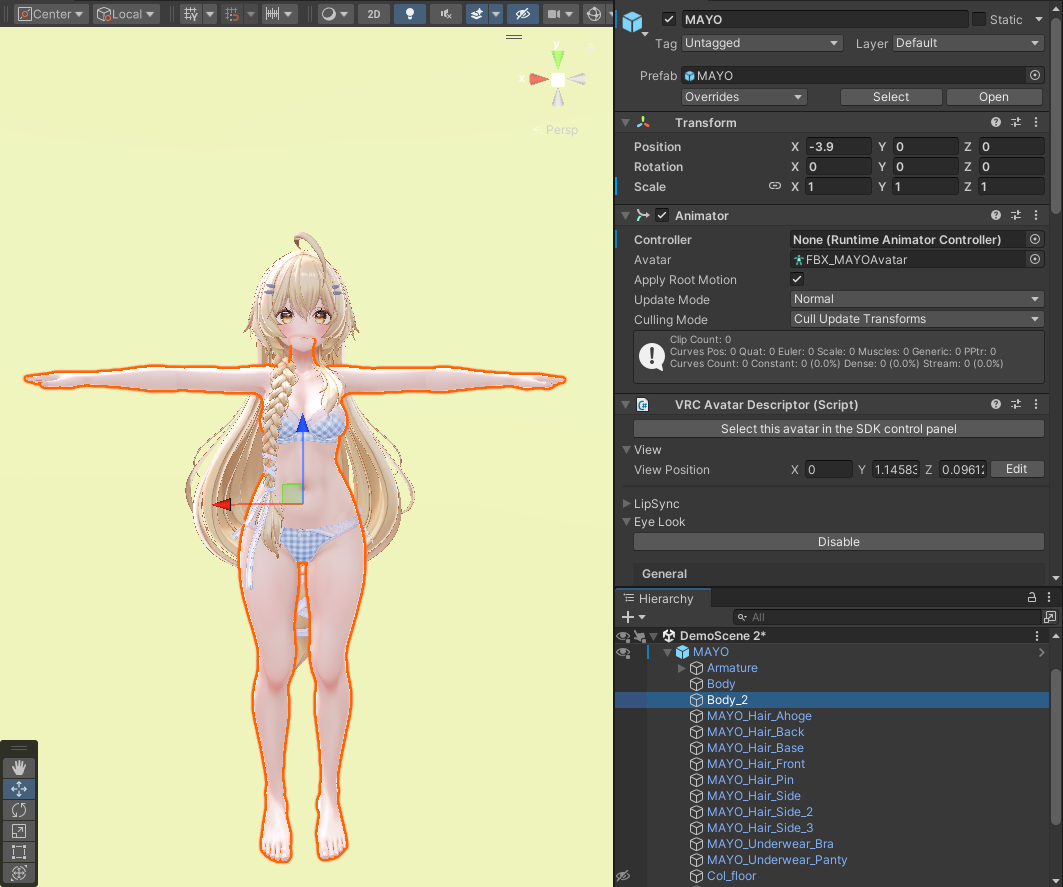
Place the avatar in the Scene, then reset its rotation and scale.
Verify that the Animator and the Skinned Mesh Renderer corresponding to the torso are present on the avatar.
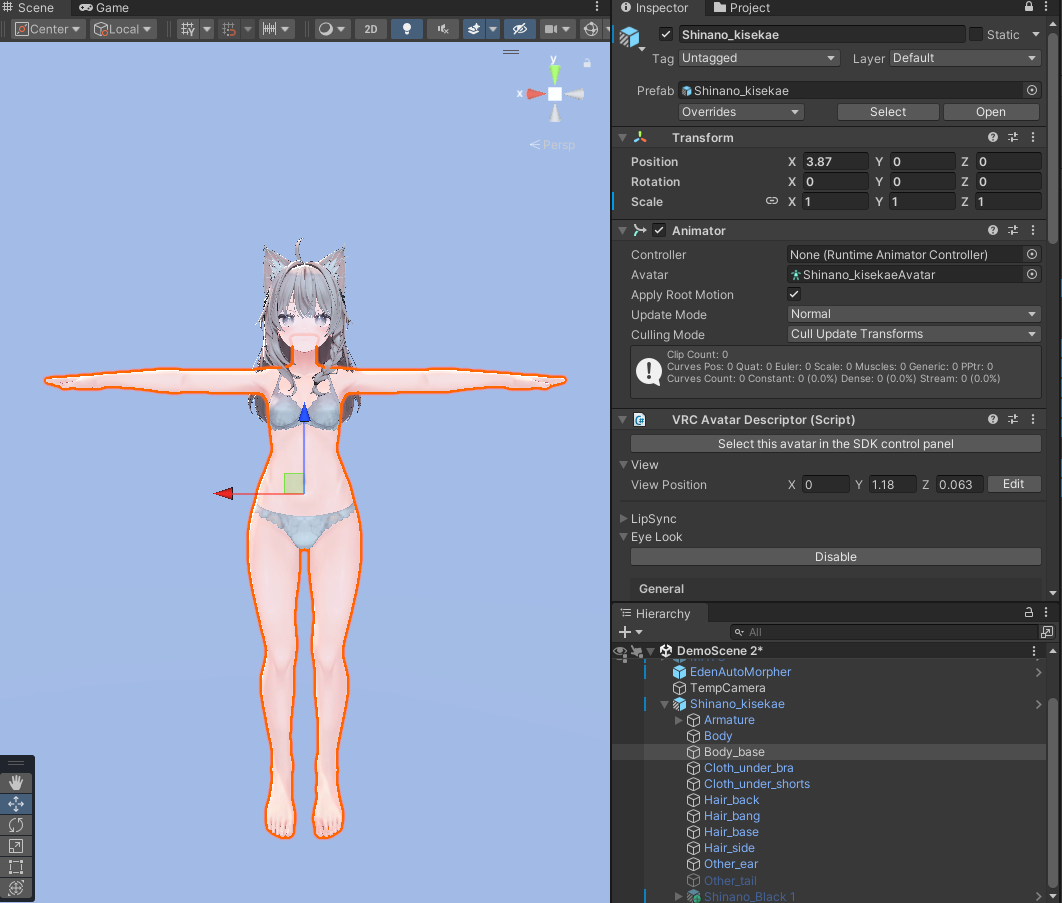
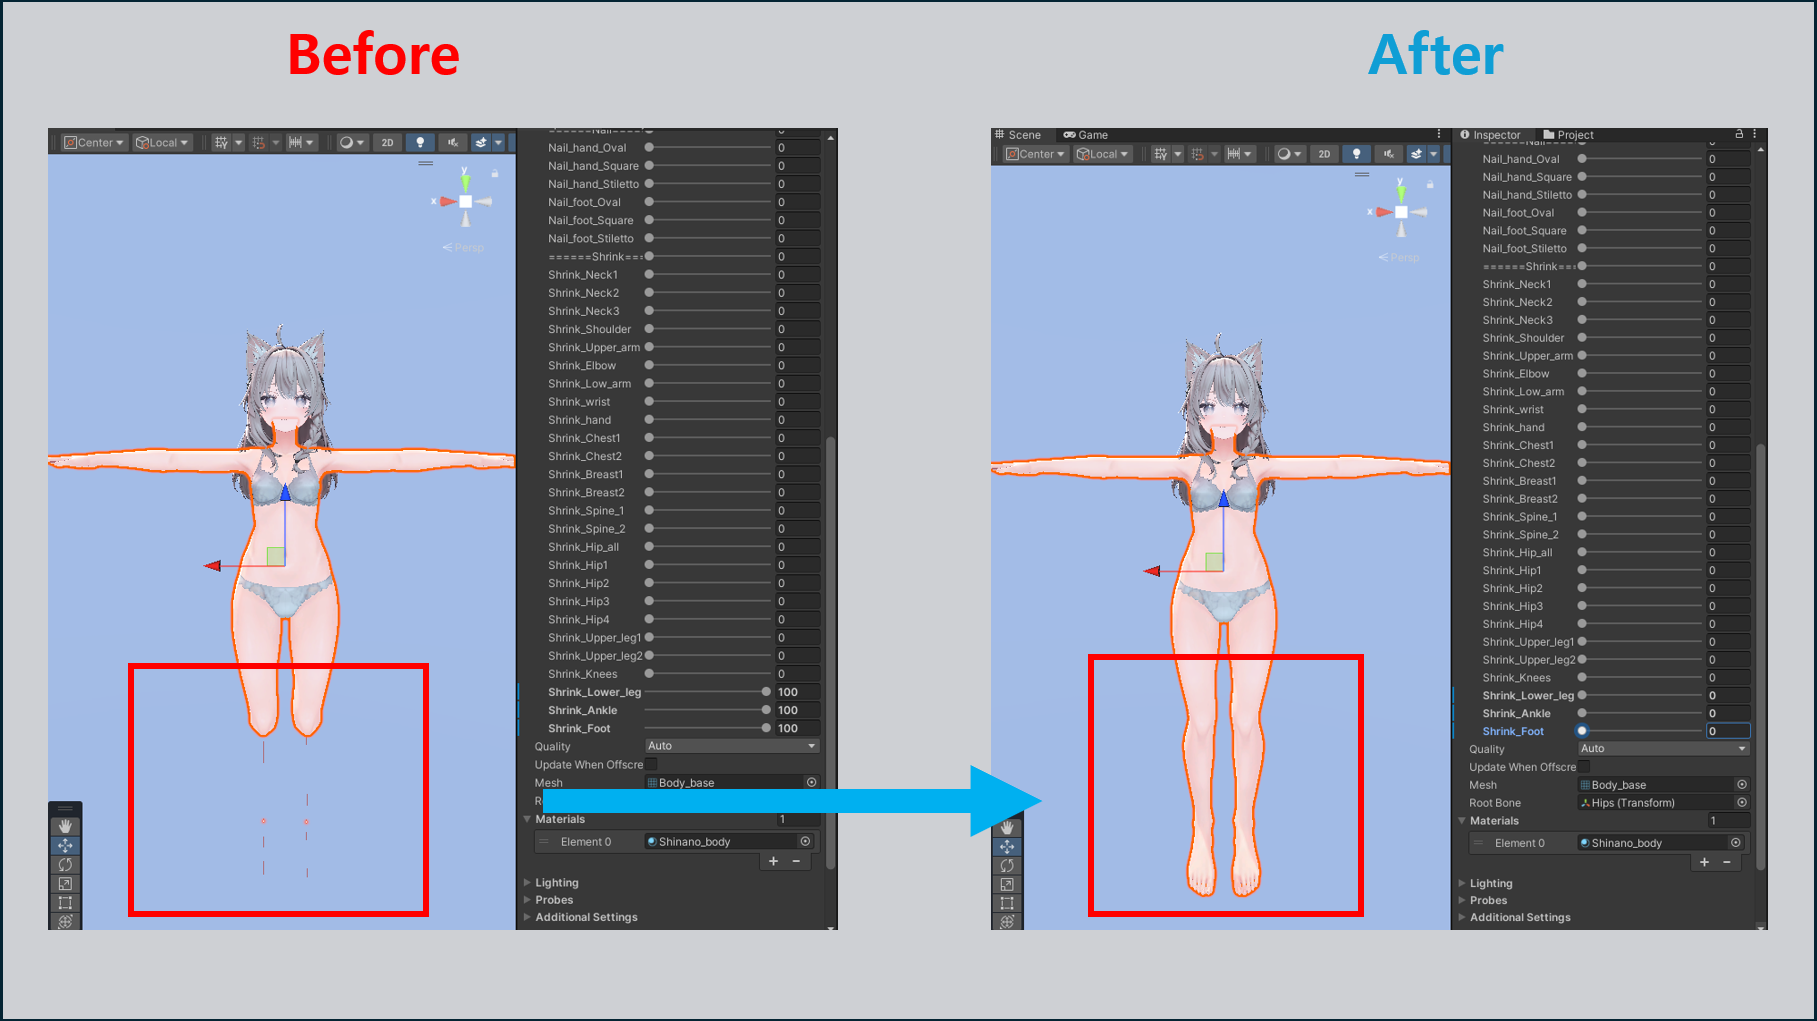
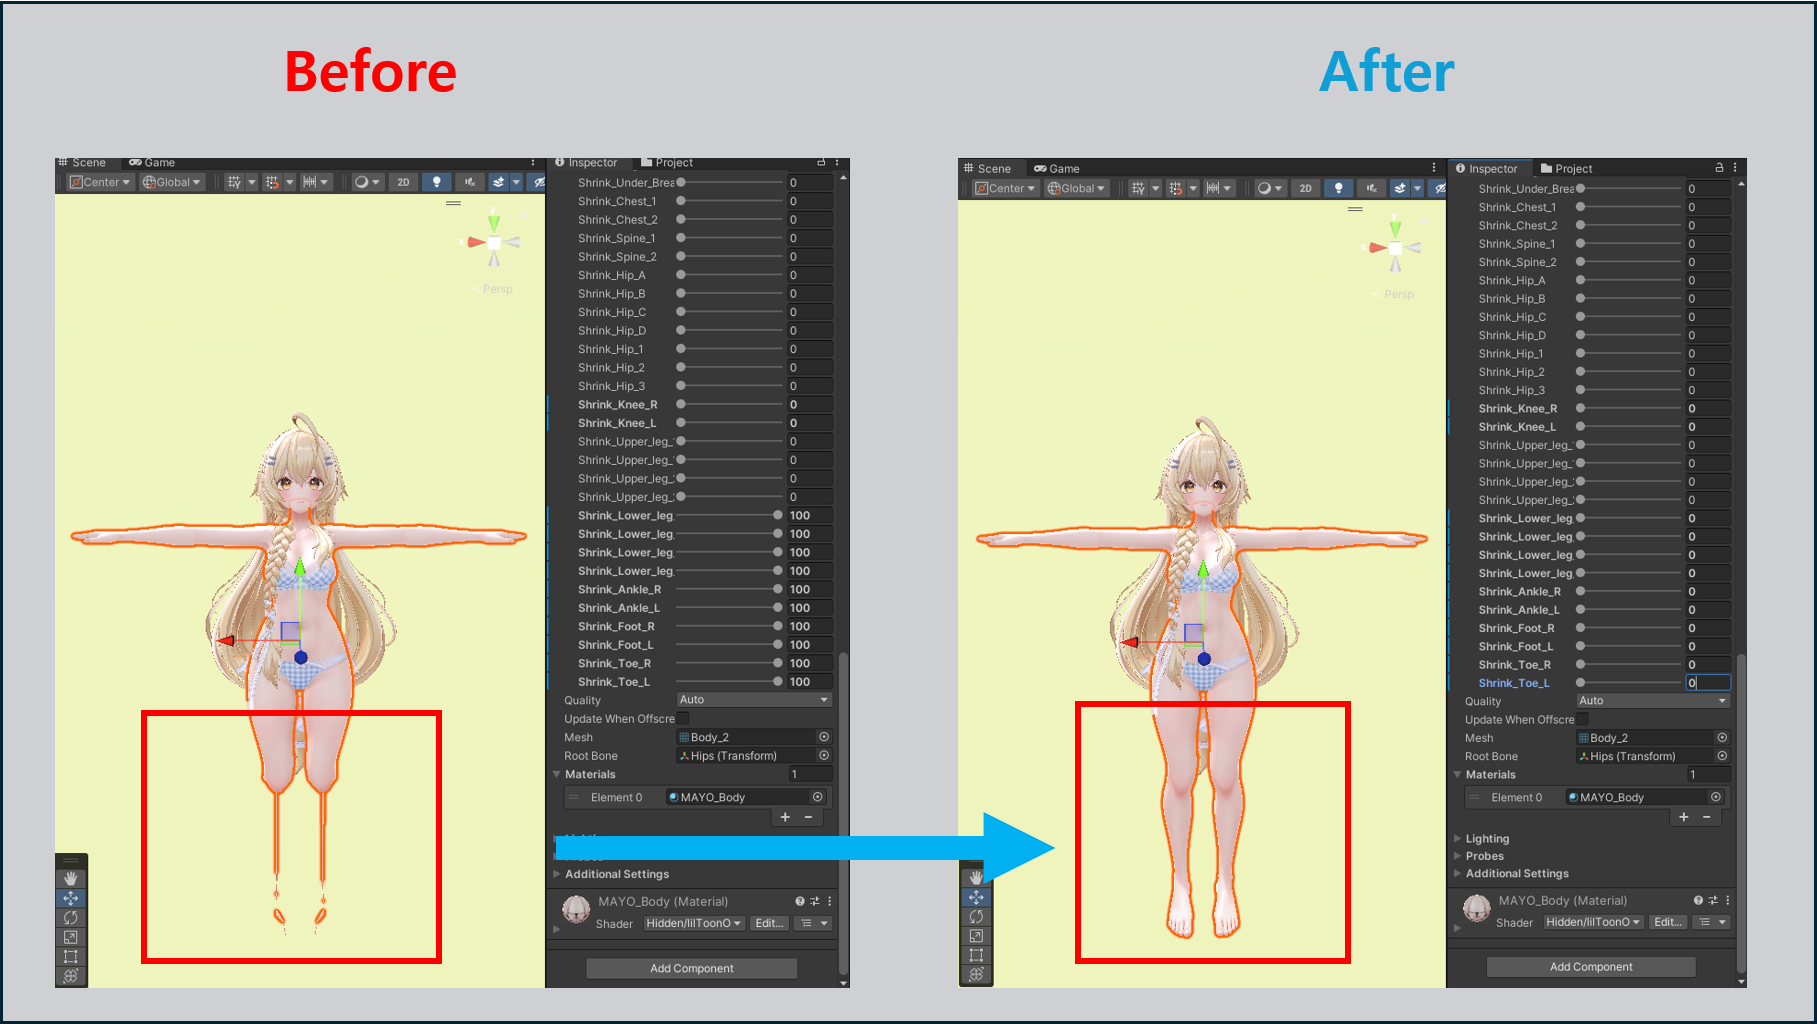
Adjust the BlendShapes so that the Body Mesh is fully visible without any parts being scaled down or obscured.
1. 👕Source Clothes Setup#
Place the outfit in the Scene, make it a child of the Source Avatar, then adjust its position and scale.
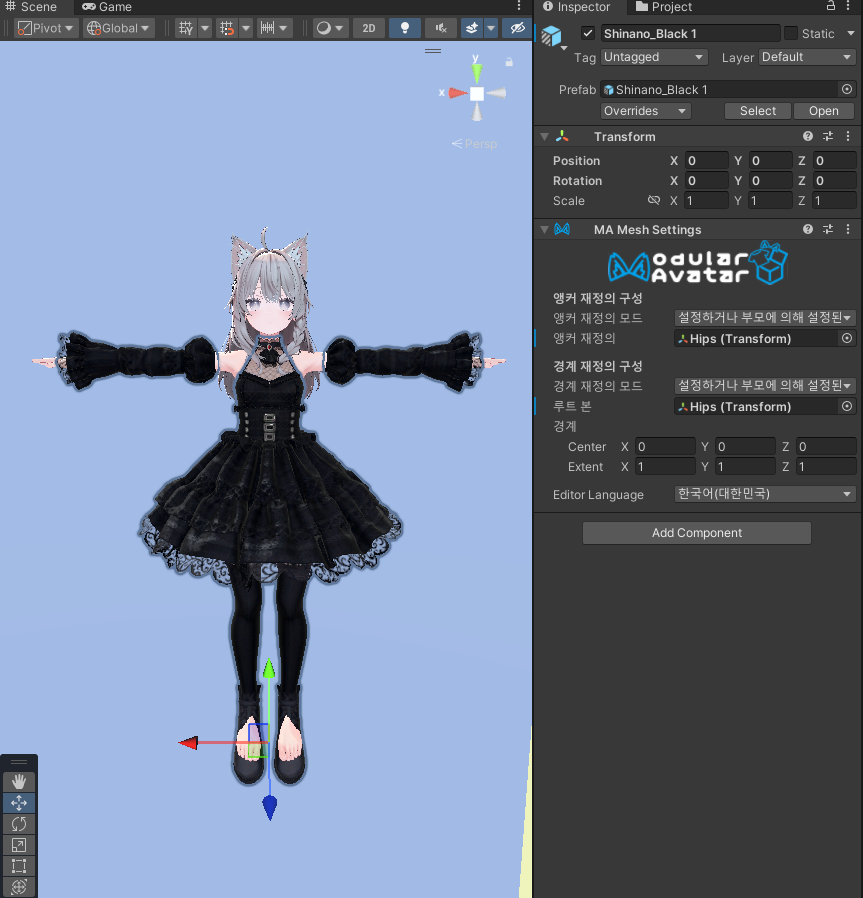
Adjust the outfit’s BlendShapes to match the Source Avatar.
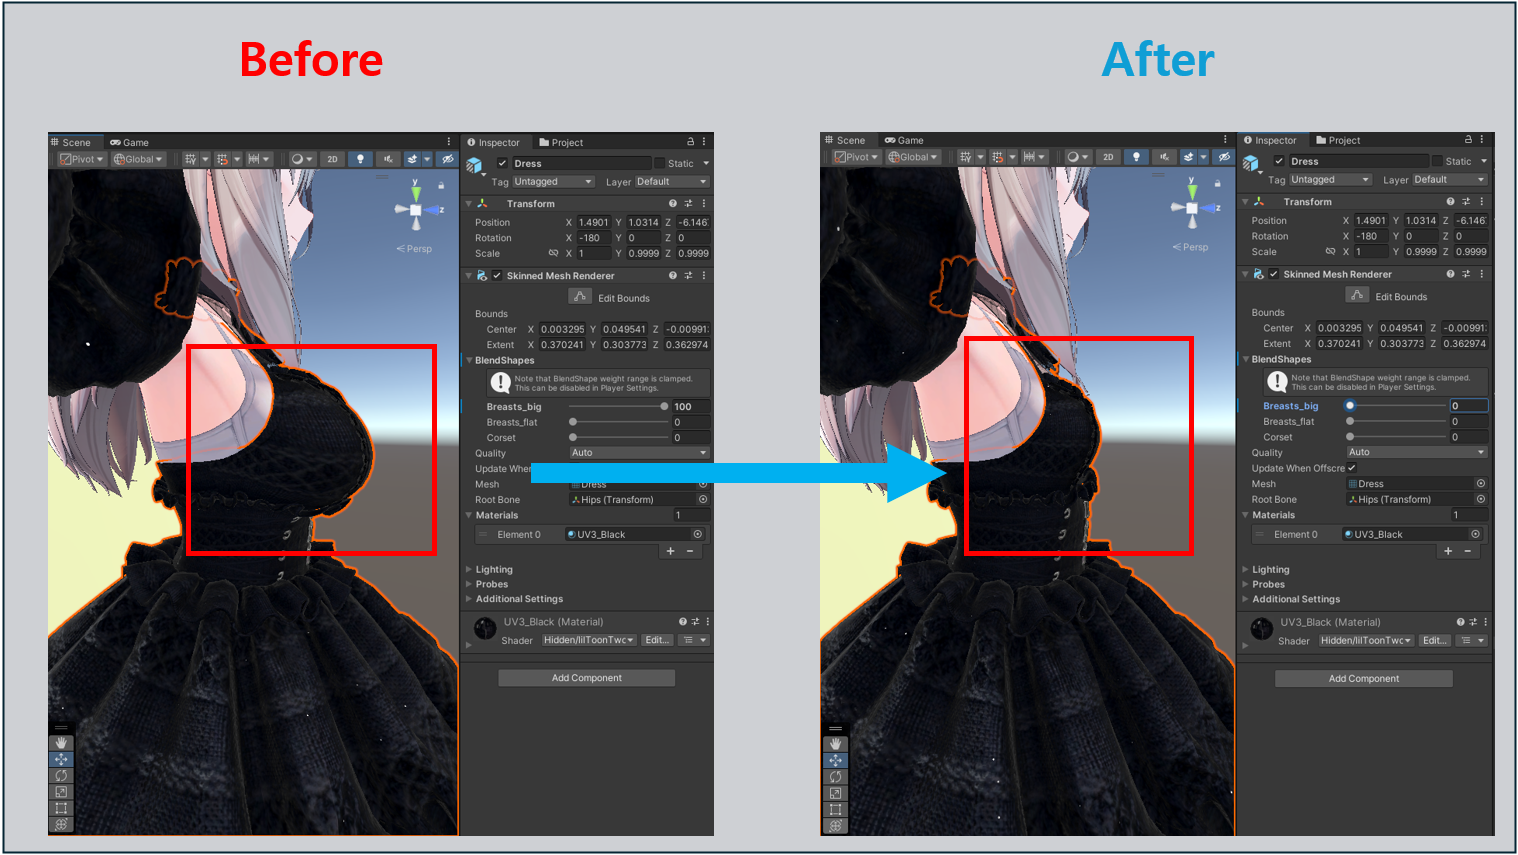
Also adjust the avatar’s BlendShapes, such as 👠 Foot Heel or 👙 Breast, to match the outfit.
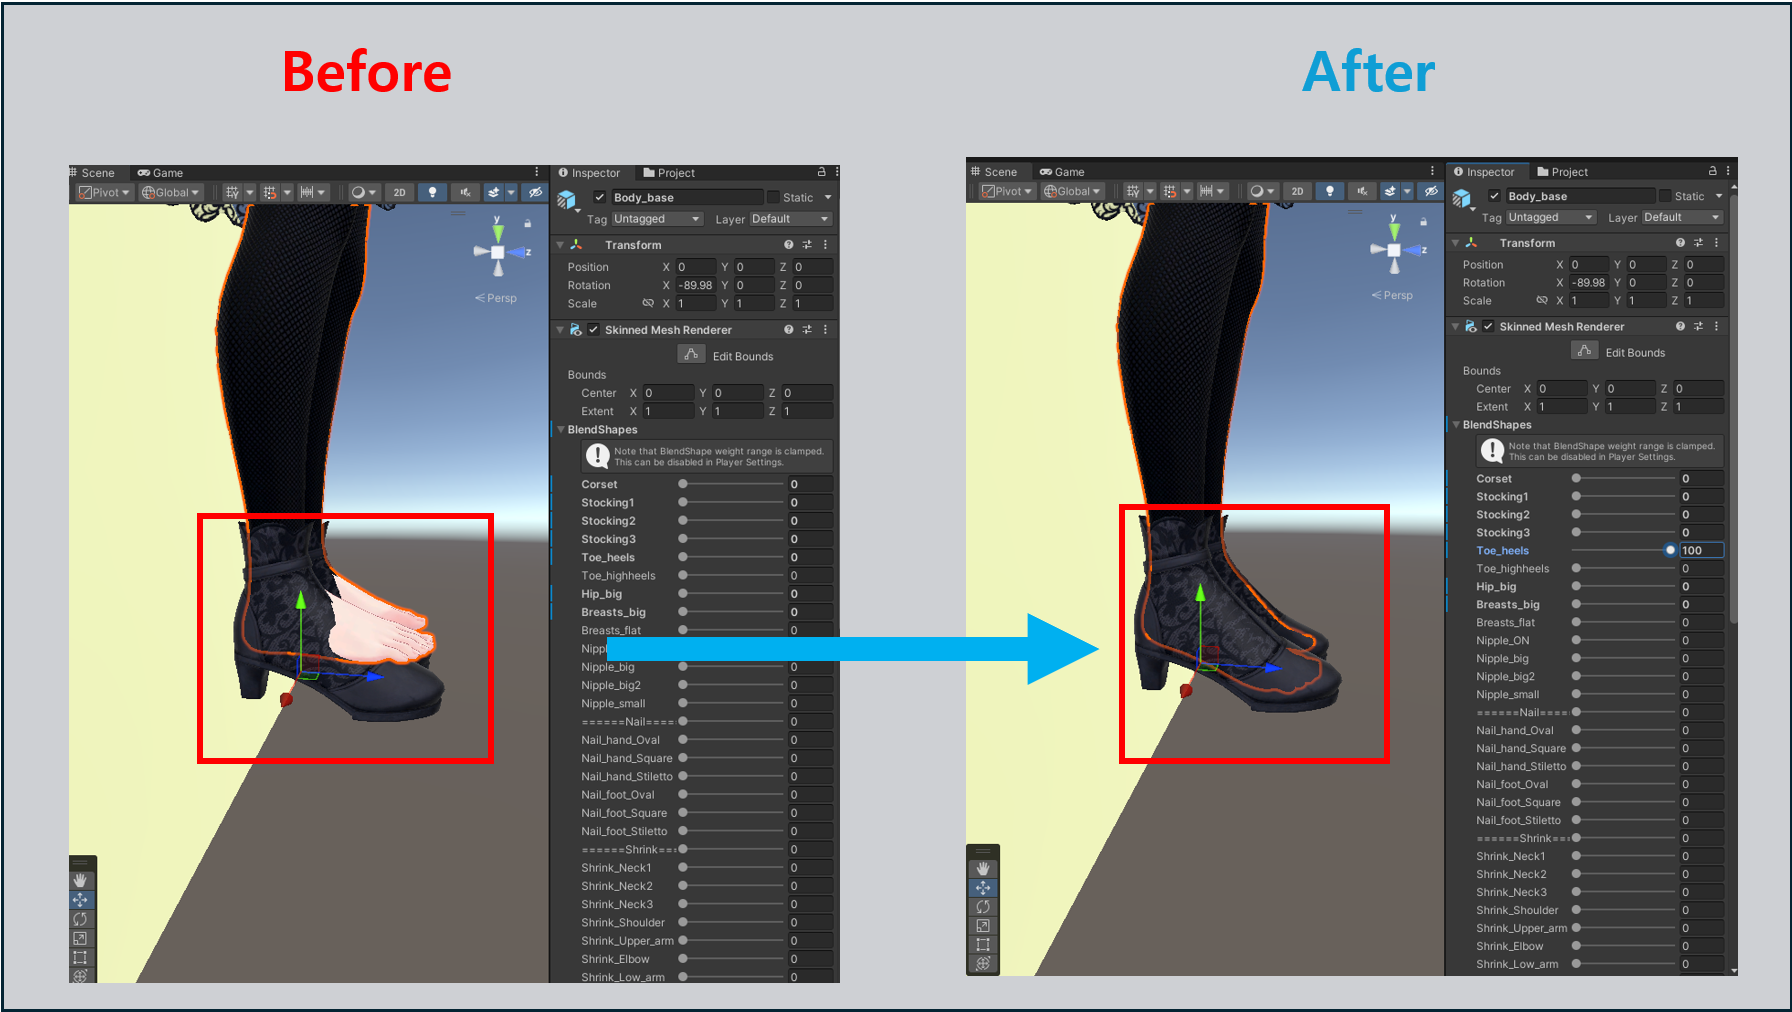
1-2. 📄 Using a Source Profile#
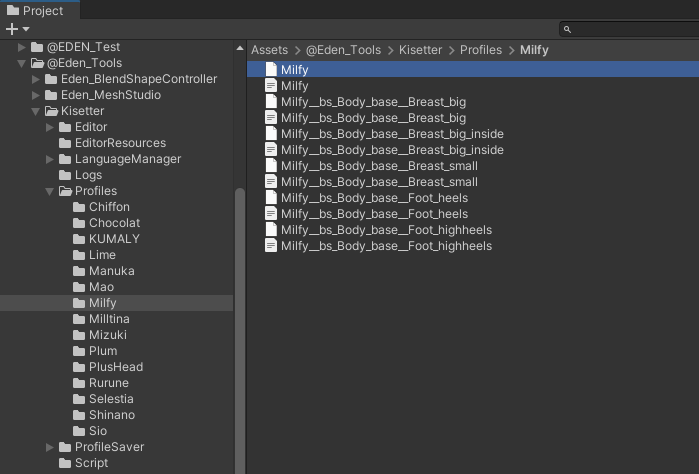
- Prepare the Profile.
- Profile path:
Assets\@Eden_Tools\Kisetter\Profiles - If the Profile you want does not appear in the list, manually add the Profile folder to the path above.
Example Profile folder structure: Profiles └─ ProfileName ├─ ProfileName.json └─ ProfileName.eb
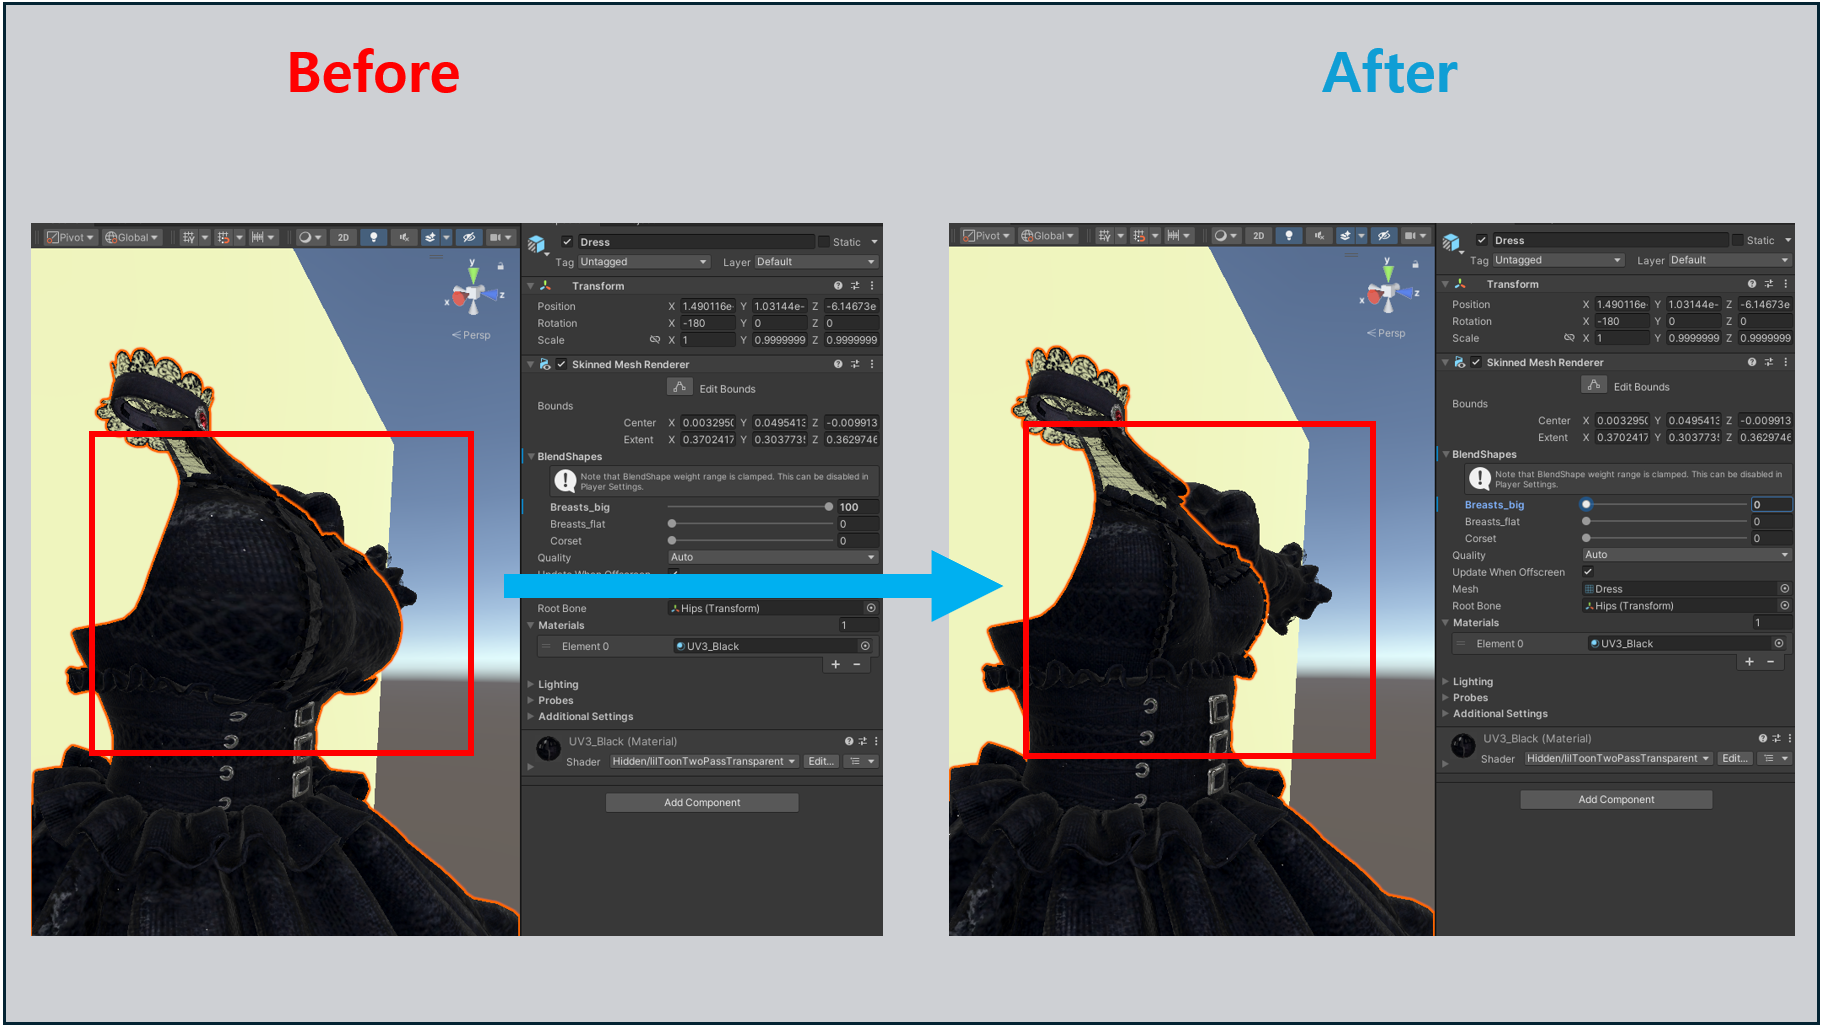
- If the Profile uses a Foot_Heel adjustment, adjust the Target Avatar’s BlendShapes so that its foot shape is similar.
- Please use a Foot_Heel or HighHeel Profile that matches the outfit.
2. 🧍Target Avatar Setup#
Place the avatar in the scene, then reset its rotation and scale.
Verify that the Animator and the Skinned Mesh Renderer corresponding to the torso are present on the avatar.
Adjust the BlendShape so that the Body Mesh is fully visible without any parts being scaled down or obscured.
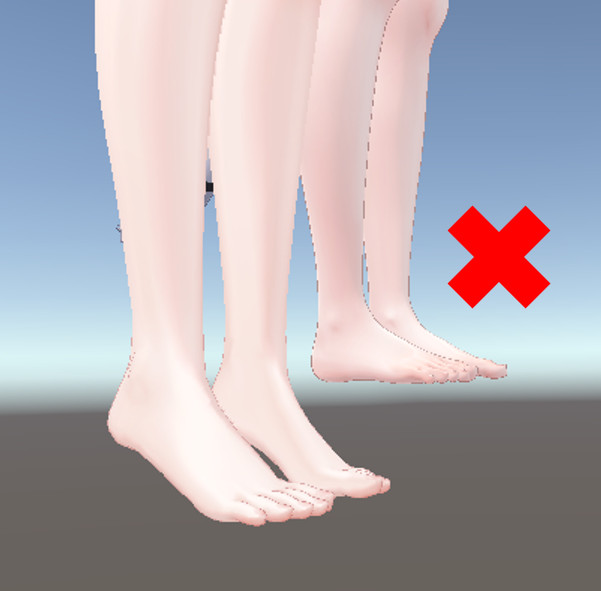
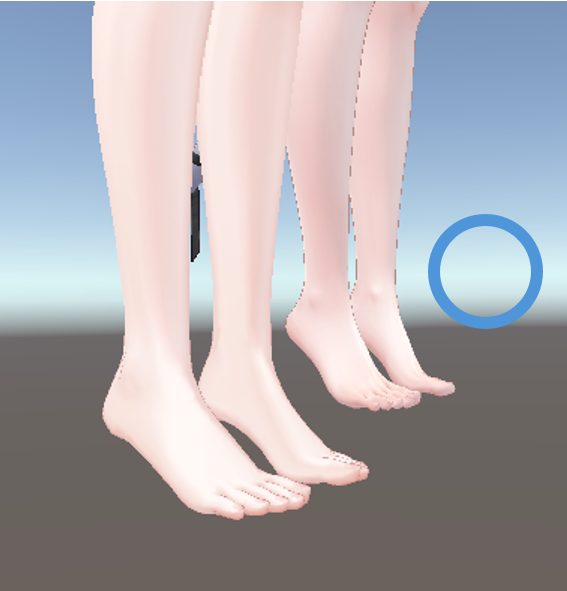
- If the Source Avatar uses a Foot Heel adjustment, adjust the Target Avatar’s BlendShapes so that the foot shape is similar.
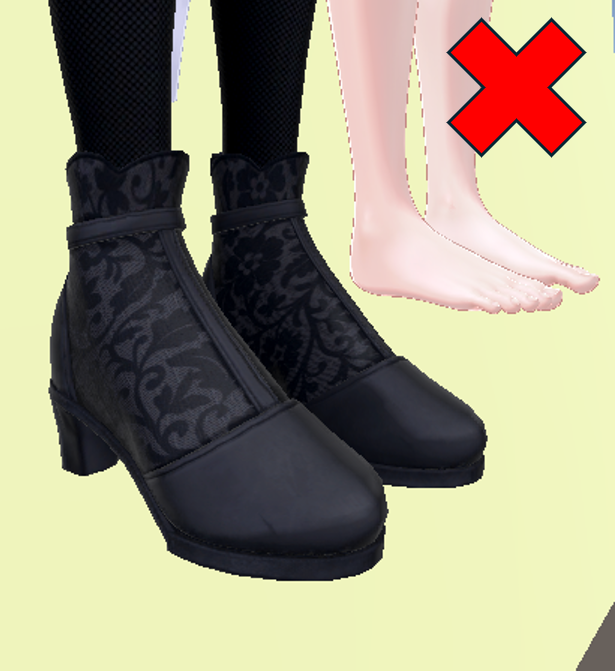
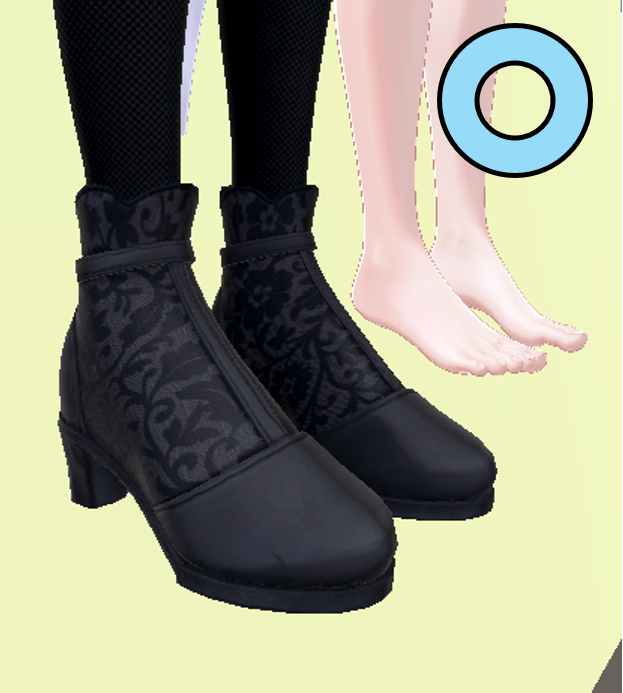
[2] Morphing in Progress#
3. 🔧きせった (Kisetter) Setup#
- Place Eden きせった (Kisetter) in the Hierarchy.
- Prefab path:
Assets\@Eden_Tools\Kisetter\Kisetter.prefab
- Prefab path:
4. きせった (Kisetter) Setup#
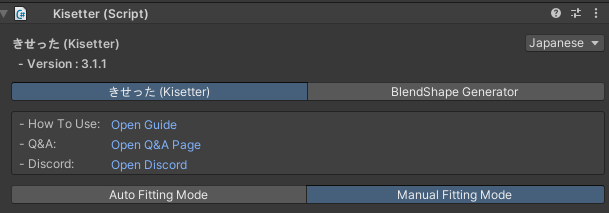
- Click きせった (Kisetter) - Manual Fitting Mode.
Assign thepreviously prepared avatar and outfitto the きせった (Kisetter).
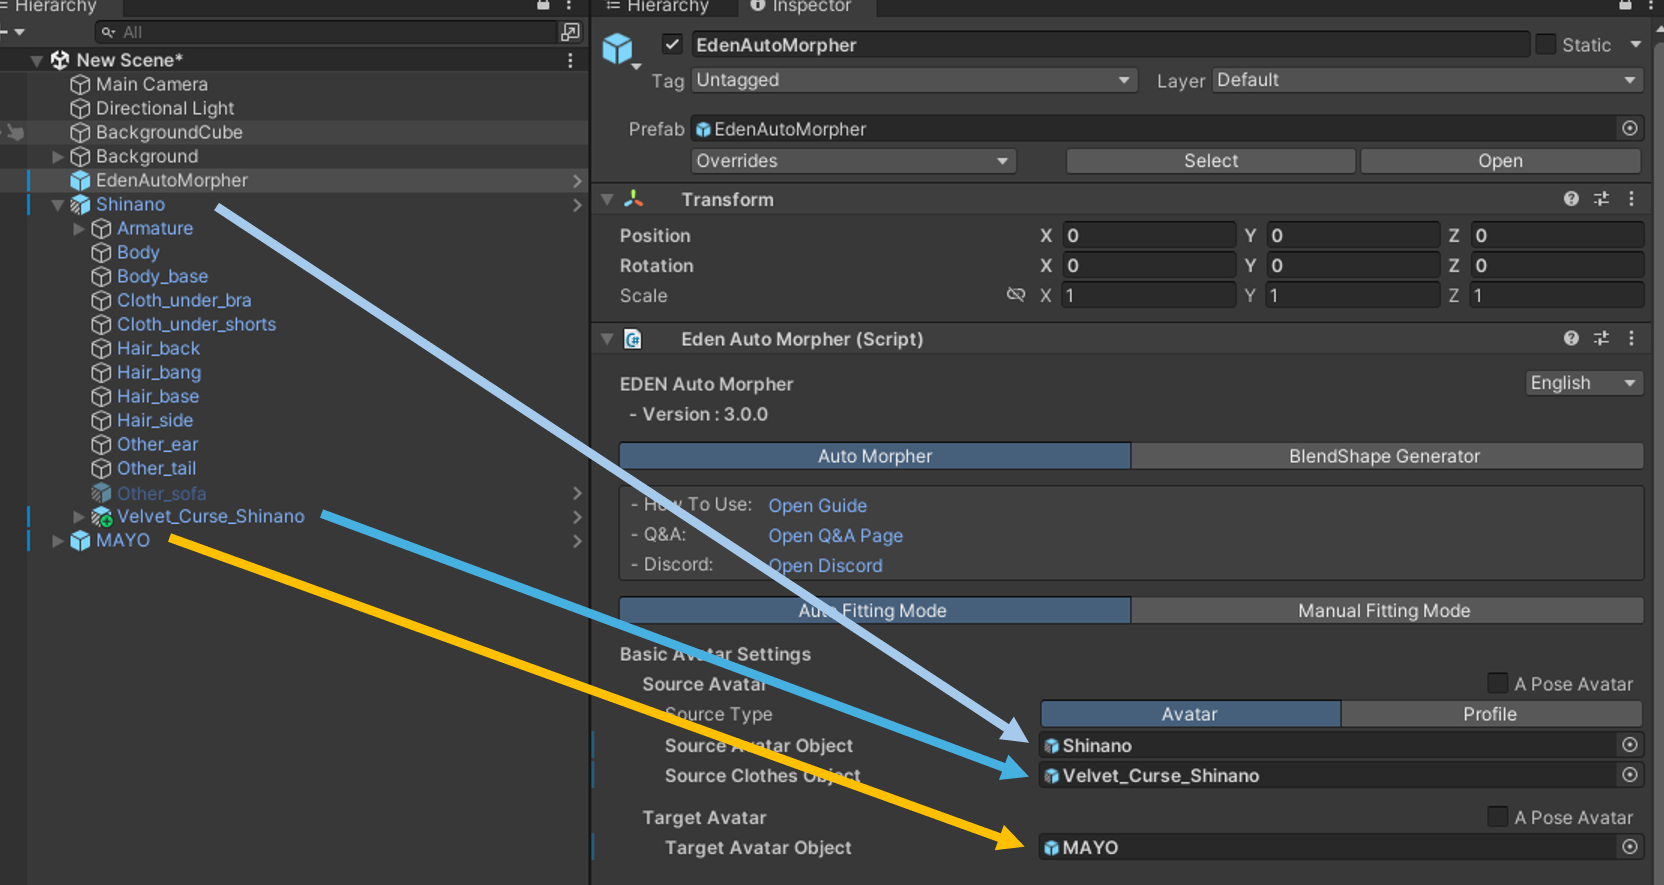
- Source Avatar Object: The original avatar object for the outfit
- Source Clothes Object: The outfit object
- Target Avatar Object: The target avatar object
When using Profile Mode
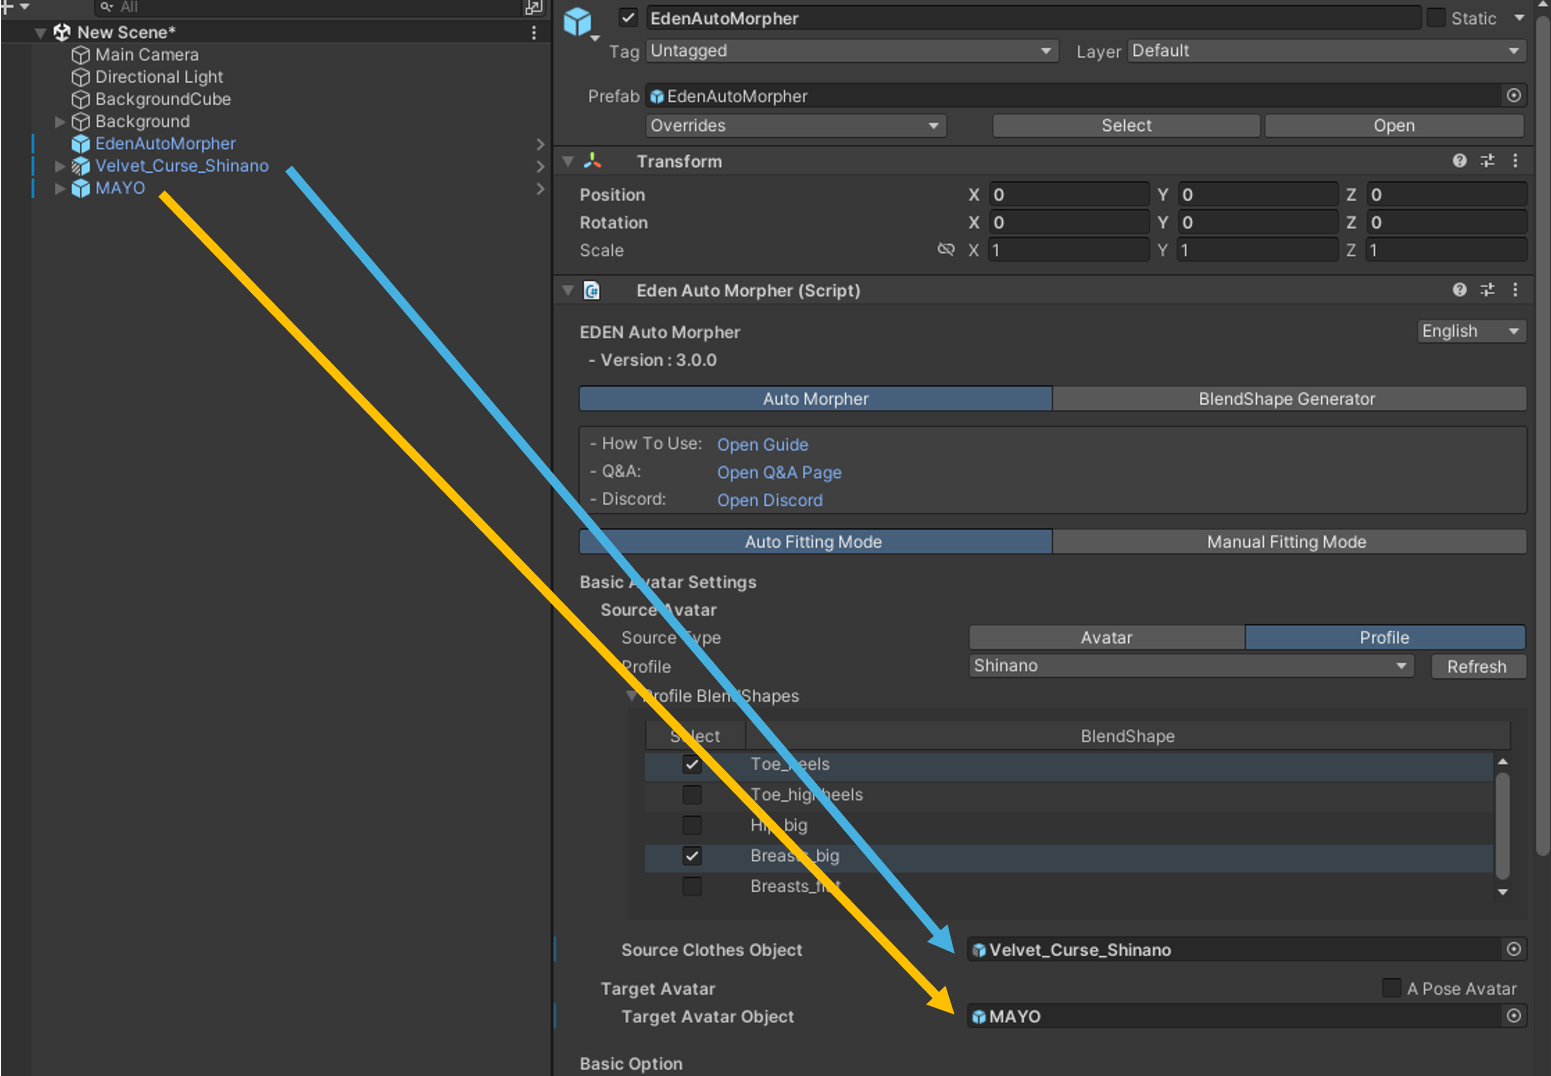
- Profile: The Profile that matches the outfit you want to use
- Source Clothes Object: The outfit object
- Target Avatar Object: The avatar object to fit the outfit to
5. きせった (Kisetter) Option Setup#
Automatically Assign Body Mesh
- When checked, the system automatically searches for the mesh corresponding to the avatar's torso.
- If the Body Mesh cannot be found automatically, the Body Mesh selection window will appear.
- In this window, select the mesh corresponding to the torso and click the [Select] button.
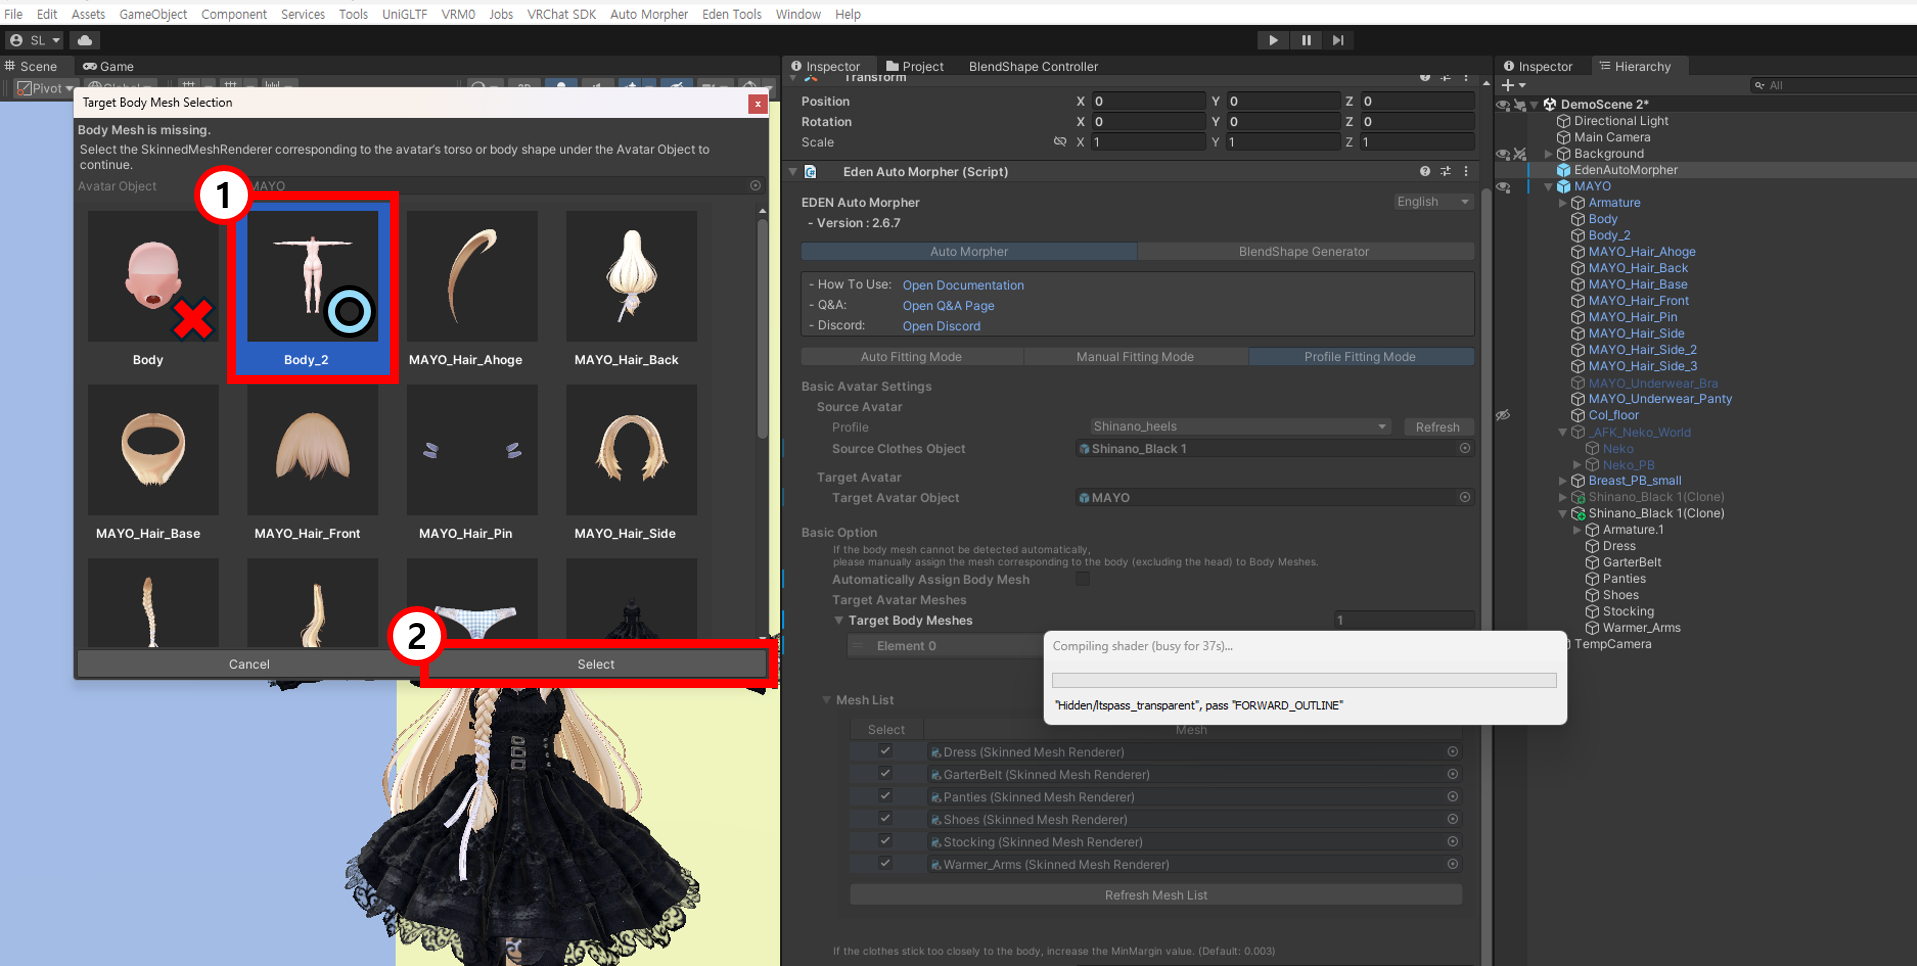
Mesh List
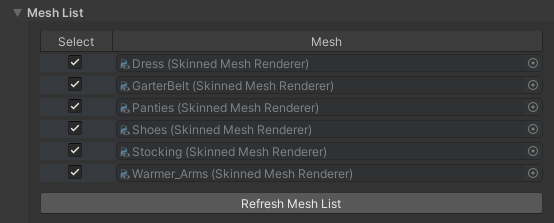
- Click the [Refresh Mesh List] button to refresh the mesh list.
- If there are any meshes you do not want to transform, deselect those items.
Body Gap
- This parameter sets the minimum distance between the garment and the body.
- If the body is penetrating the garment significantly, increase this value.
Skip Foot Fitting
- This option prevents fitting(shape modification) from being applied to shoes. (Scale adjustments will still be applied.)
- To deform the shape according to the specific details of the foot, please disable this option.
[Advanced Option] - [Save Settings] - Save Result As BlendShape
- When enabled, the transformed result is saved as a BlendShape rather than being applied directly to the mesh.
[Advanced Option] - [Weighting Settings] - Transfer Weight To Avatar
- This option reassigns the weights of the clothing mesh based on the target avatar's armature.
- Please enable this only when you need to connect the costume directly to the avatar's bones without using Modular Avatar or similar features.
- For detailed explanations of other parameters, please refer to the following document.
6. Performing the Transformation#
Click [Run ALL] to proceed with the transformation.
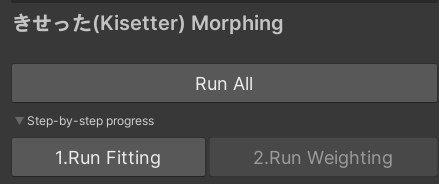
- Use the Step-by-Step Progress below to proceed with Fitting and Weighting step by step.
7. Bone Adjustment#
In Manual Fitting Mode, you can adjust the bones of the automatically fitted outfit.
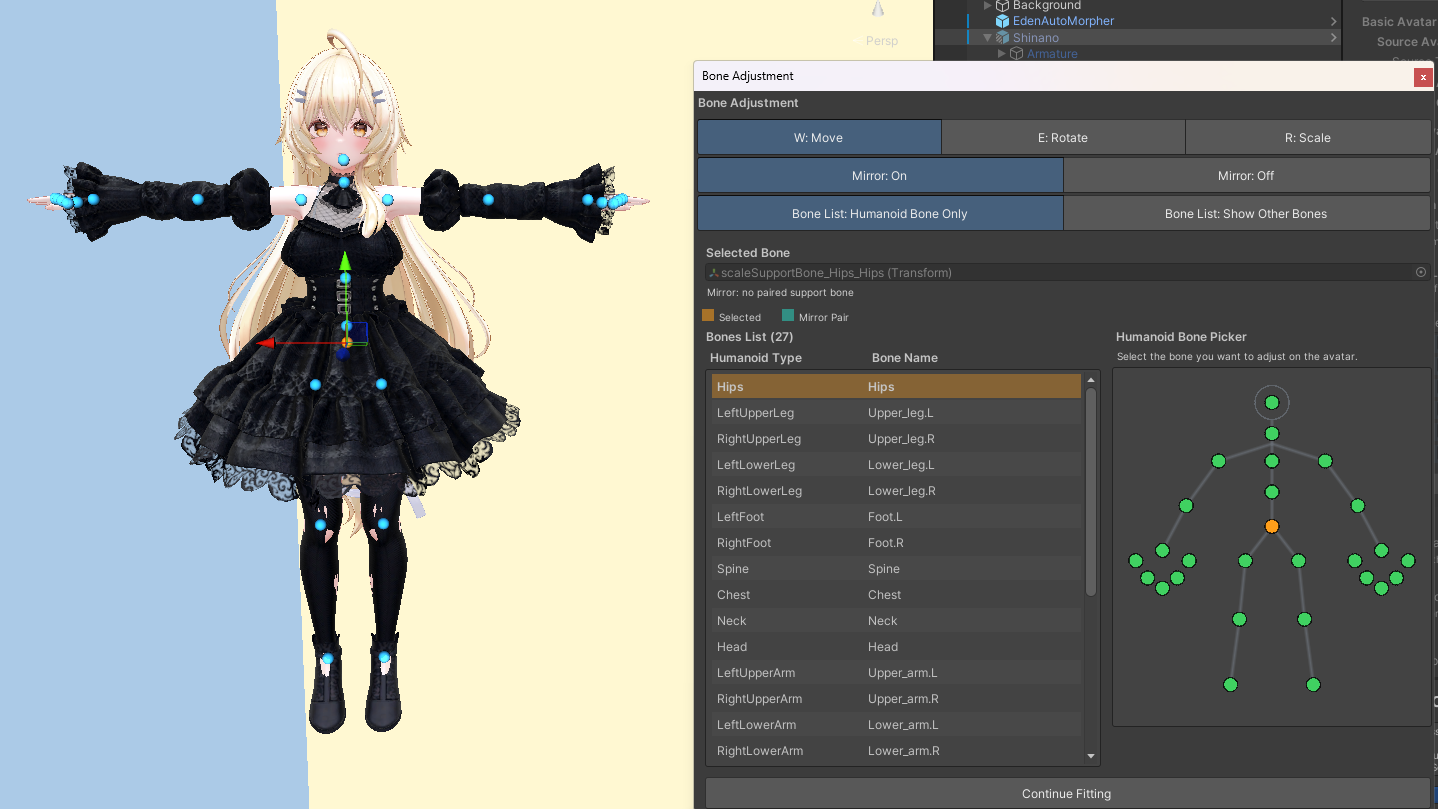
Bone Controls#

- You can change the operation mode by clicking W: Move / E: Rotation / R: Scale at the top, or by pressing W / E / R on the keyboard.
- W: Move: Move the Position
- E: Rotation: Rotate the selected bone
- R: Scale: Adjust the Scale
Mirror#

- If there is a symmetrical bone on the opposite side, you can move both sides together using the Mirror button.
- When Mirror: On is enabled, the movement is mirrored along the avatar’s X-axis.
Bone List#
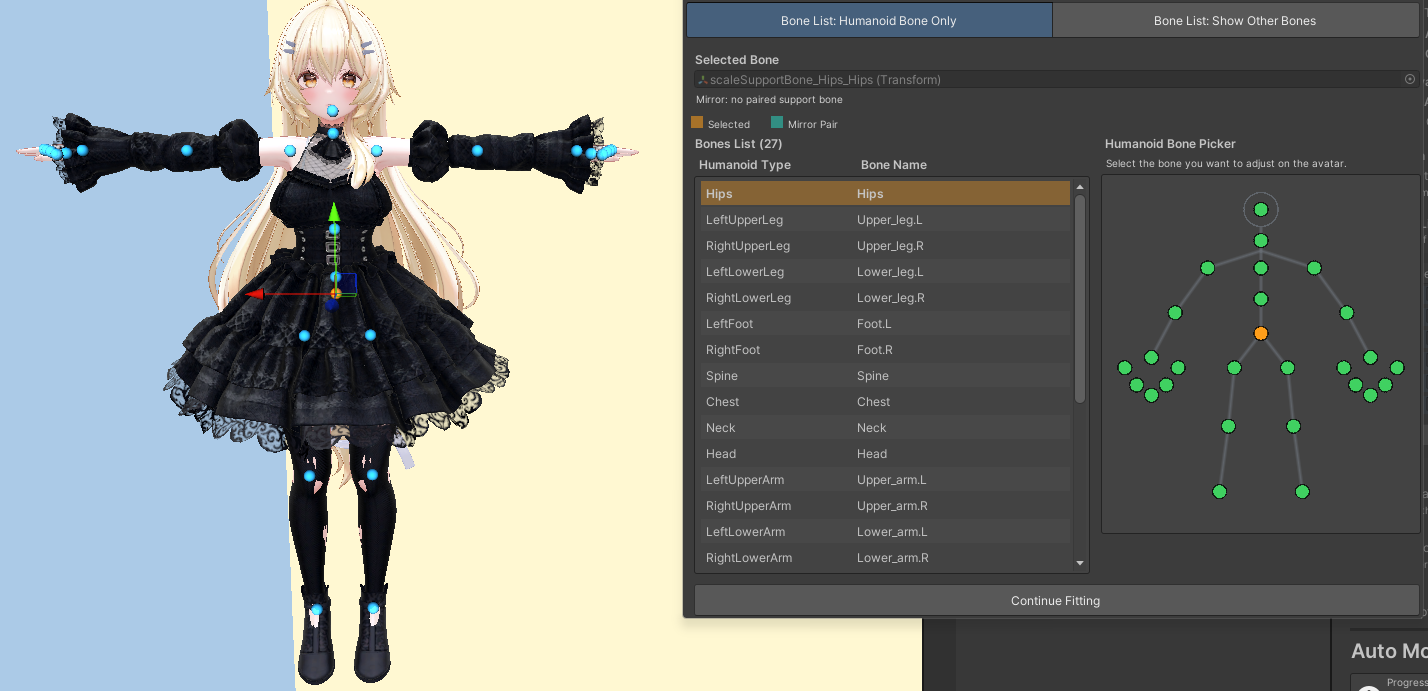
- This is the list of bones that can be adjusted.
- Adjustable bones are displayed in the Bones List.
- Bone List: Humanoid Bone Only
- Only Humanoid Bones such as Hip and Chest are displayed in the Bone List.
- Bone List: Show Other Bones
- Child bones other than Humanoid Bones such as Hip and Chest are also displayed in the Bone List.
- Bone List: Humanoid Bone Only
- Humanoid Bone Picker
- You can select a bone by clicking the desired body part.
- You can also select and adjust bones by clicking the blue points on the avatar in the Scene view.
We recommend using this option to make additional detailed adjustments for items such as hats, gloves, and shoes.
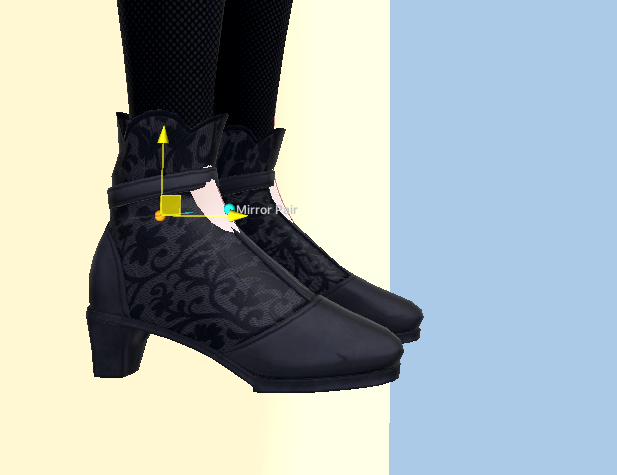
- When you finish adjusting the bones, click the button below to continue the fitting process.
8. Mesh Editing#
In Manual Fitting Mode, you can adjust the automatically fitted clothing mesh directly in Scene View.
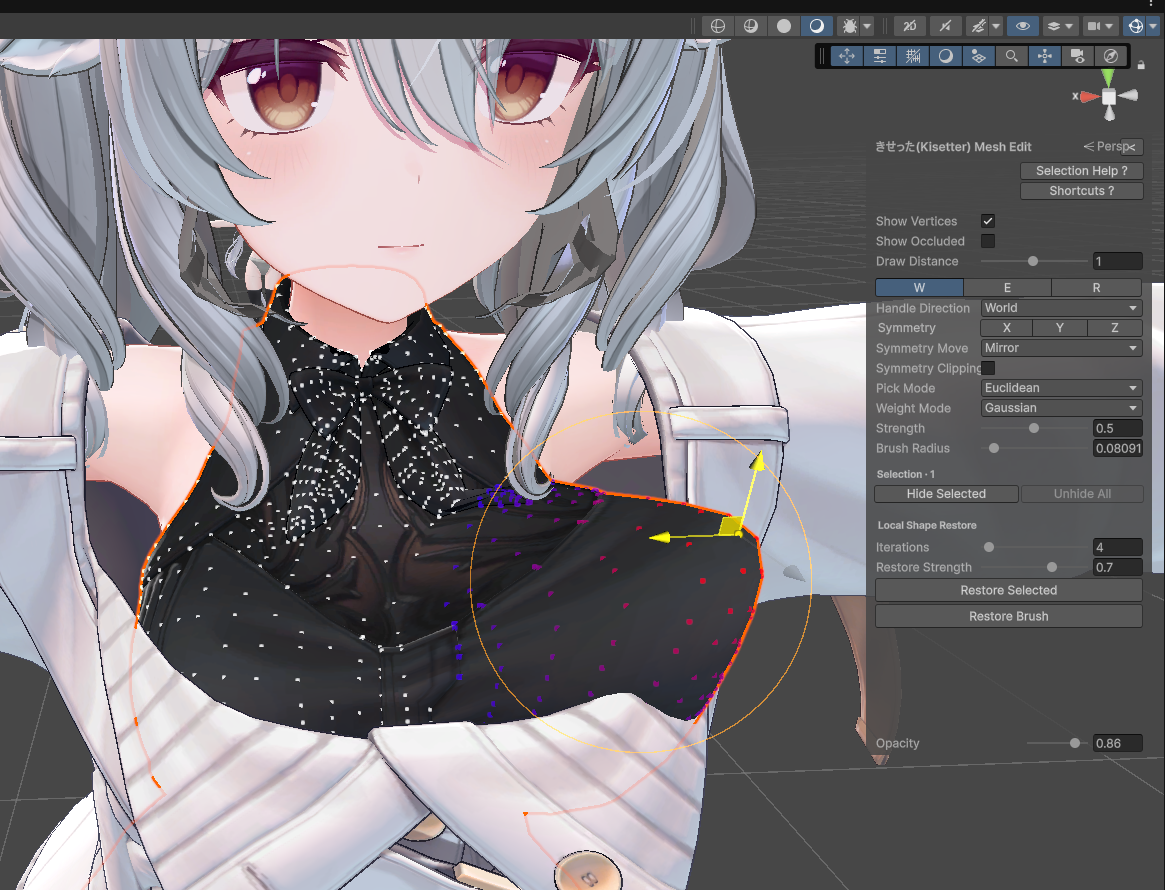
Select the Mesh to Edit#
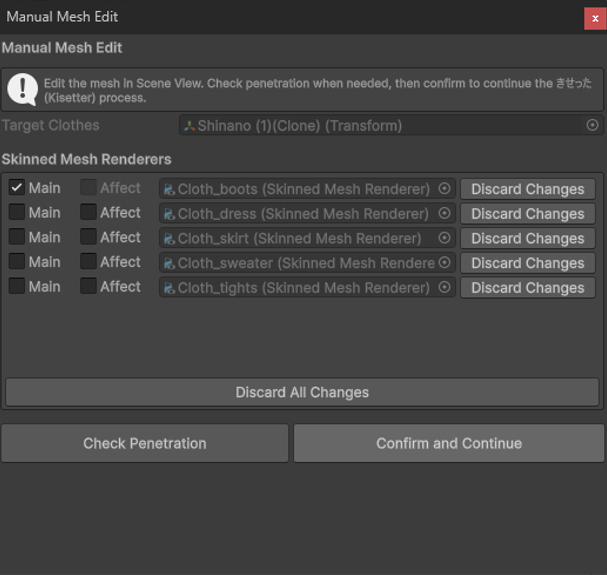
- Select the mesh you want to edit as
Main. - To edit multiple meshes together, enable
Affectfor each additional mesh. - Use
Discard Changesto undo edits made to that mesh.
Select Vertices#
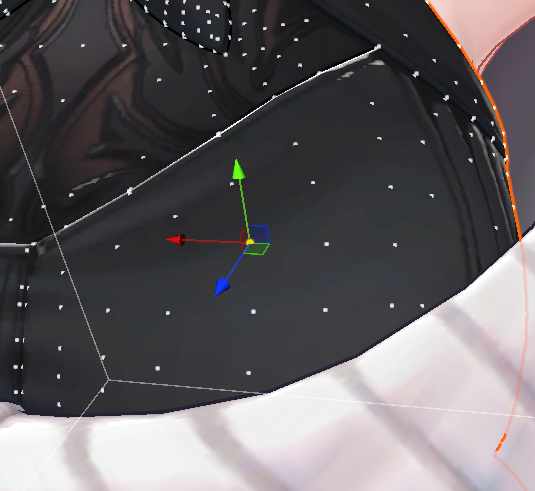
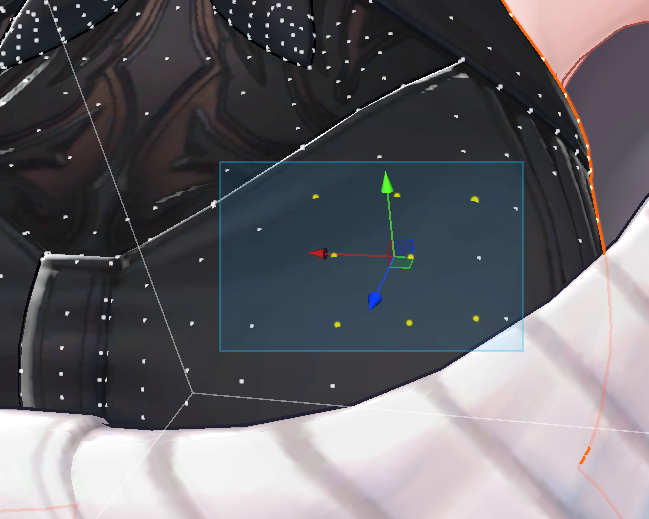
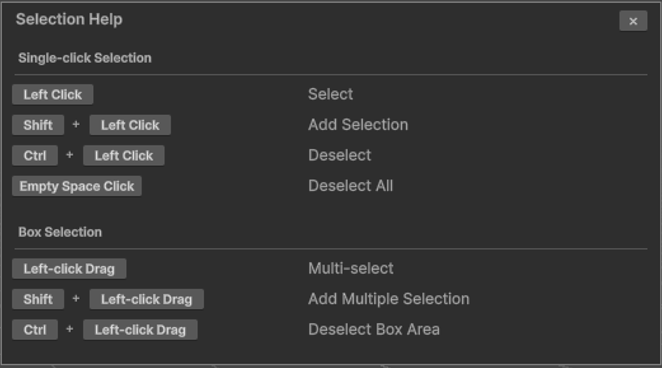
- Click a vertex to select it, or drag to box-select multiple vertices.
- Selected vertices are shown in yellow.
Select Connected Vertices#
- This is useful when a mesh consists of multiple disconnected parts and you want to select one part at once.
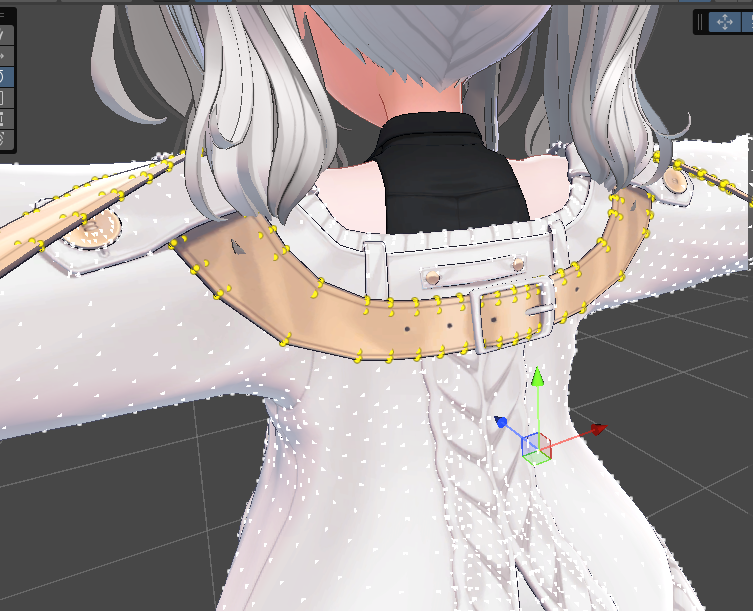
L: Adds all vertices connected to the vertex nearest the mouse cursor to the selection.Shift + L: Deselects all vertices connected to the vertex nearest the mouse cursor.
Transform Vertices#
- Switch between transform modes using the
W / E / Rbuttons or keyboard shortcuts.W: MoveE: RotateR: Scale
W Move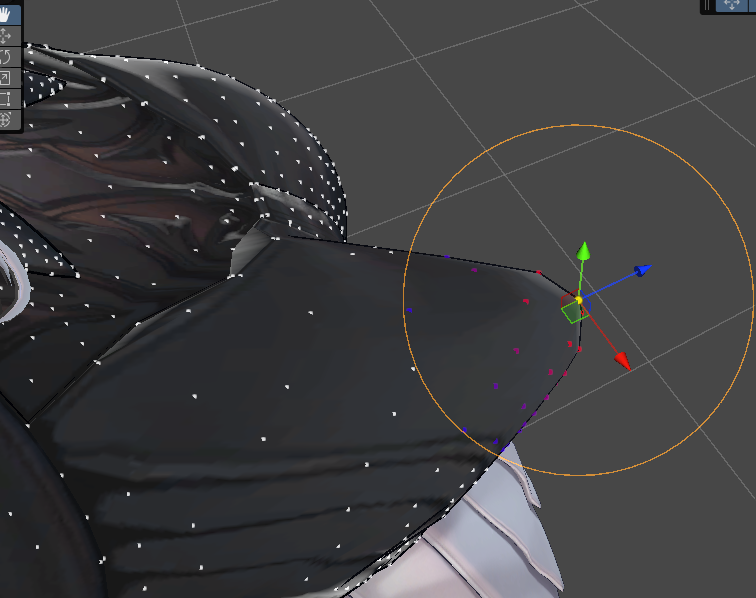
E Rotate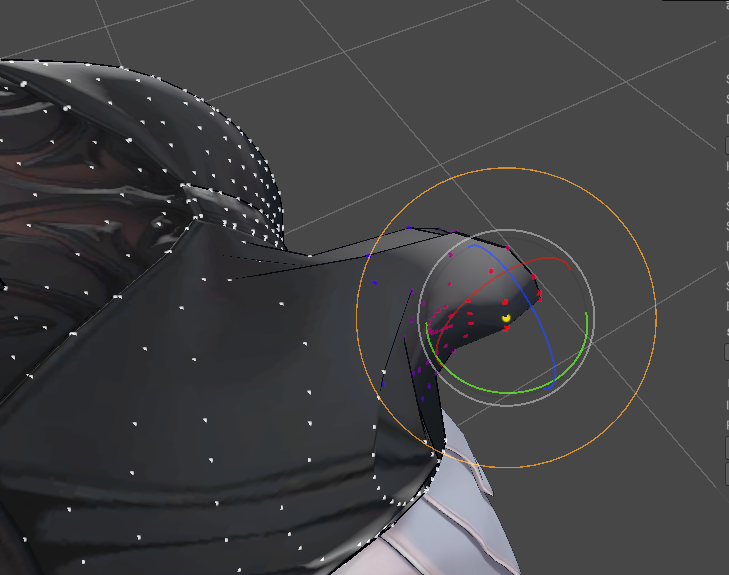
R Scale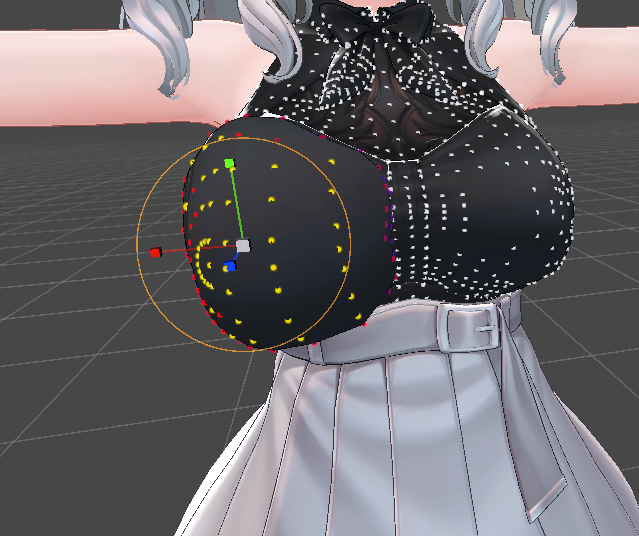
Handle DirectionWorld: Aligns the handle with the world coordinate axes.Vertex Normal: Aligns the handle with the normal direction of the selected vertices.
Vertex Display#
- You can configure how vertices are displayed in the editing panel.
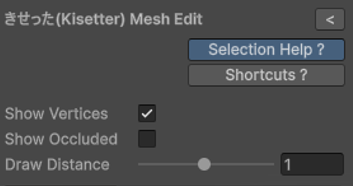
Show Vertices: Controls whether editable vertices are displayed.Show Occluded: Controls whether vertices occluded from the current view are also displayed.Draw Distance: Displays only vertices within the specified distance from the camera.
Hide Vertices#
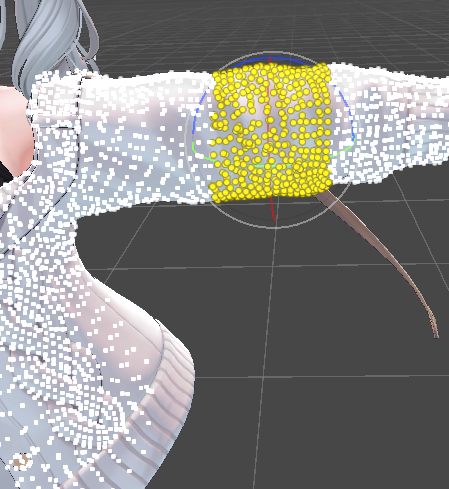
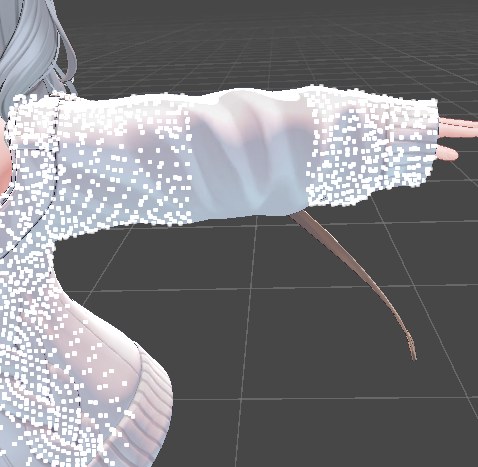
Press
Gto hide vertices that interfere with editing.G: Hide selected verticesShift + G: Show hidden vertices again
Symmetry Editing#
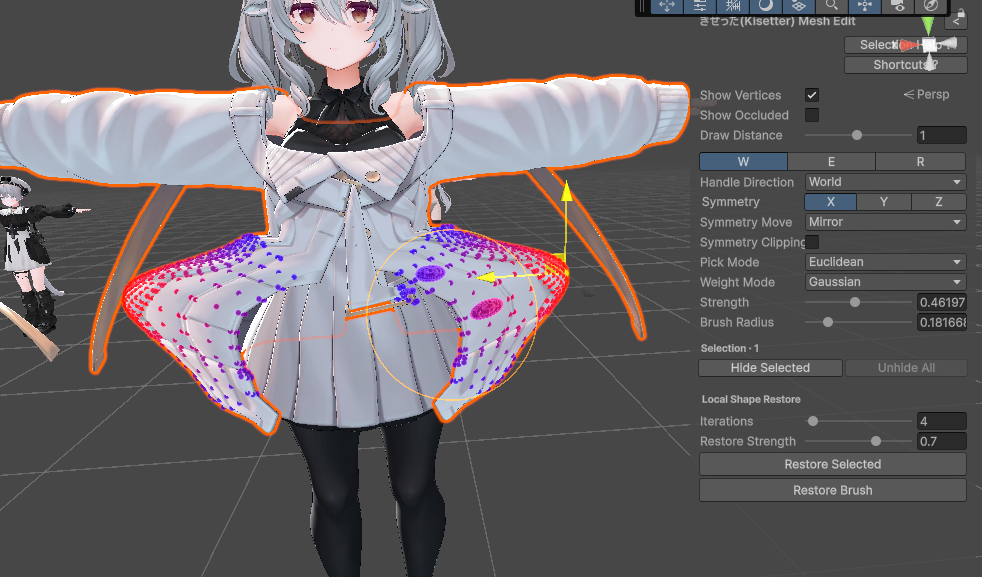
Symmetry: Select theX / Y / Zaxis to use for symmetry editing.- You can enable multiple axes at the same time.
Symmetry MoveMirror: Vertices on the opposite side move as a mirror image across the selected axis.Same: Applies the deformation in the same direction to vertices on the opposite side.
Symmetry Clipping- Prevents vertices near the symmetry axis from crossing to the opposite side.
Adjust the Edit Influence Range#
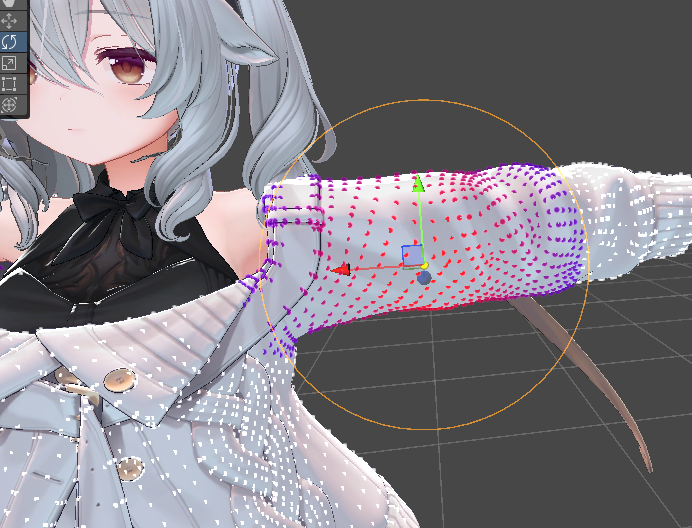
- When you transform selected vertices, nearby vertices are also deformed according to the configured influence range and weight.
- Vertices with stronger influence are shown in red, while vertices with weaker influence are shown in blue.
Pick ModeEuclidean: Vertices whose straight-line distance from the selection is within theBrush Radiusare affected.Adjacency: Influence follows the mesh topology and affects connected vertices within theBrush Radius.
Weight ModeLinear- Influence decreases at a constant rate as the distance from the selection increases.
Gaussian- Applies a smooth falloff between the selected area and the surrounding area.
Clamp- All vertices within the brush range receive the same influence.
Strength- Adjusts how strongly surrounding vertices are influenced within the brush range.
Ctrl (Command) + Shift + Mouse WheelCaps Lock + Shift + Mouse Wheel- Adjusts the brush strength.
Brush Radius- Adjusts the range of influence around the selected area.
Shift + Mouse Wheel- Adjusts the brush radius.
Local Shape Restore#
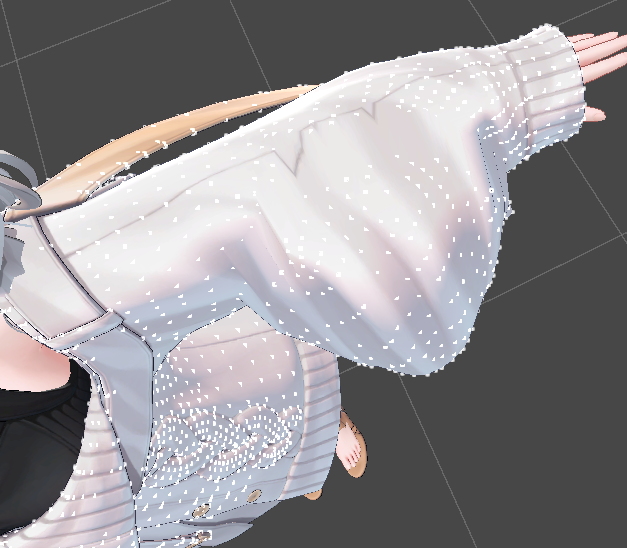
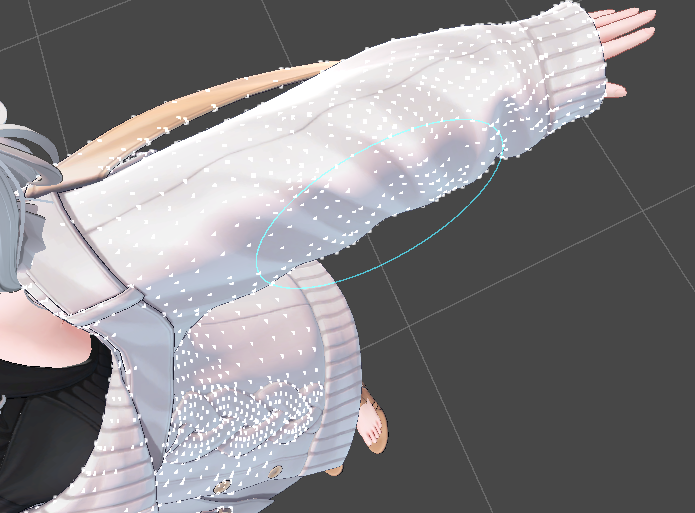
If wrinkles or edges become overly distorted during editing, use Local Shape Restore to smooth and refine the surrounding shape.
Iterations- Sets the number of iterations used for local shape restoration.
- Higher values spread the restoration effect more widely and smoothly.
Restore Strength- Adjusts how strongly the local shape of the paired Source mesh is applied.
Restore Selected- Restores the local shape of the currently selected area at once.
Restore Brush- Enable the button, then drag in Scene View to restore only the areas you need.
- Smoothly blends deformation differences with surrounding vertices to reduce localized distortion.
Finish Editing#
- After adjusting the mesh, use
Check Penetrationto check for penetration, then clickConfirm and Continueto proceed. Confirm and Continueapplies the current edits and resumes the remaining Kisetter process.
[3] Checking the Results#
9. Viewing the Fitting Results#
9-1. Checking the Fitting Results#
- Check whether the morphed result has been applied correctly to the avatar.
- If the transformation resulted in an undesired shape, and you enabled [Advanced Option] - [Save Settings] - Save Result As BlendShape, you can adjust the Kisetter_fit BlendShape value added to the outfit to restore it to its original form.
9-2. VRChat - Modular Avatar#
- The Modular Avatar is merely an example; you may use other tools, such as VRCFury, to configure the outfit’s bones to follow the avatar’s movements.
- However, if you have checked [Advanced Option] - [Weighting Settings] - Transfer Weight To Avatar, the outfit is already configured to follow the avatar’s bones.
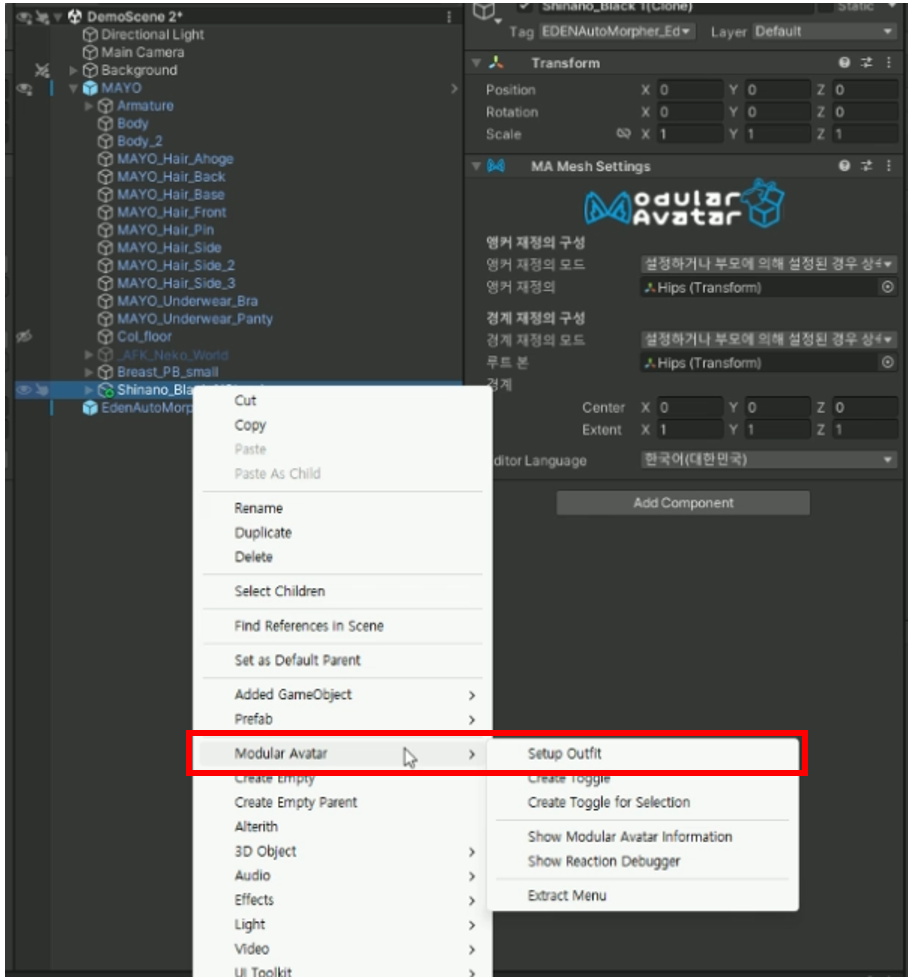
- Right-click the outfit and select [Modular Avatar] - [Setup Outfit] to configure the outfit’s bones to follow the avatar.
- Table of Contents